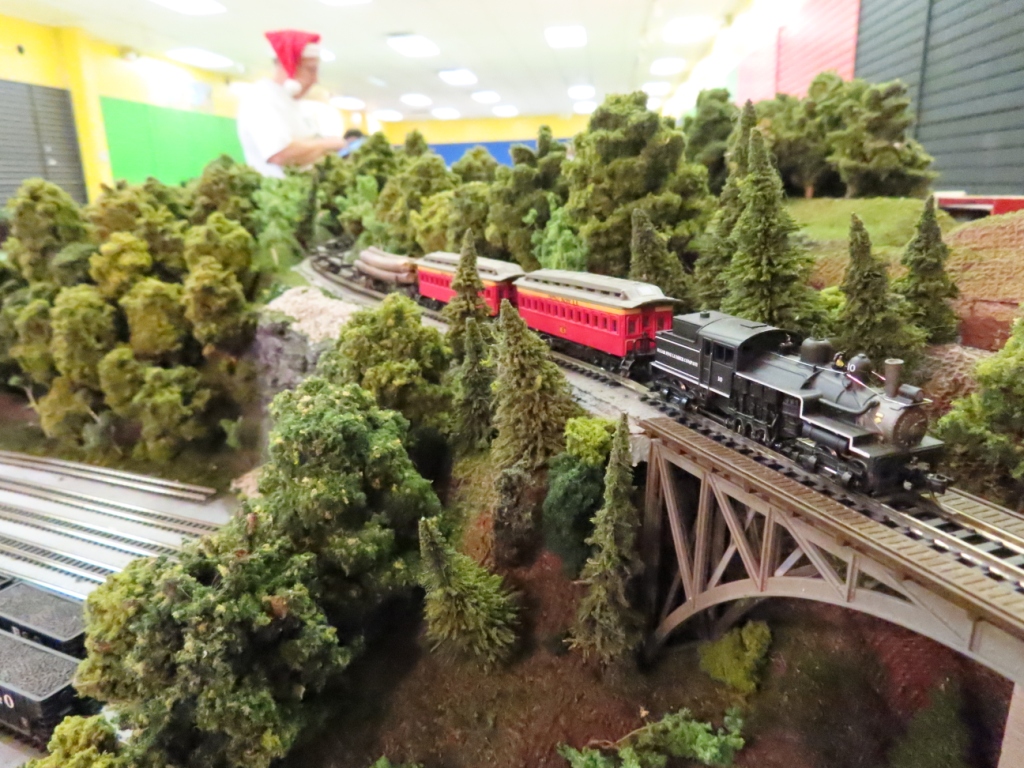
Tips & Tricks Project Page from the Club.
Below are different projects that our Members are working on to prepare for the next show. We will be adding new projects, tips & Tricks, and other useful How-To's for Model Railroading and Train related projects every Tuesday.
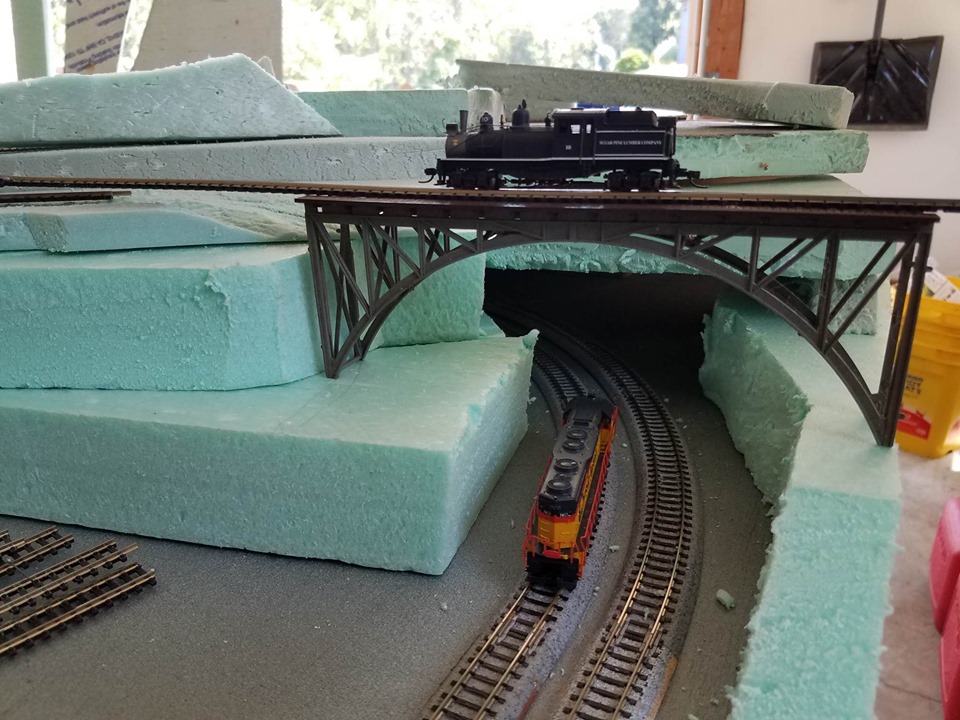
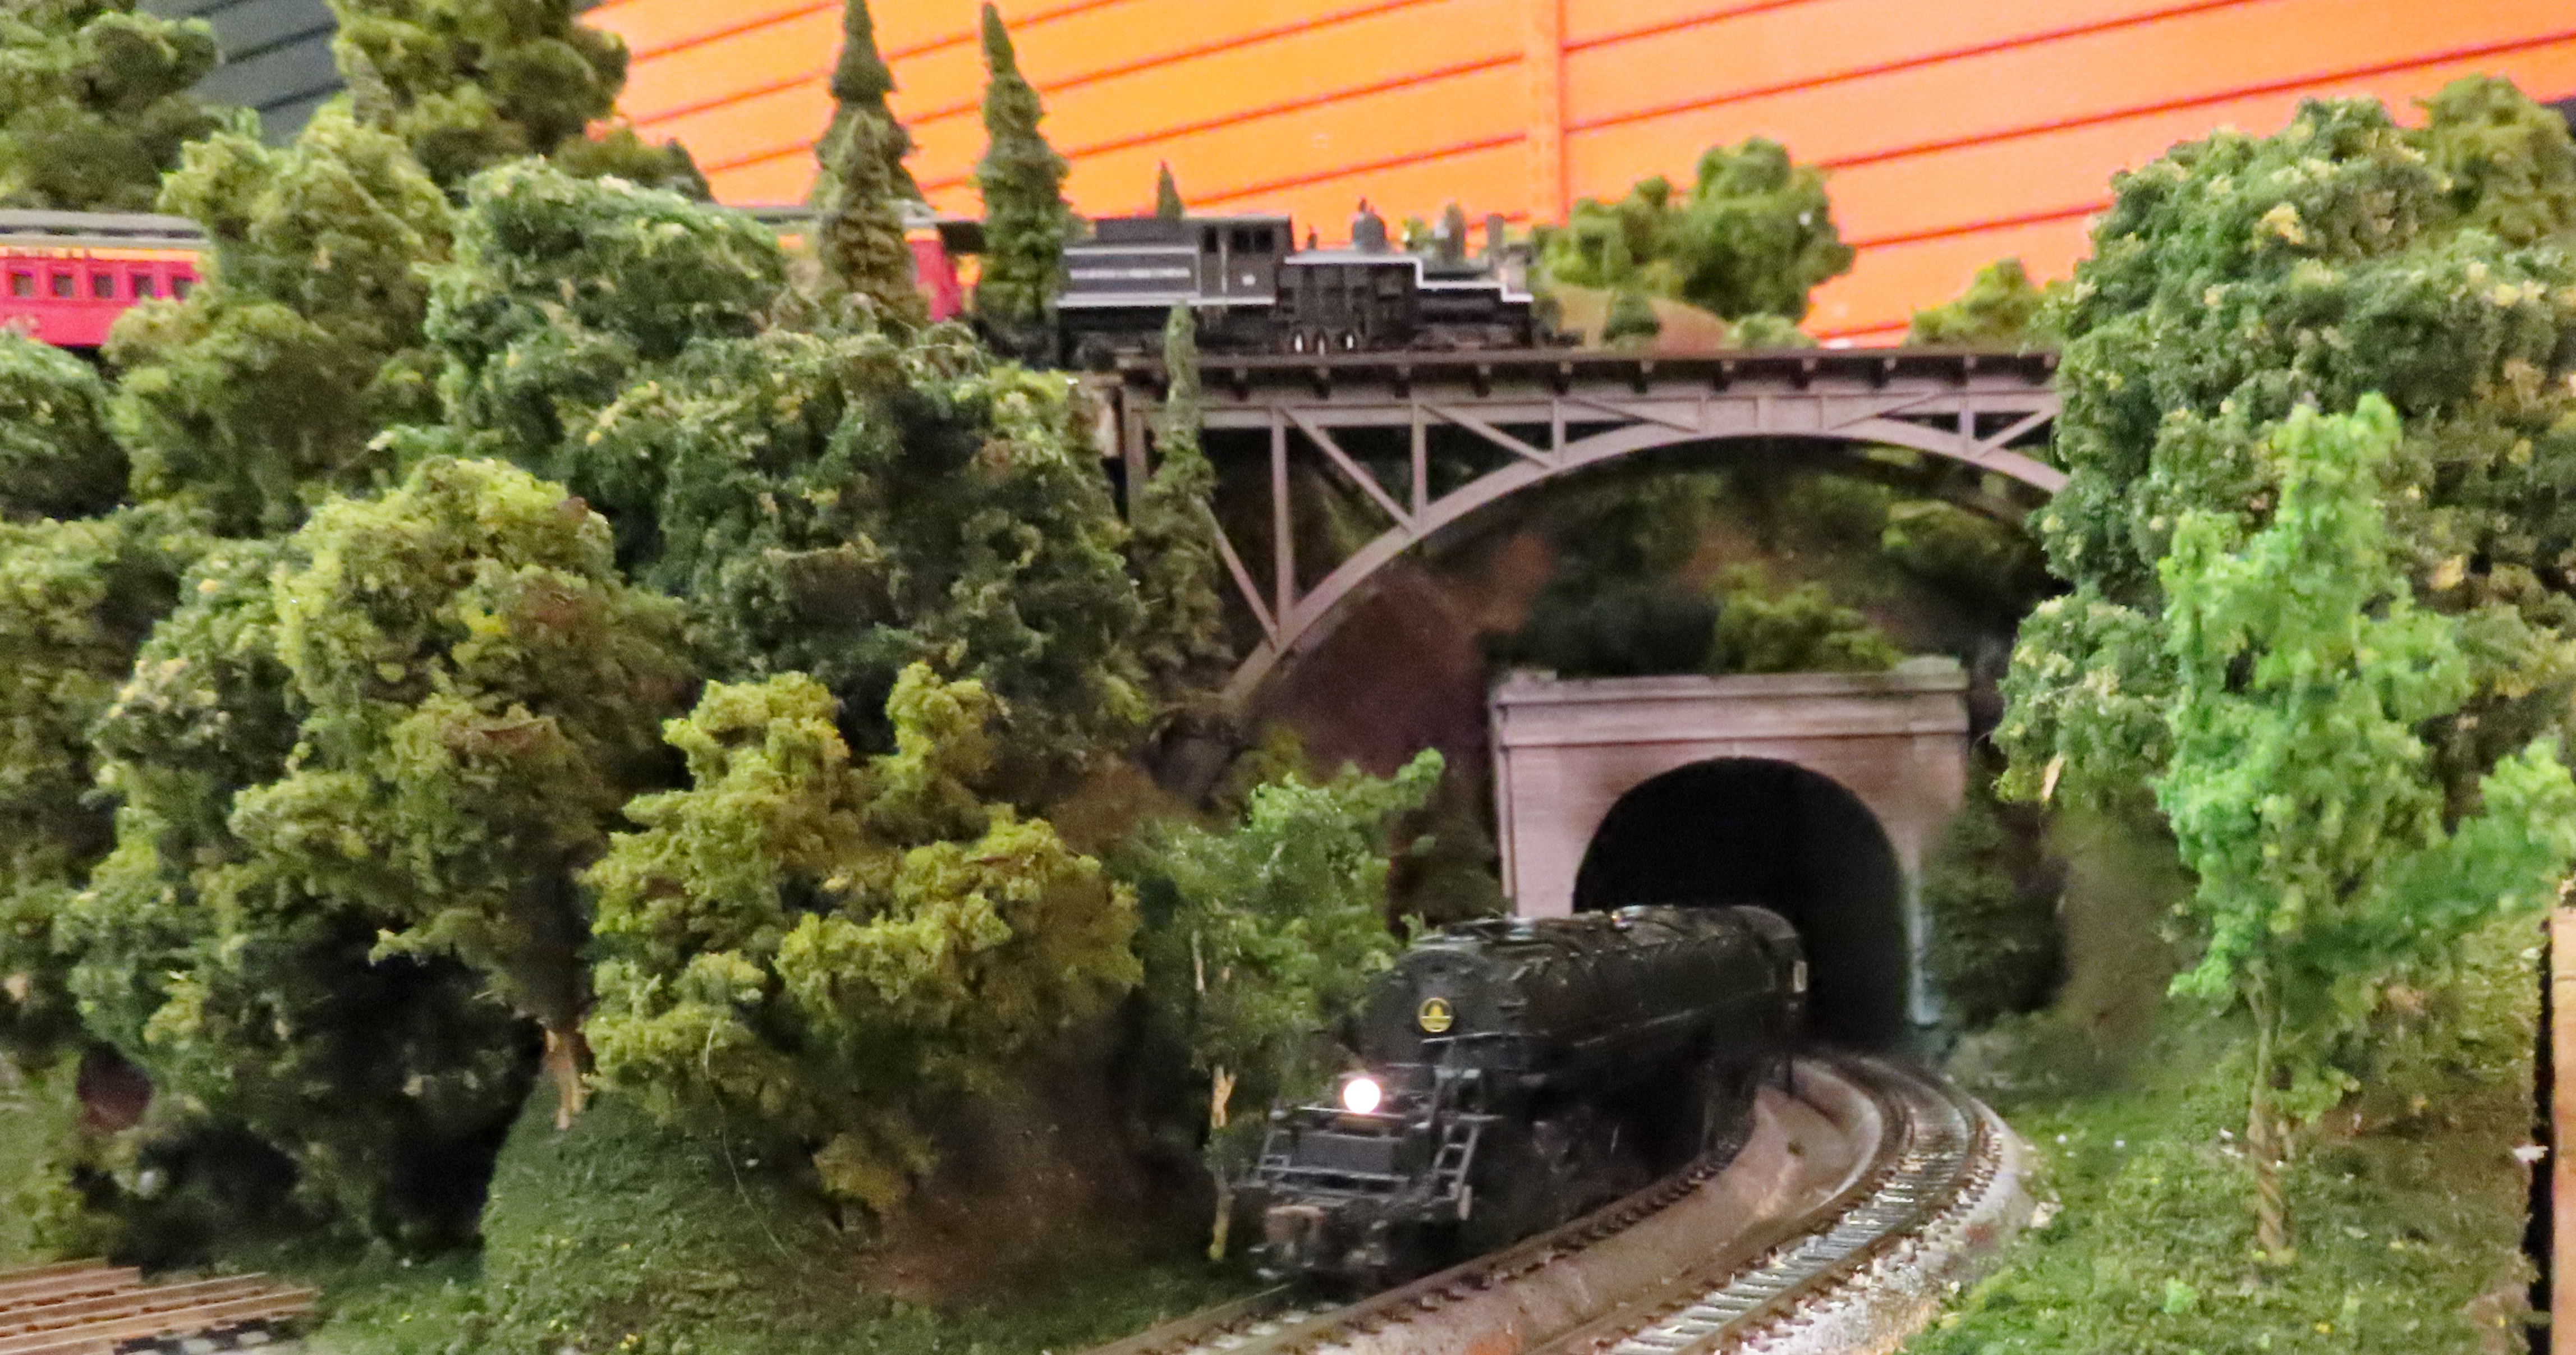
"T" Module with Automatic Reverser Unit
April, 2021
One problem with running longer trains is that if you want to change the direction of the train, you normally would have to pick each part of the train up and flip it. That is unless you have a reversing section. Member Bo DeCoy tested out his under construction "T" module that includes a reversing loop at our Open House in April. Below is a video of it demonstrating the reversing process.
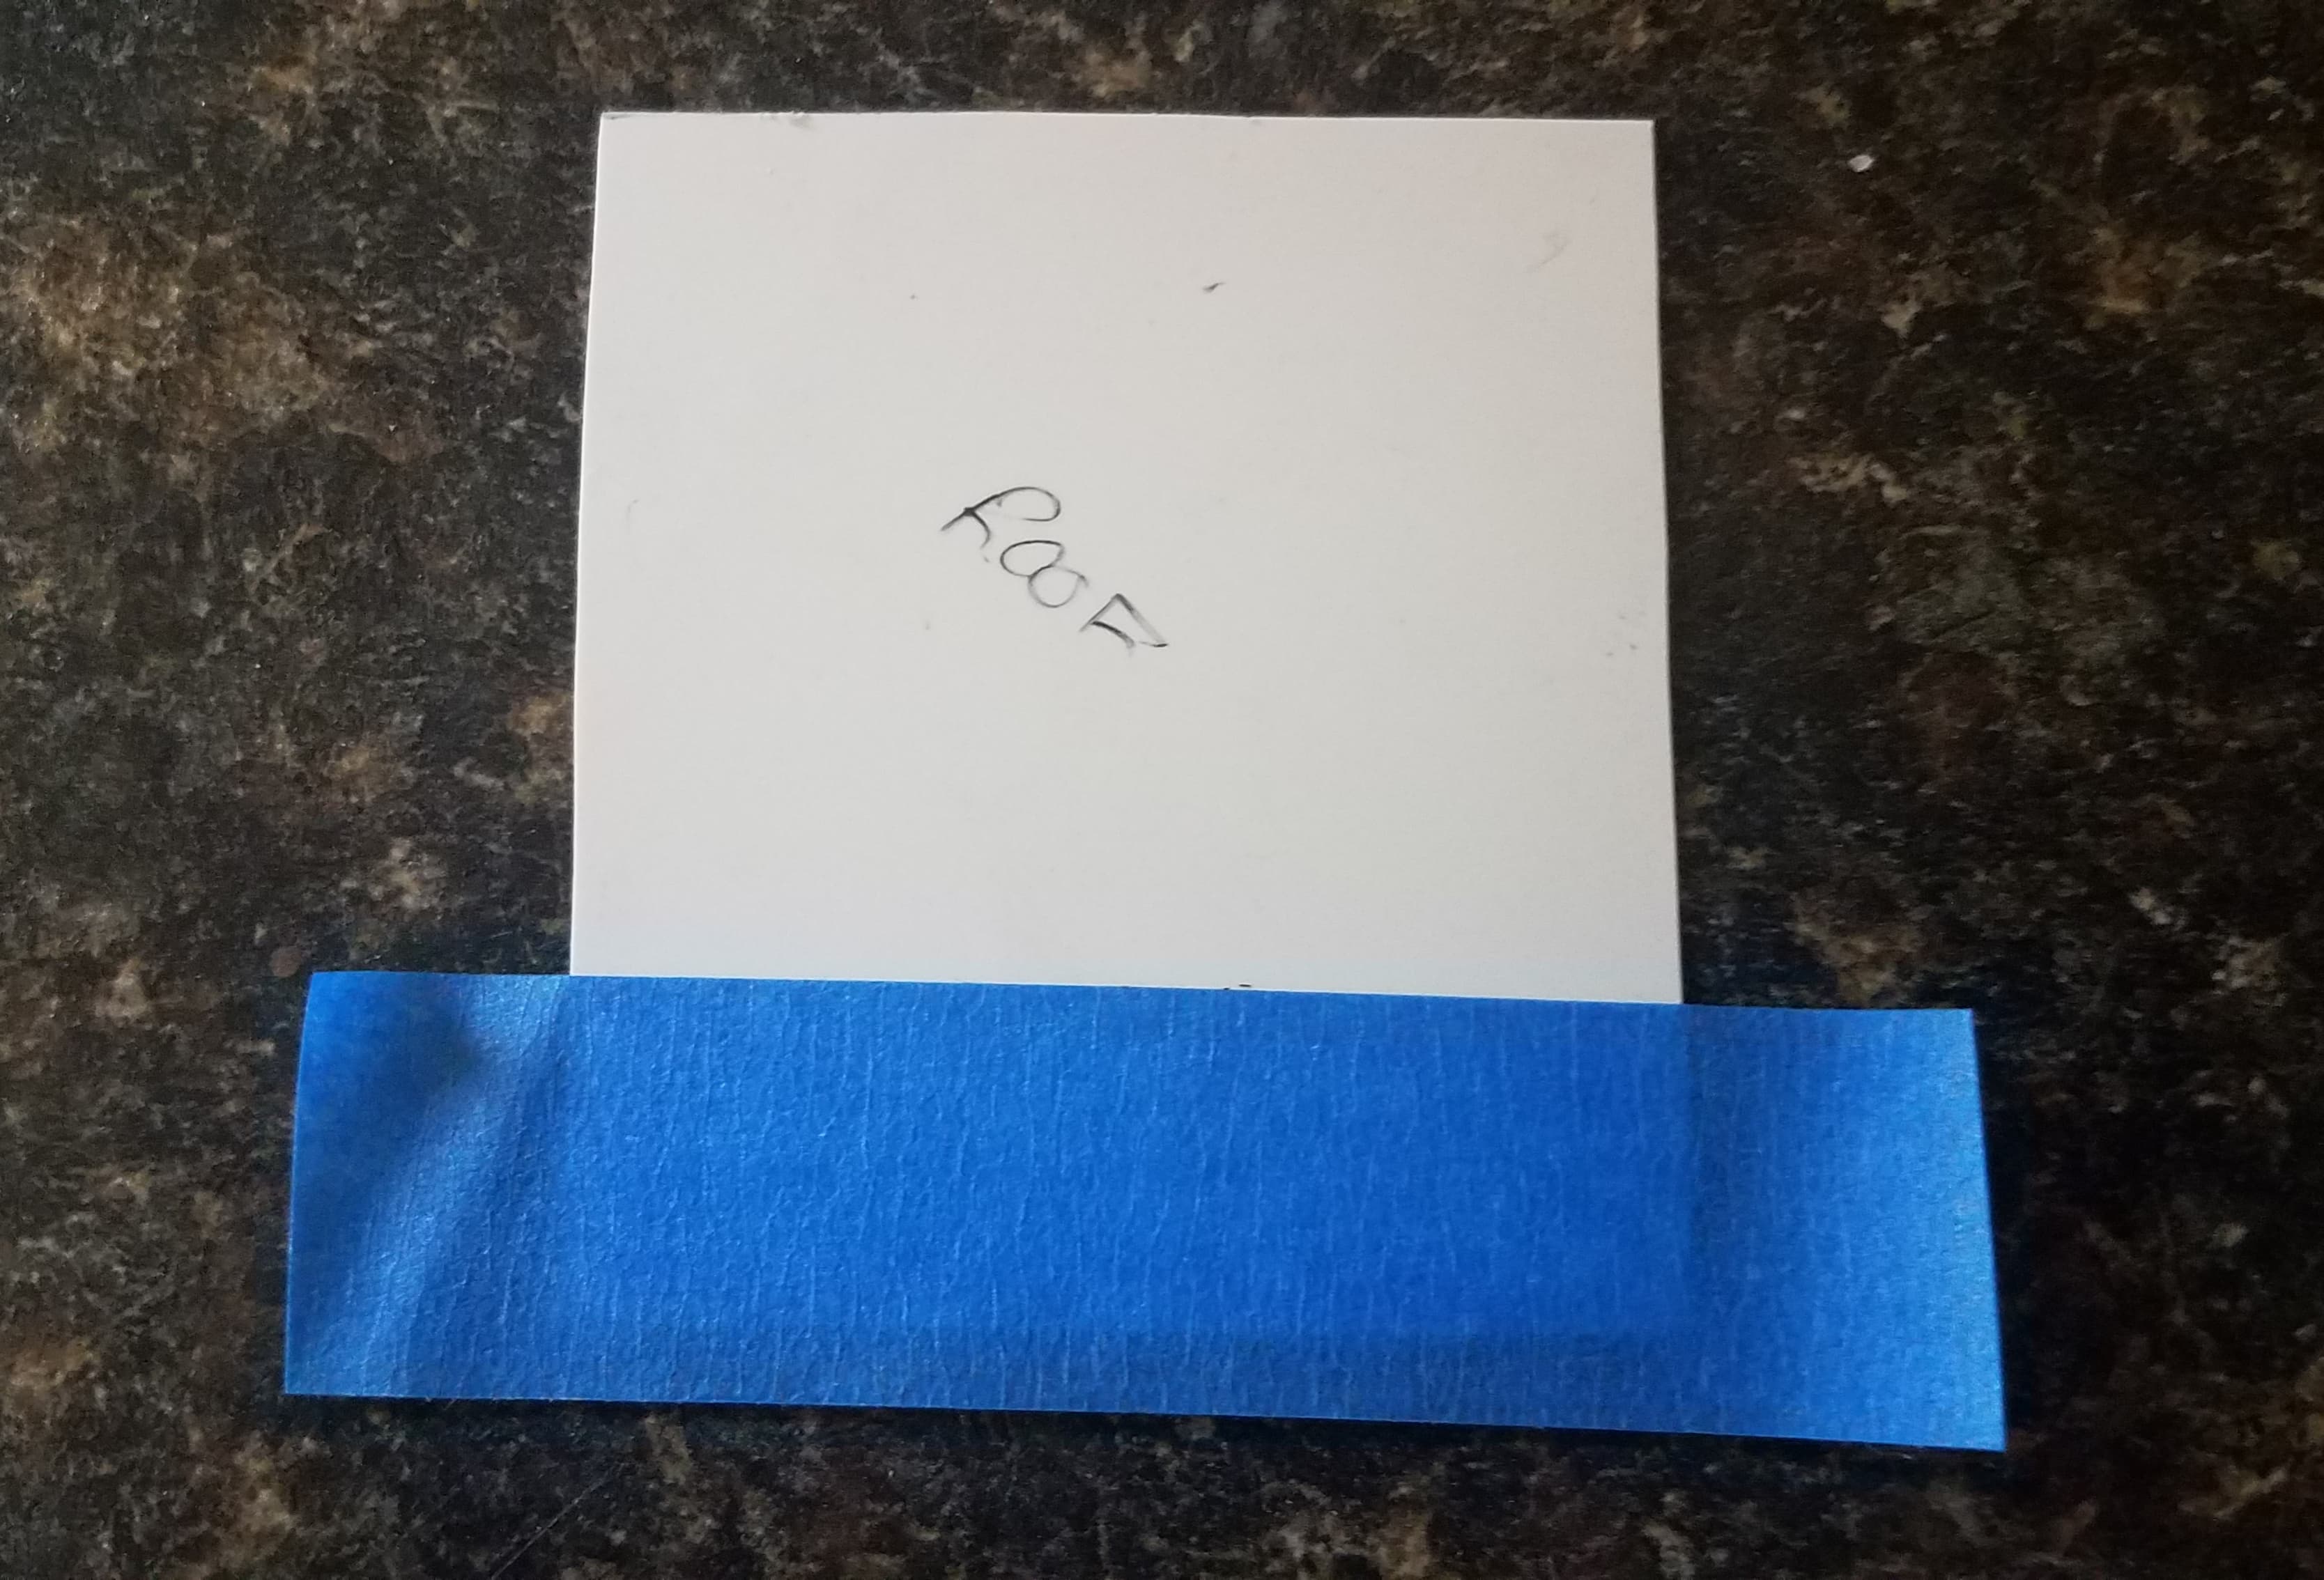
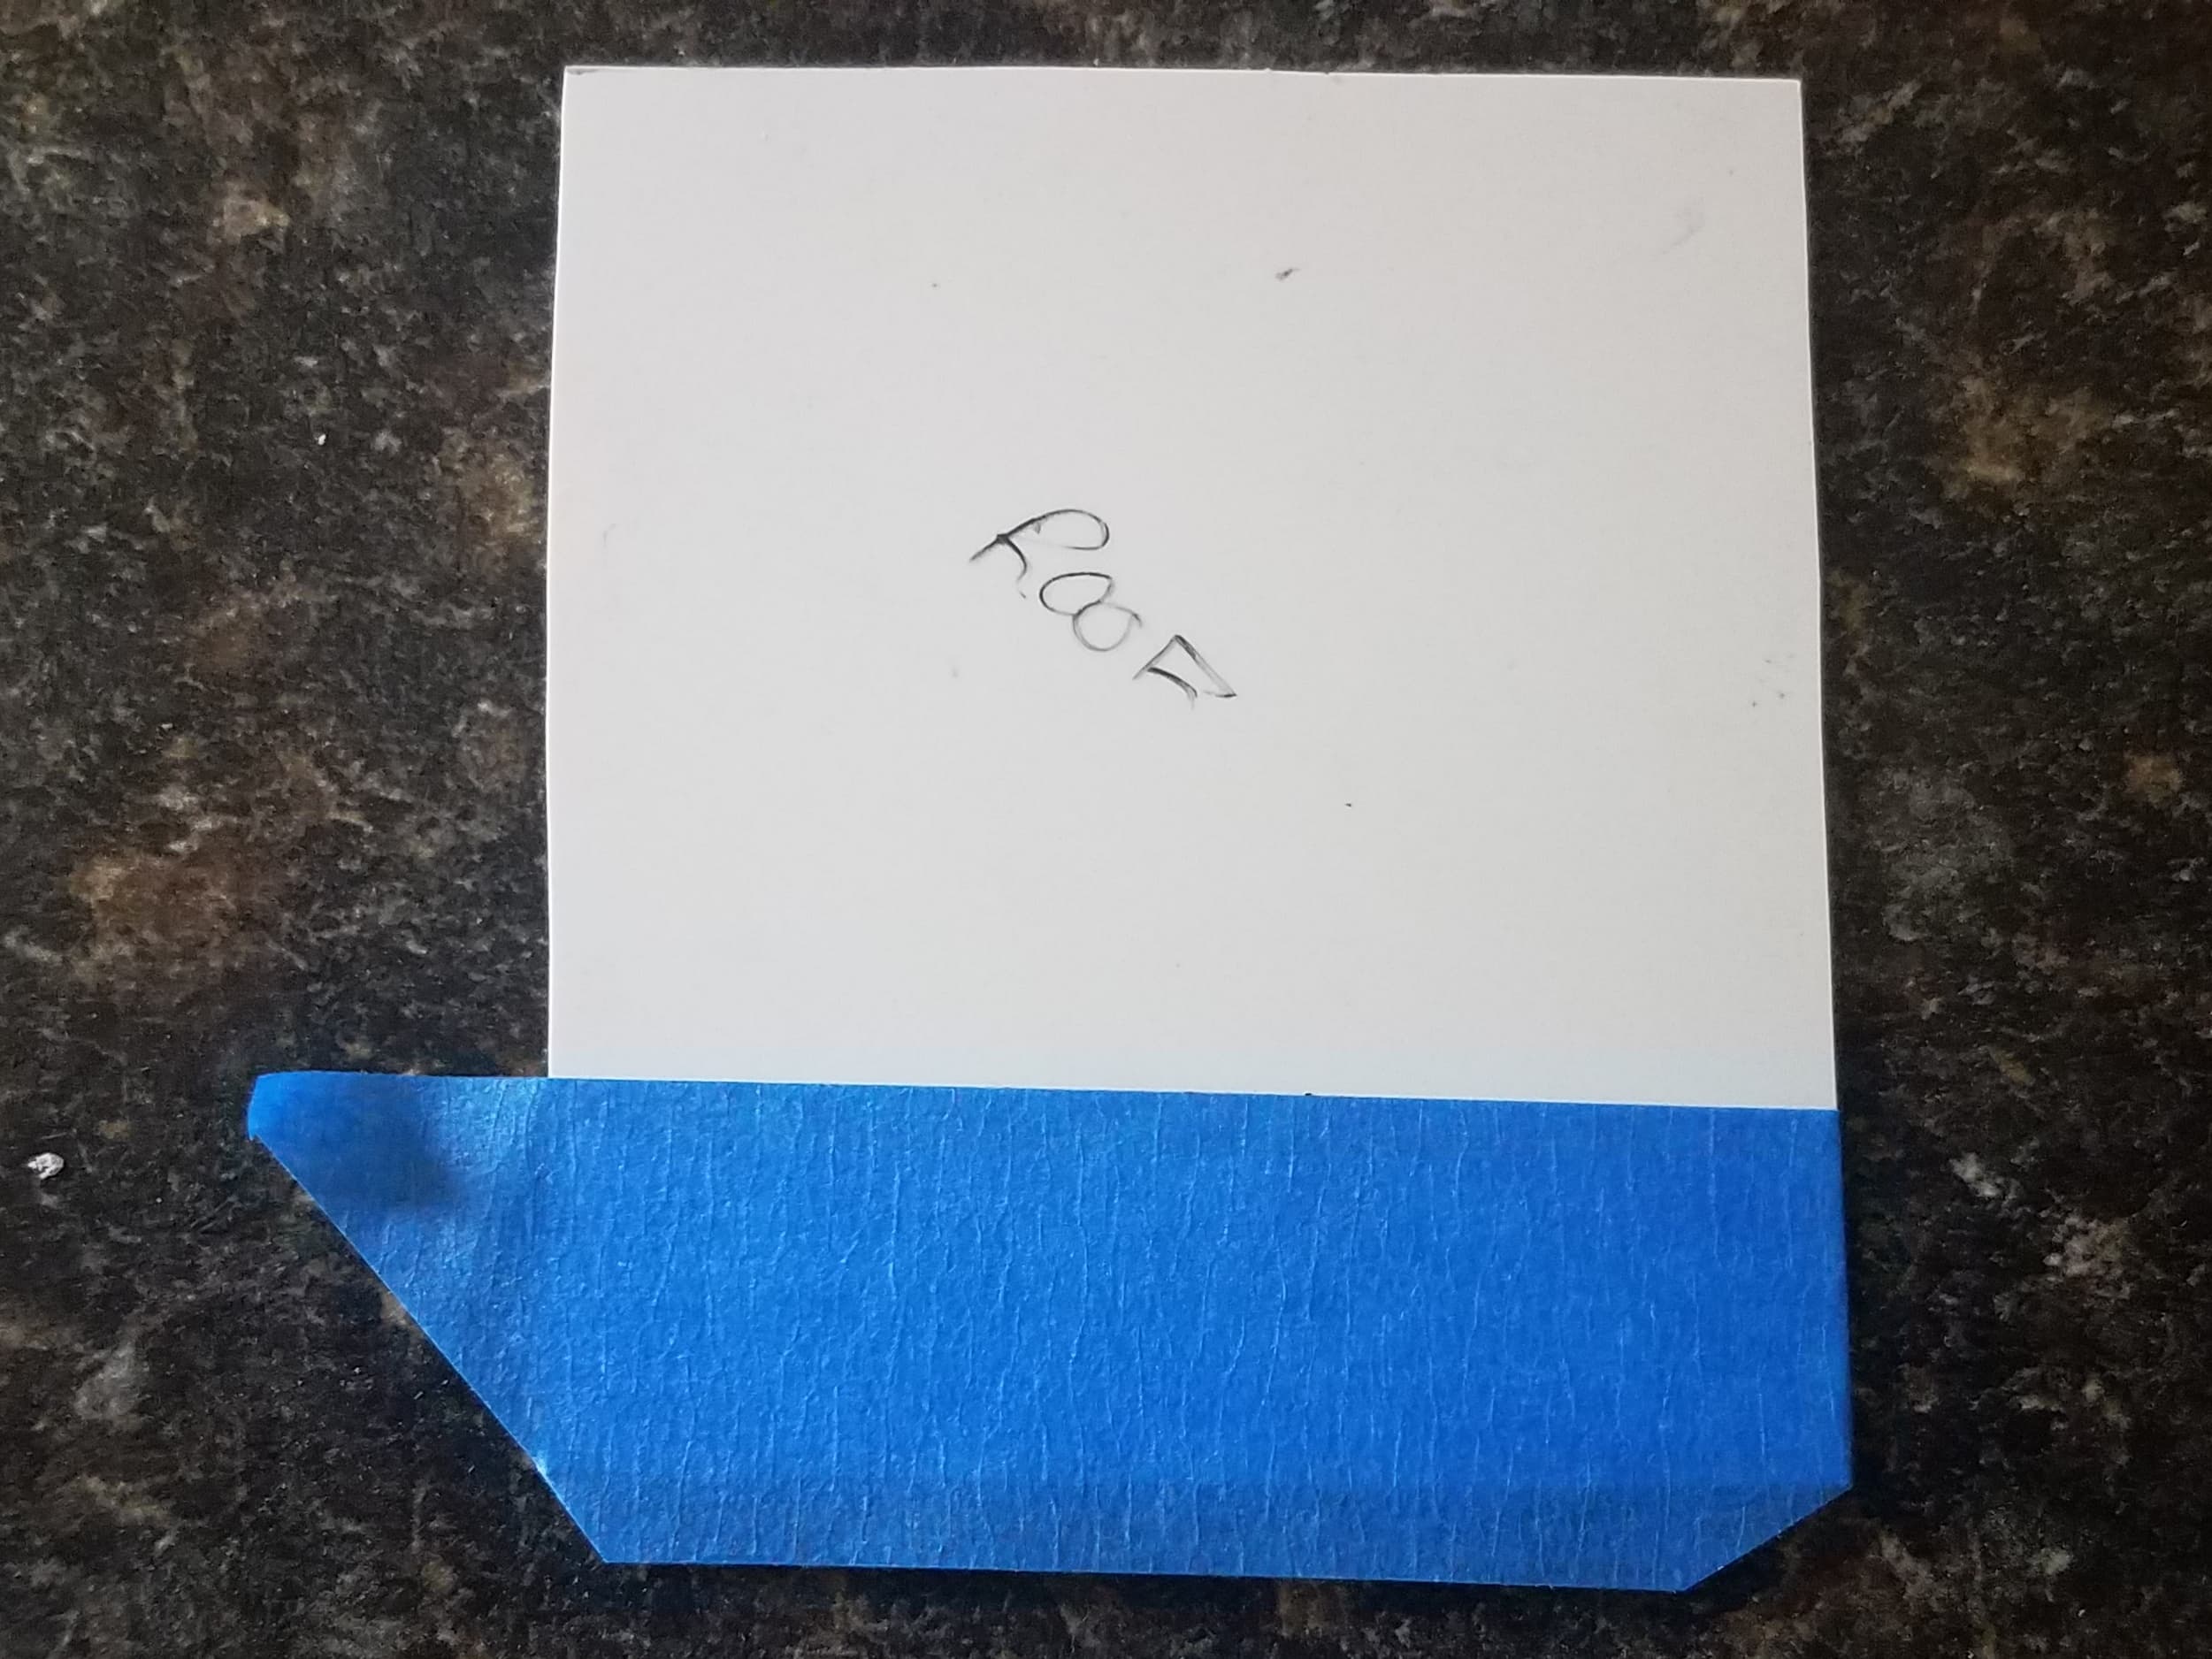
Modeling Rolled Roofs
October 20th, 2020

Putting a roof over your buildings.
There are many different ways to water proof a roof. The type of roof that you want to model depends on what moment in time that you are modeling as well the region. For example, the style roofs in Texas is not the same as the roofs in Maine. For my modeling era, Rolled Roofs were popular. As modelers, we can easily recreate this look by using some painter's tape and some paint.
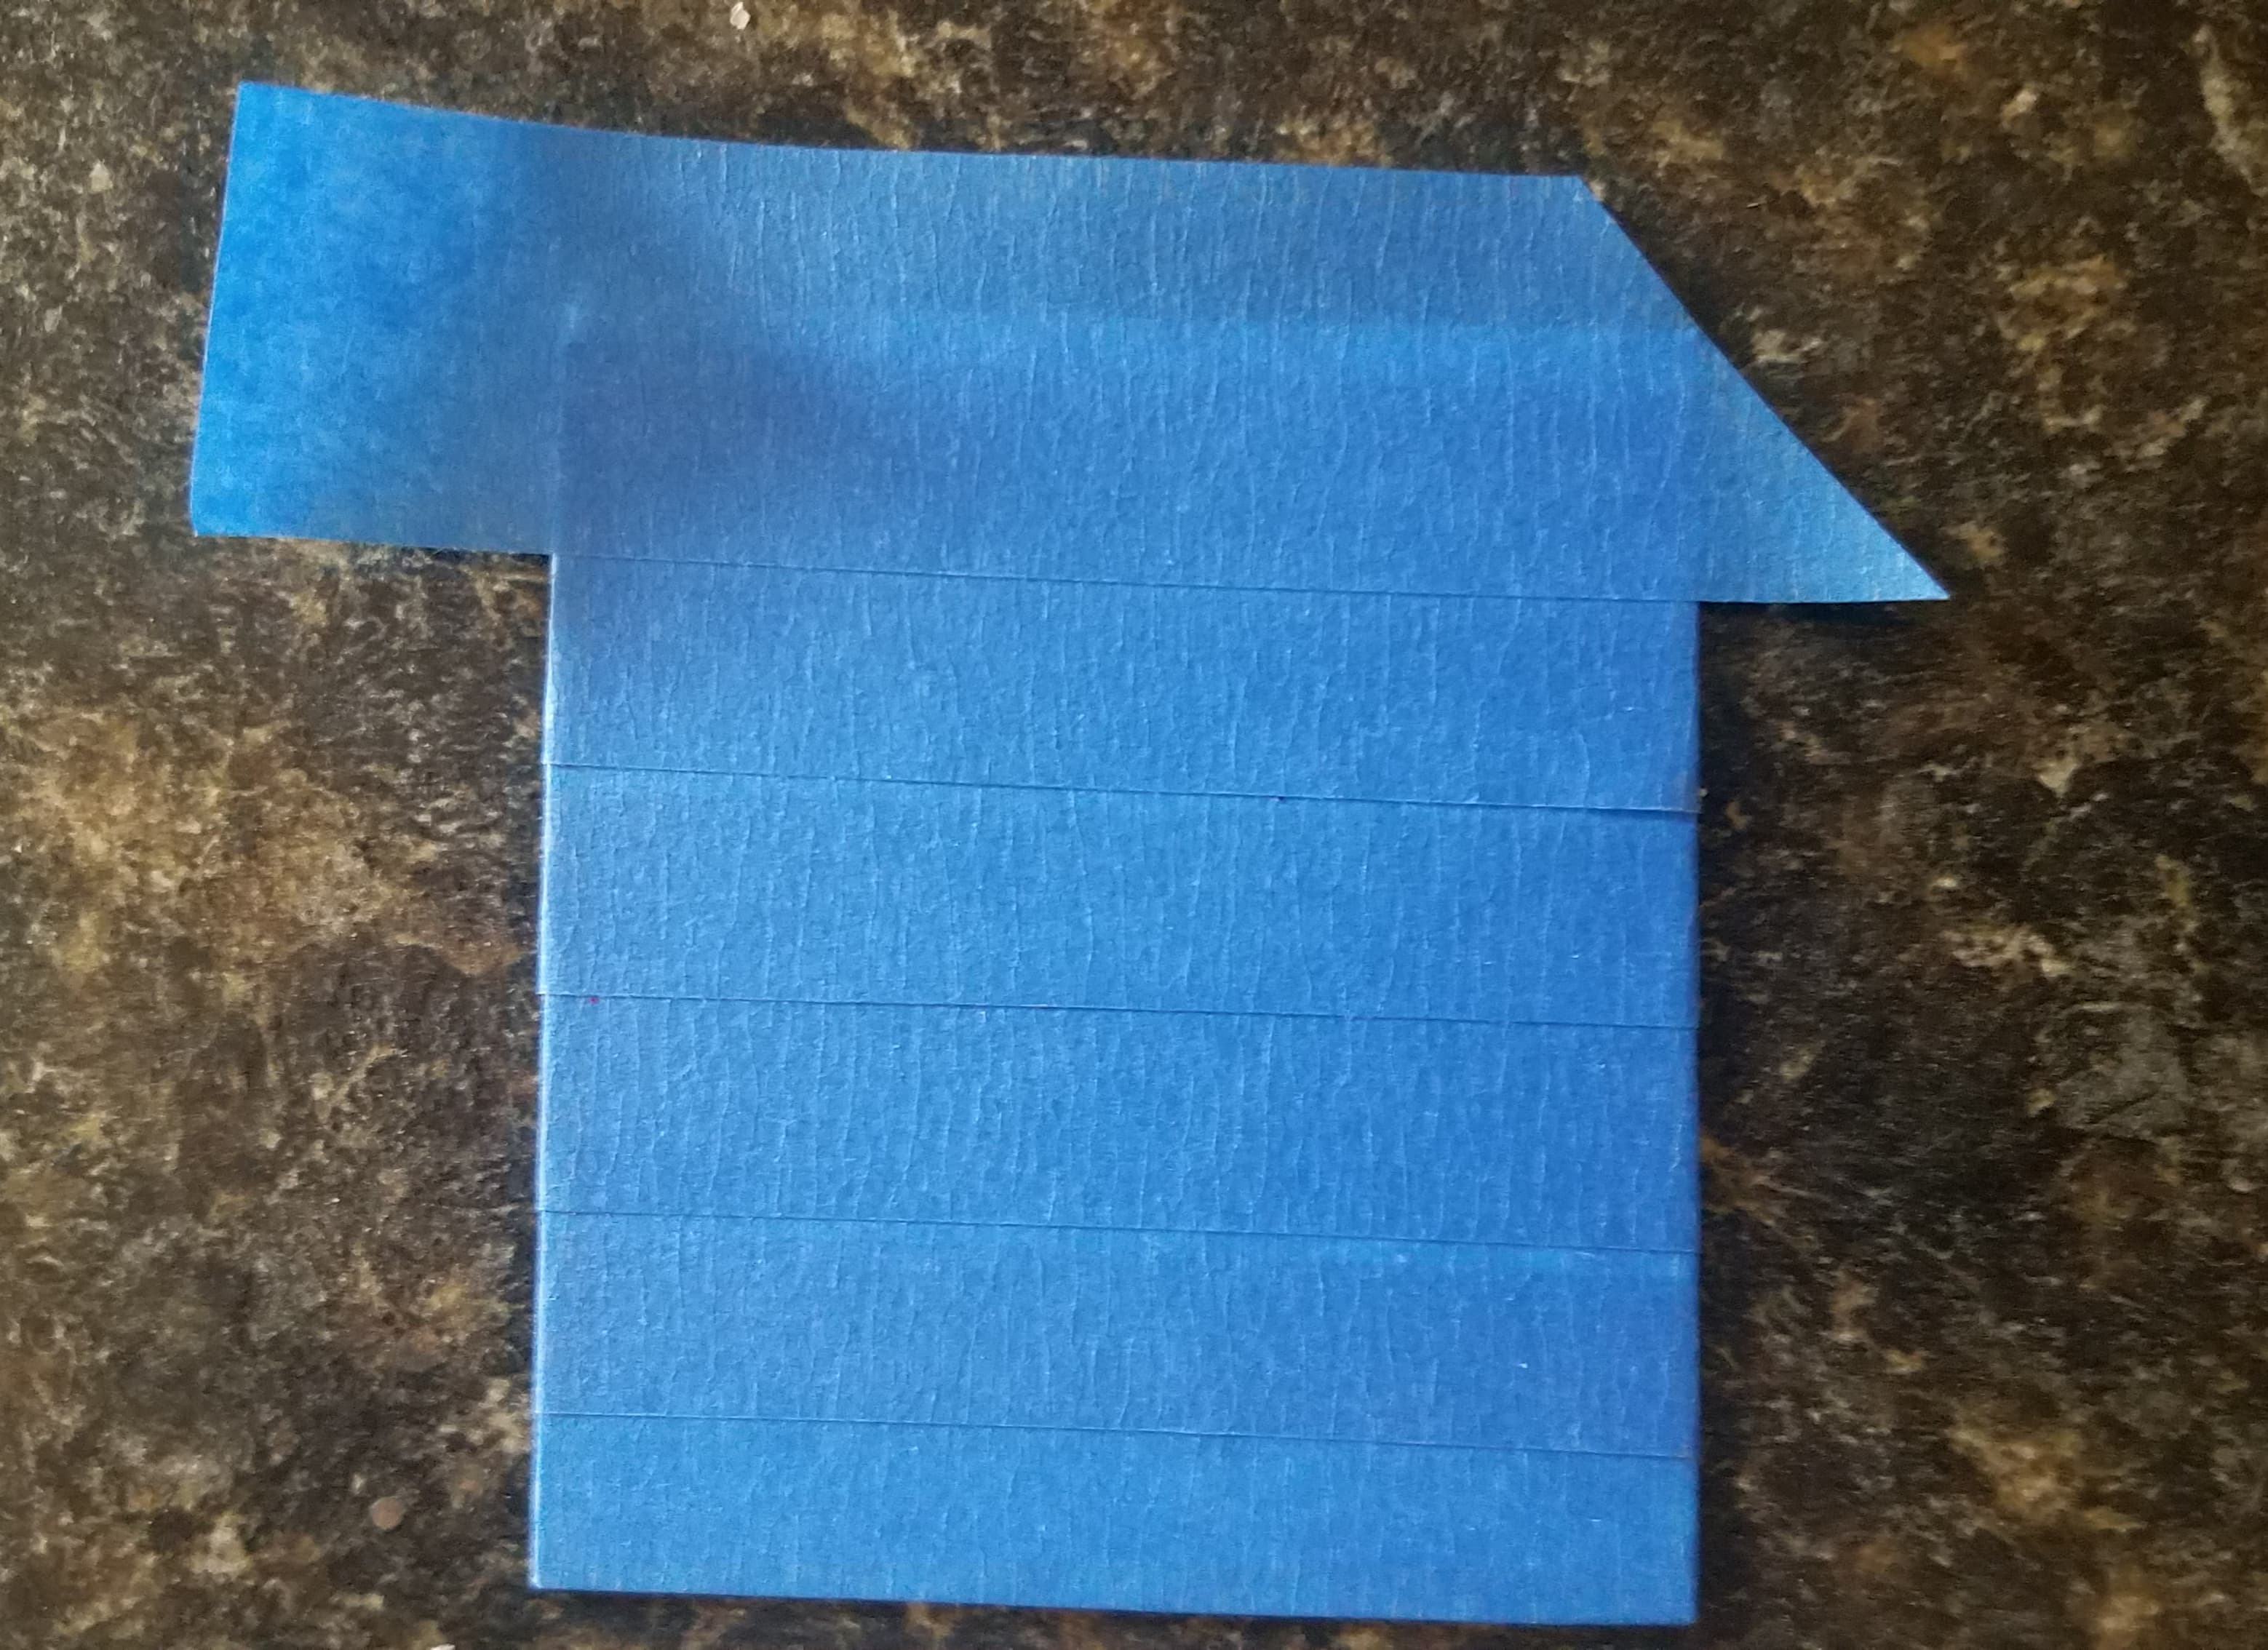
Materials needed for this build is Painter's tape, craft paint, scissors, and some plastic sheet (For Sale Sign).

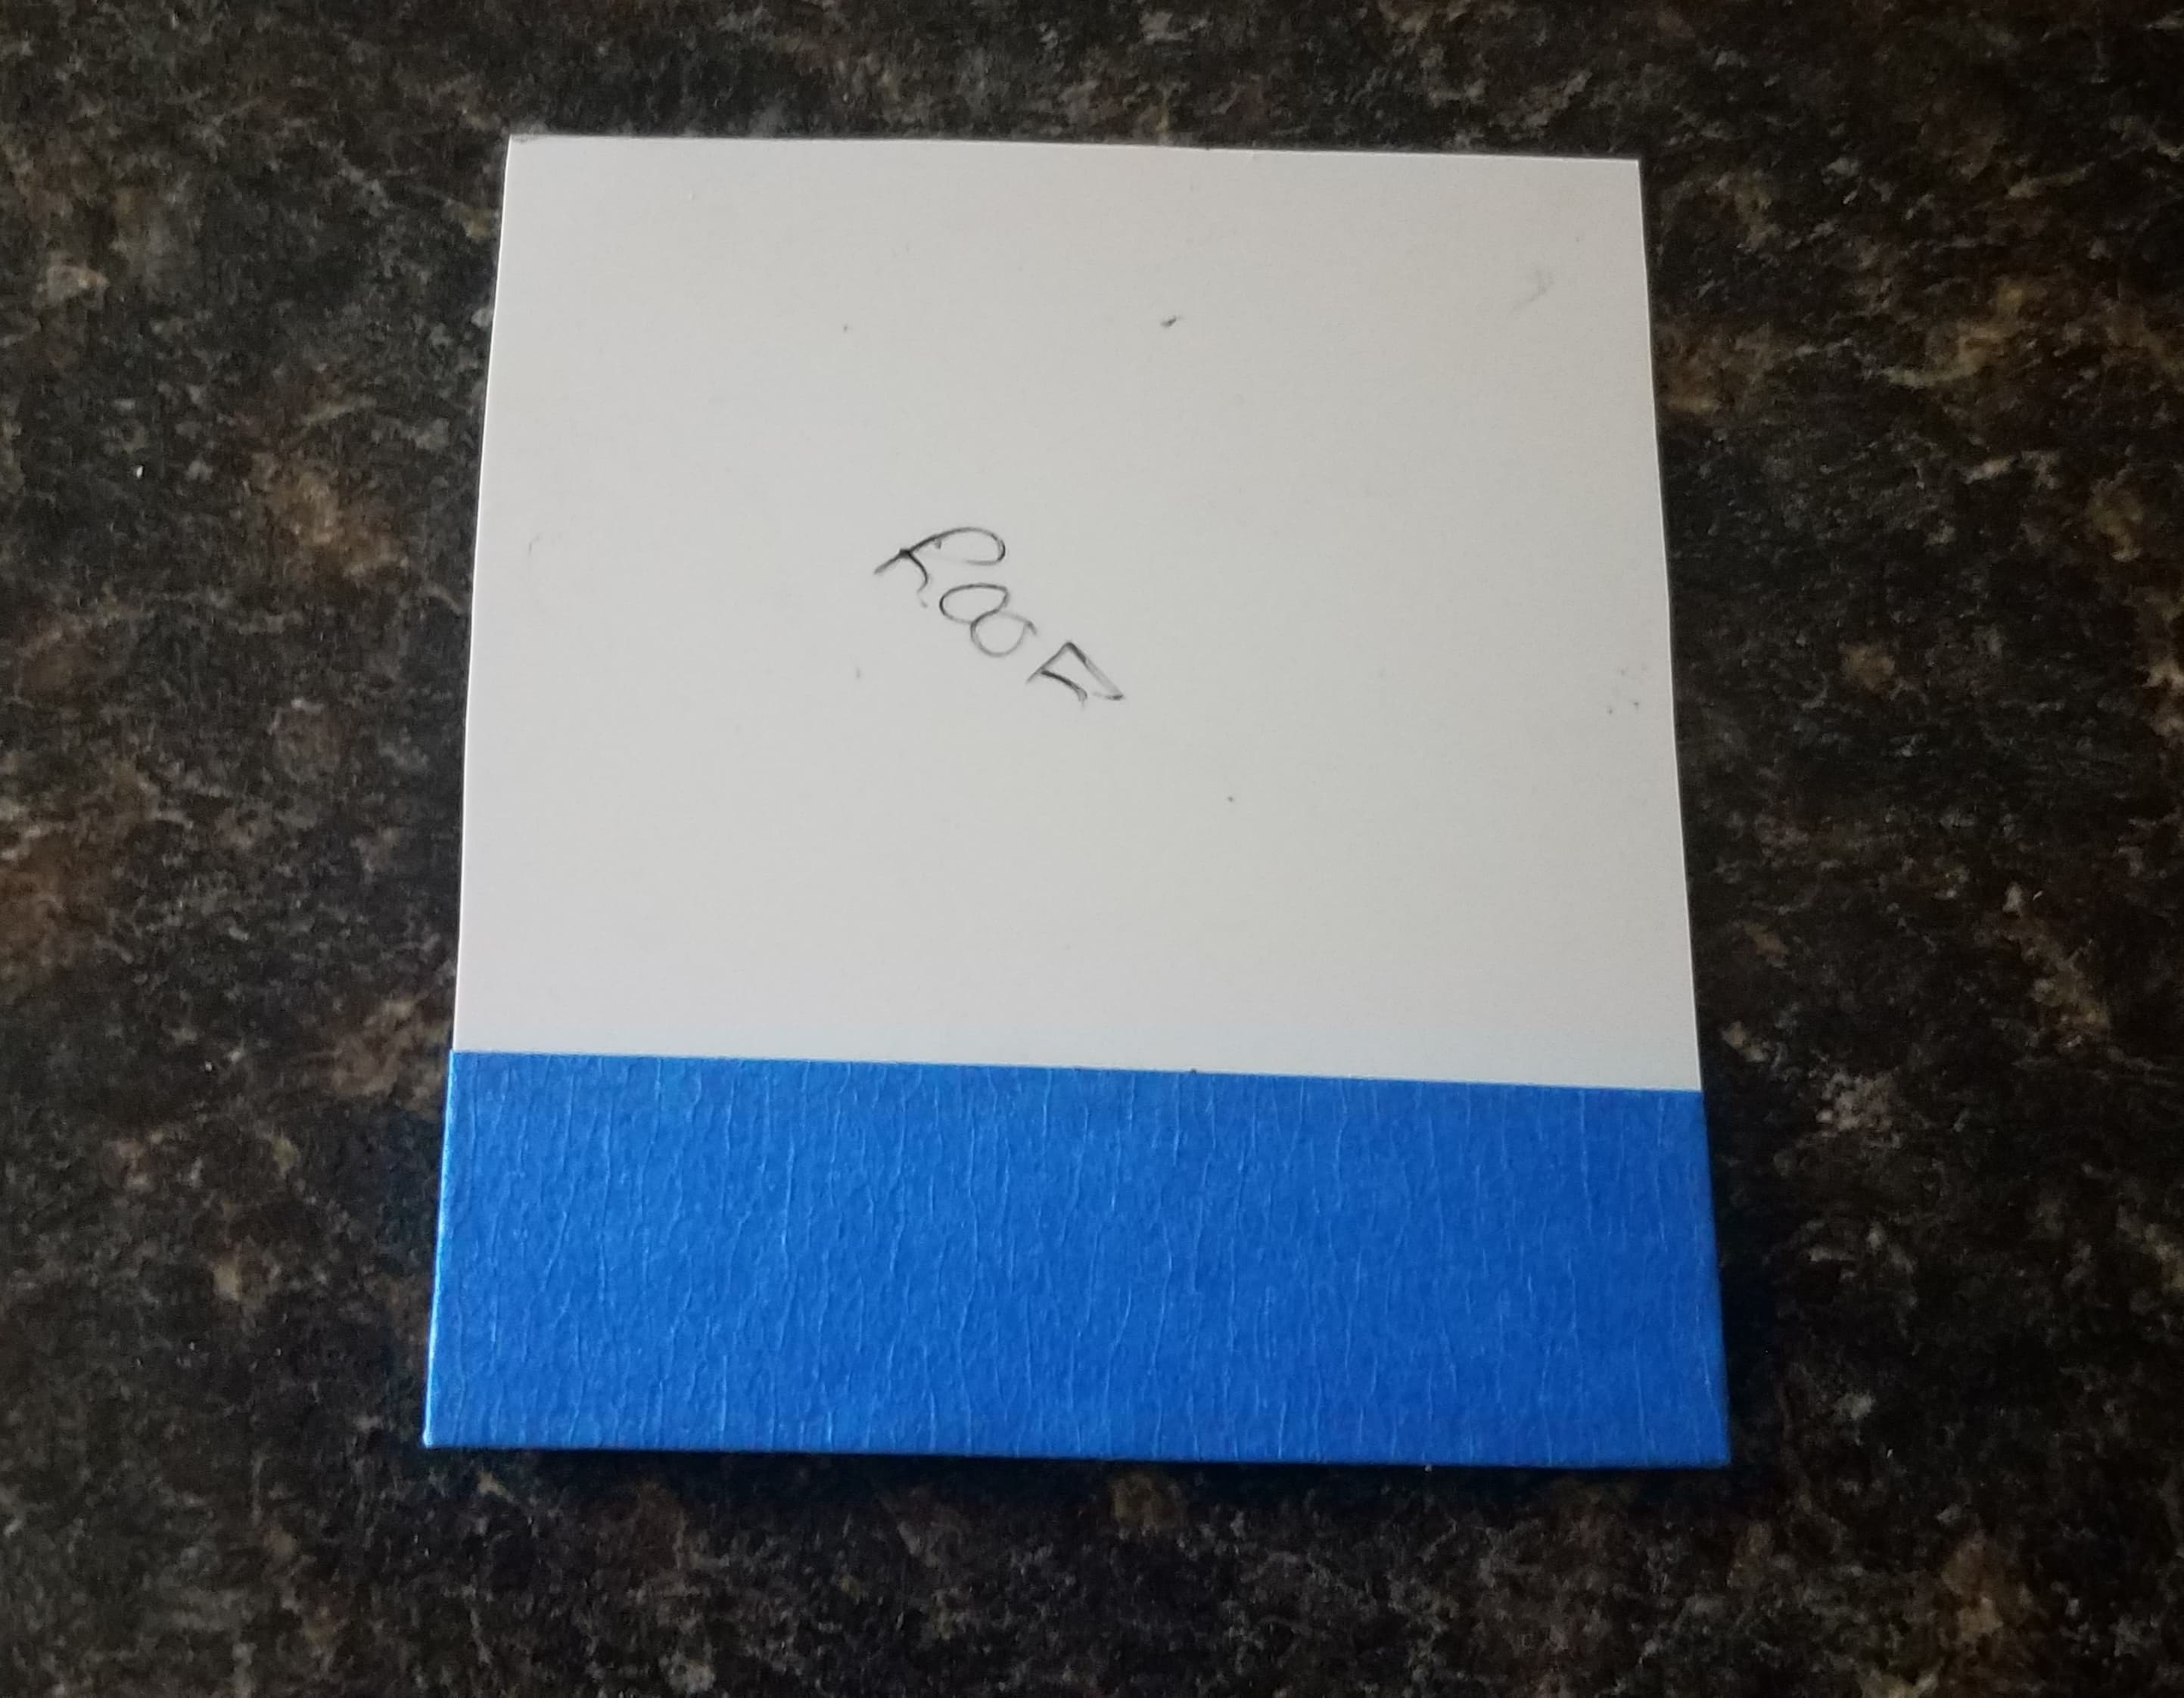
First step is to cut out the plastic for the roof. Tip: Trace the building onto the plastic and then begin to trim to fit. Make sure to test fit it and to give it some wiggle room to allow the tape to wrap around the edge.
Next apply the first layer of tape working fromt he lowest point on the roof towards the highest point.
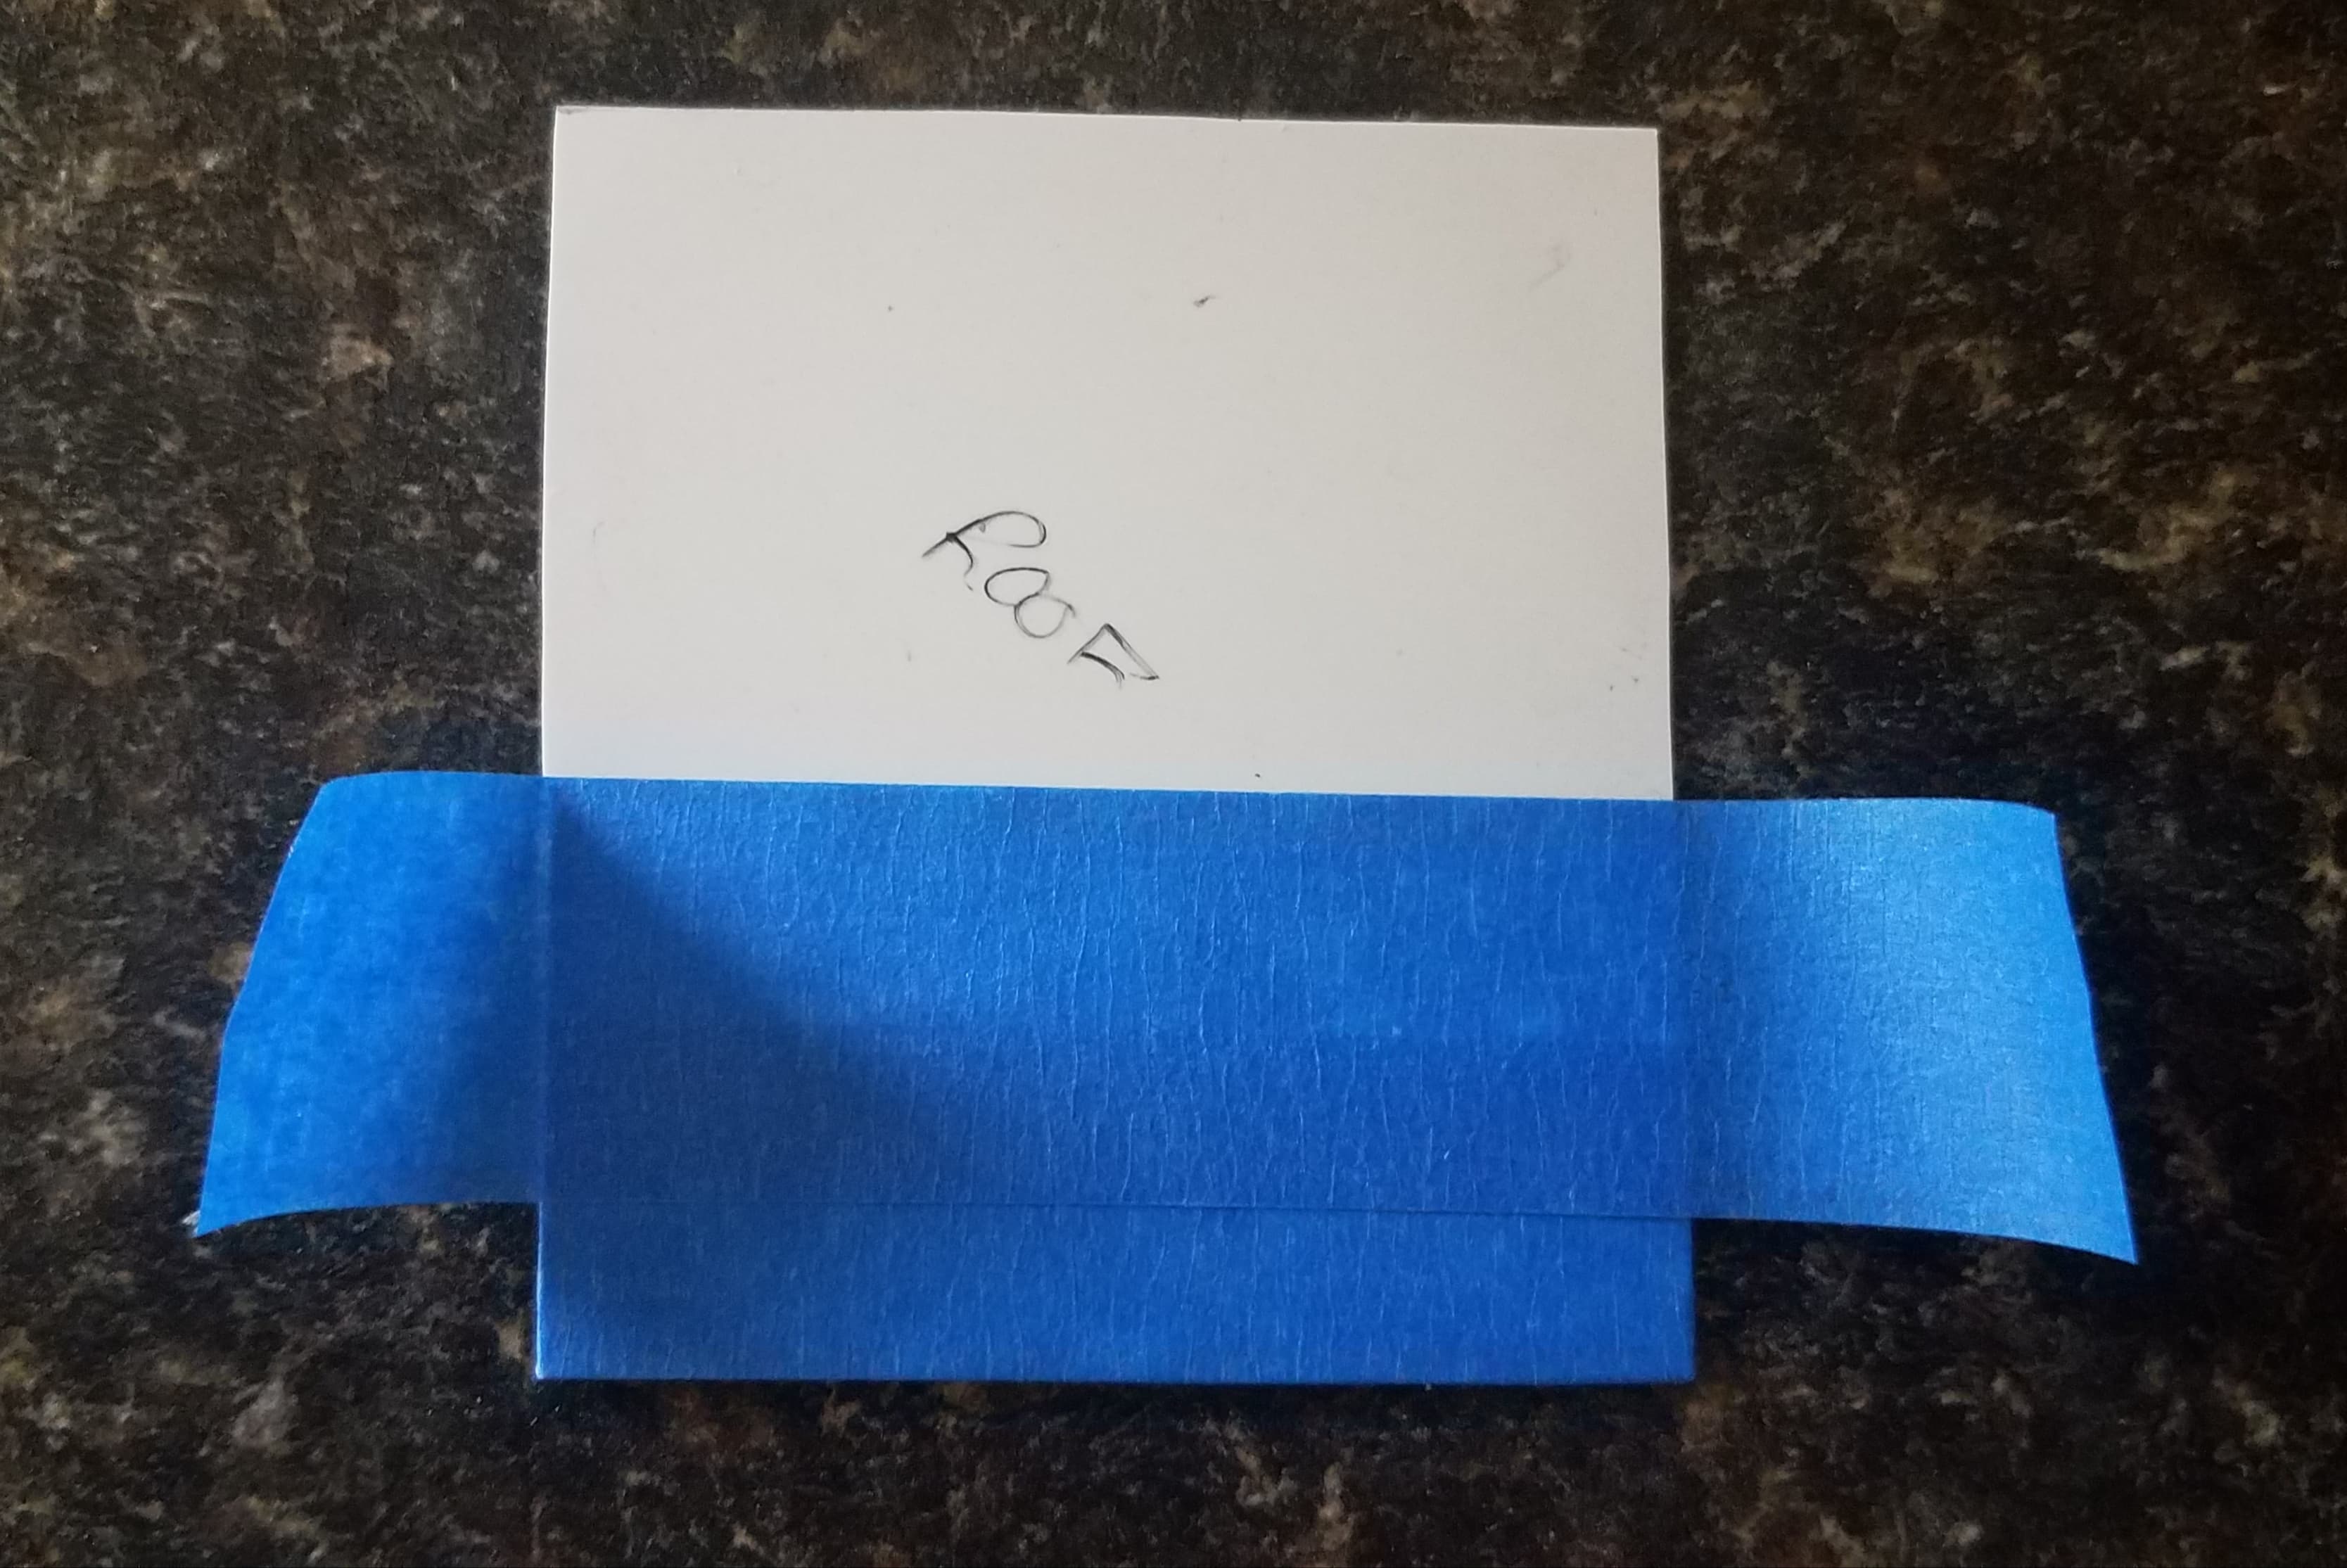
Next, trim off the corners of the tape to make a nice fold.
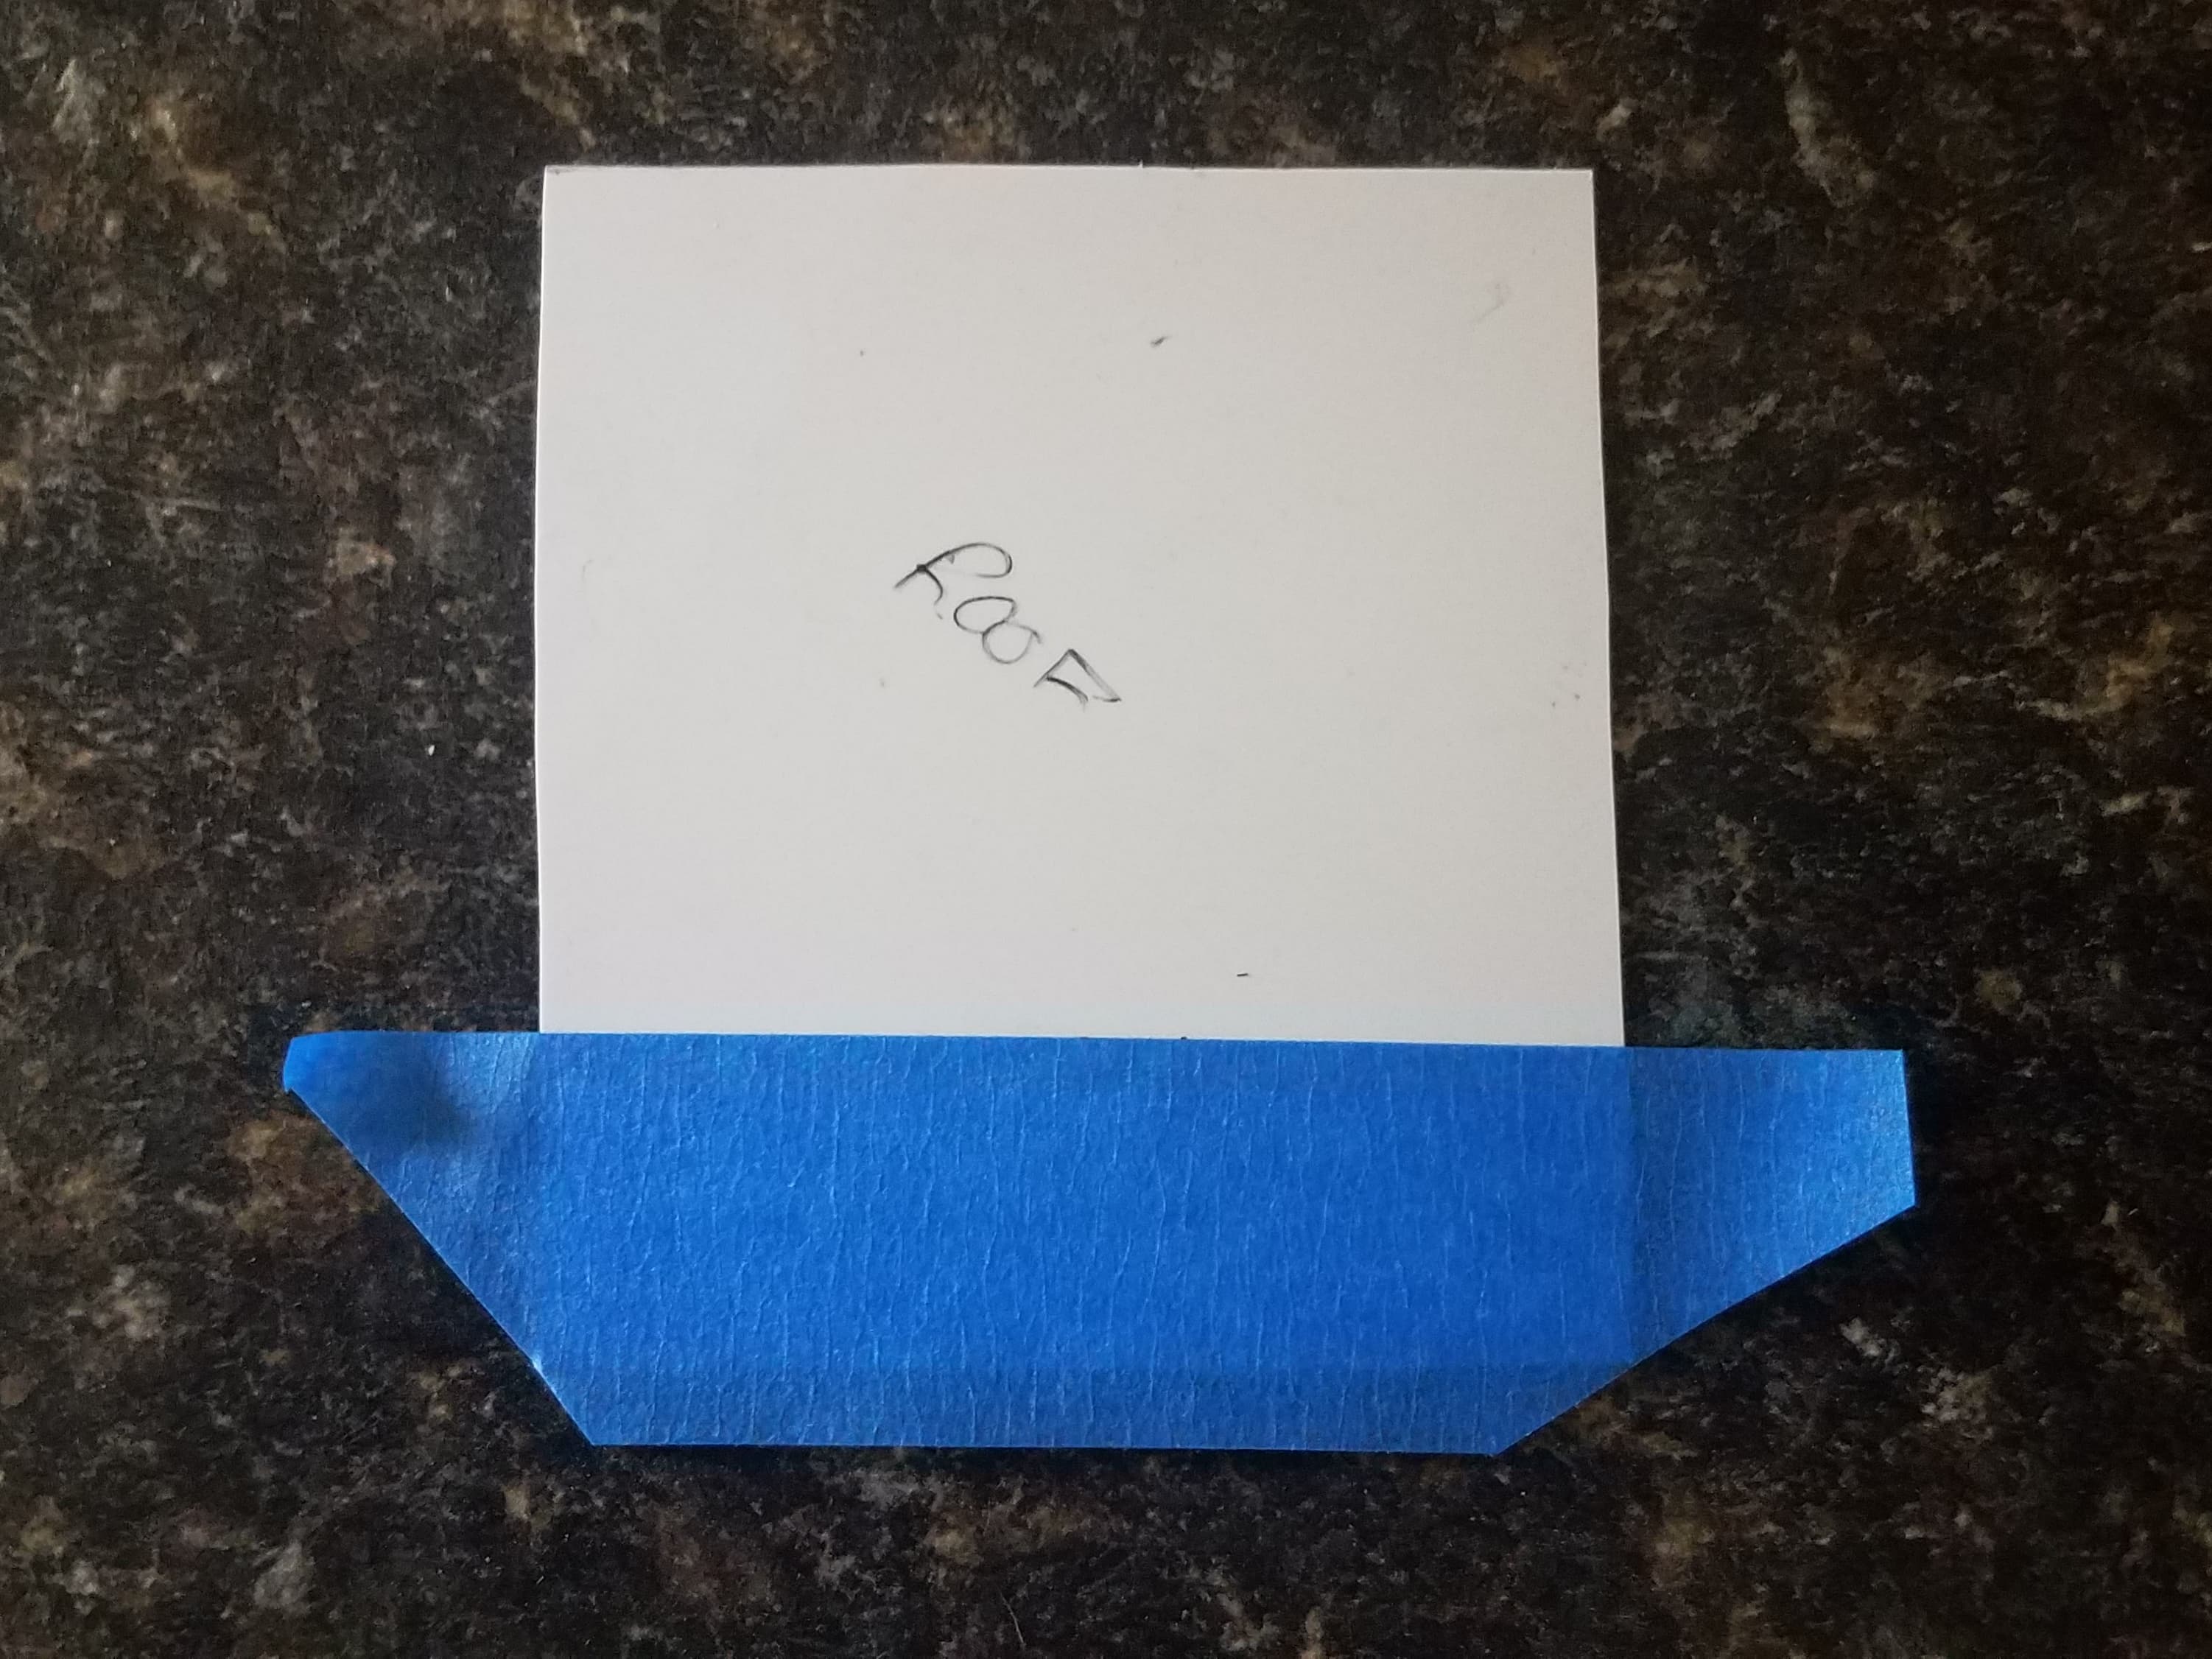
Then, fold the two sides over onto the back of the roof.
Next, fold the front edge of the roof back.
For the middle sections of the roof, apply the tape and fold the edges over. No cutting needed. Note: Keep a uniform distance between the edges of the tape.
For the middle sections of the roof, apply the tape and fold the edges over. No cutting needed. Note: Keep a uniform distance between the edges of the tape.Work your way towards the highest point of the roof.
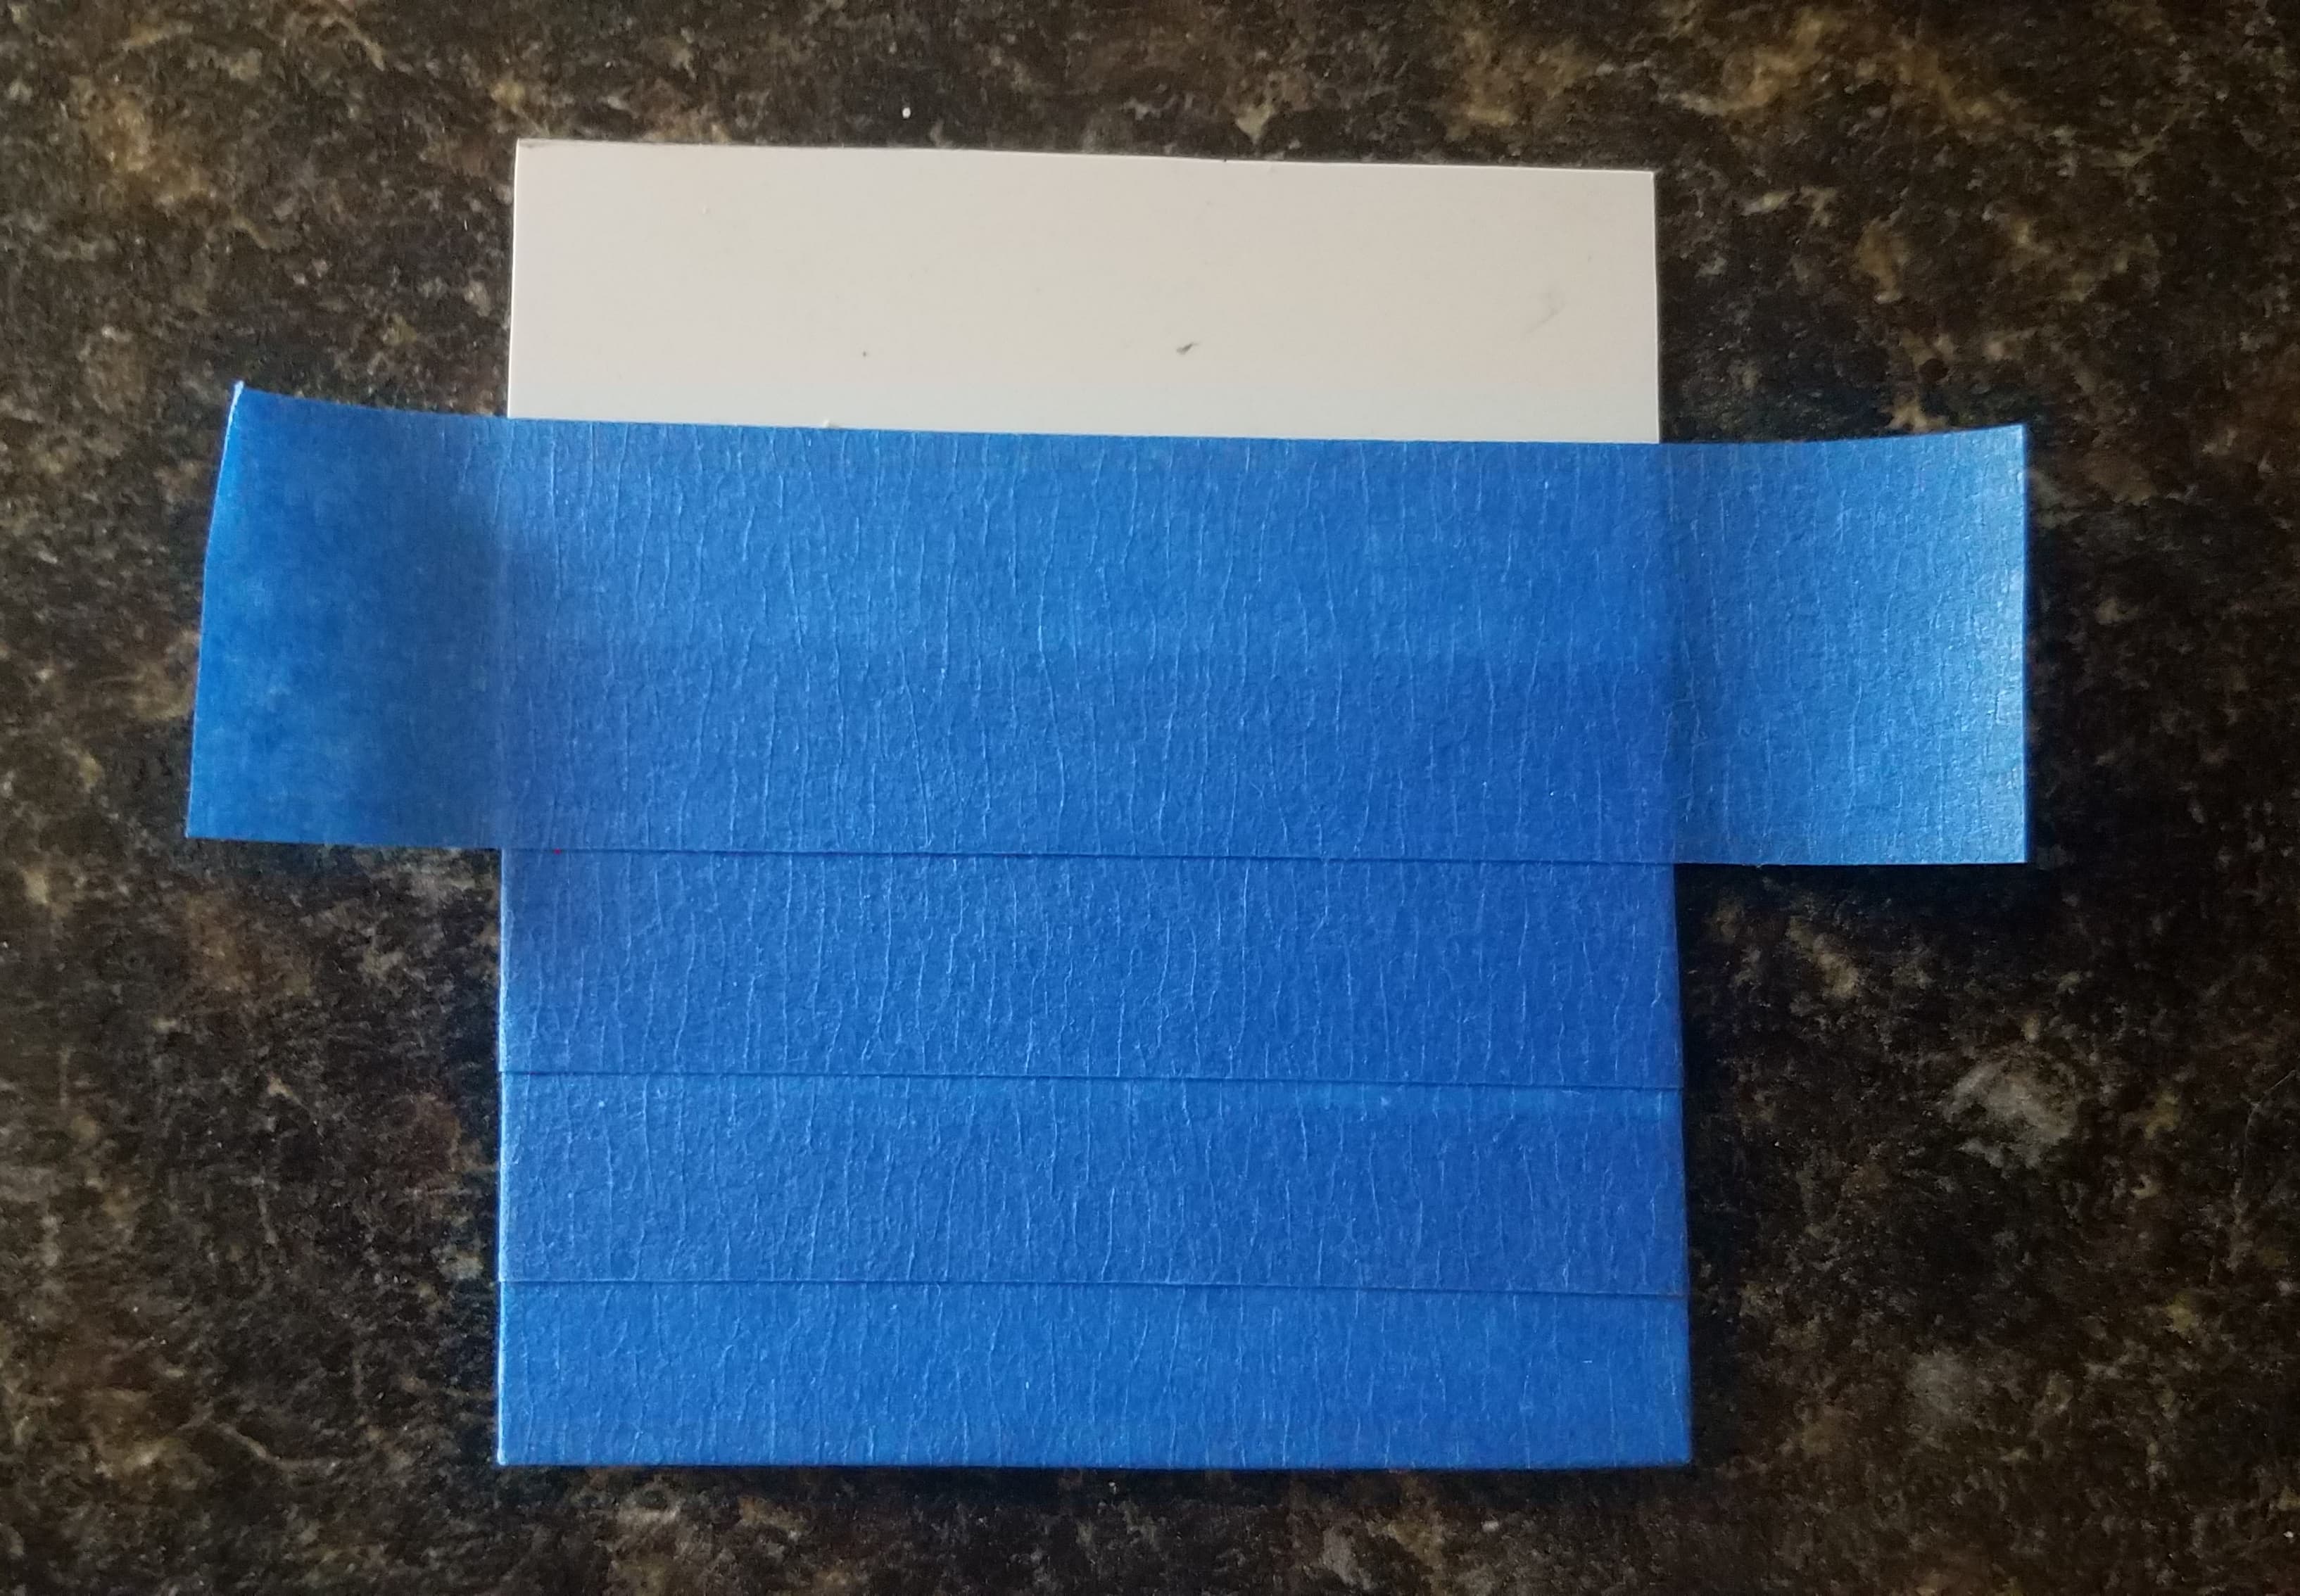
Like the first strip of tape, trim the edges to be able to fold them over. Fold the sides over first.
Finish folding over the top edge.
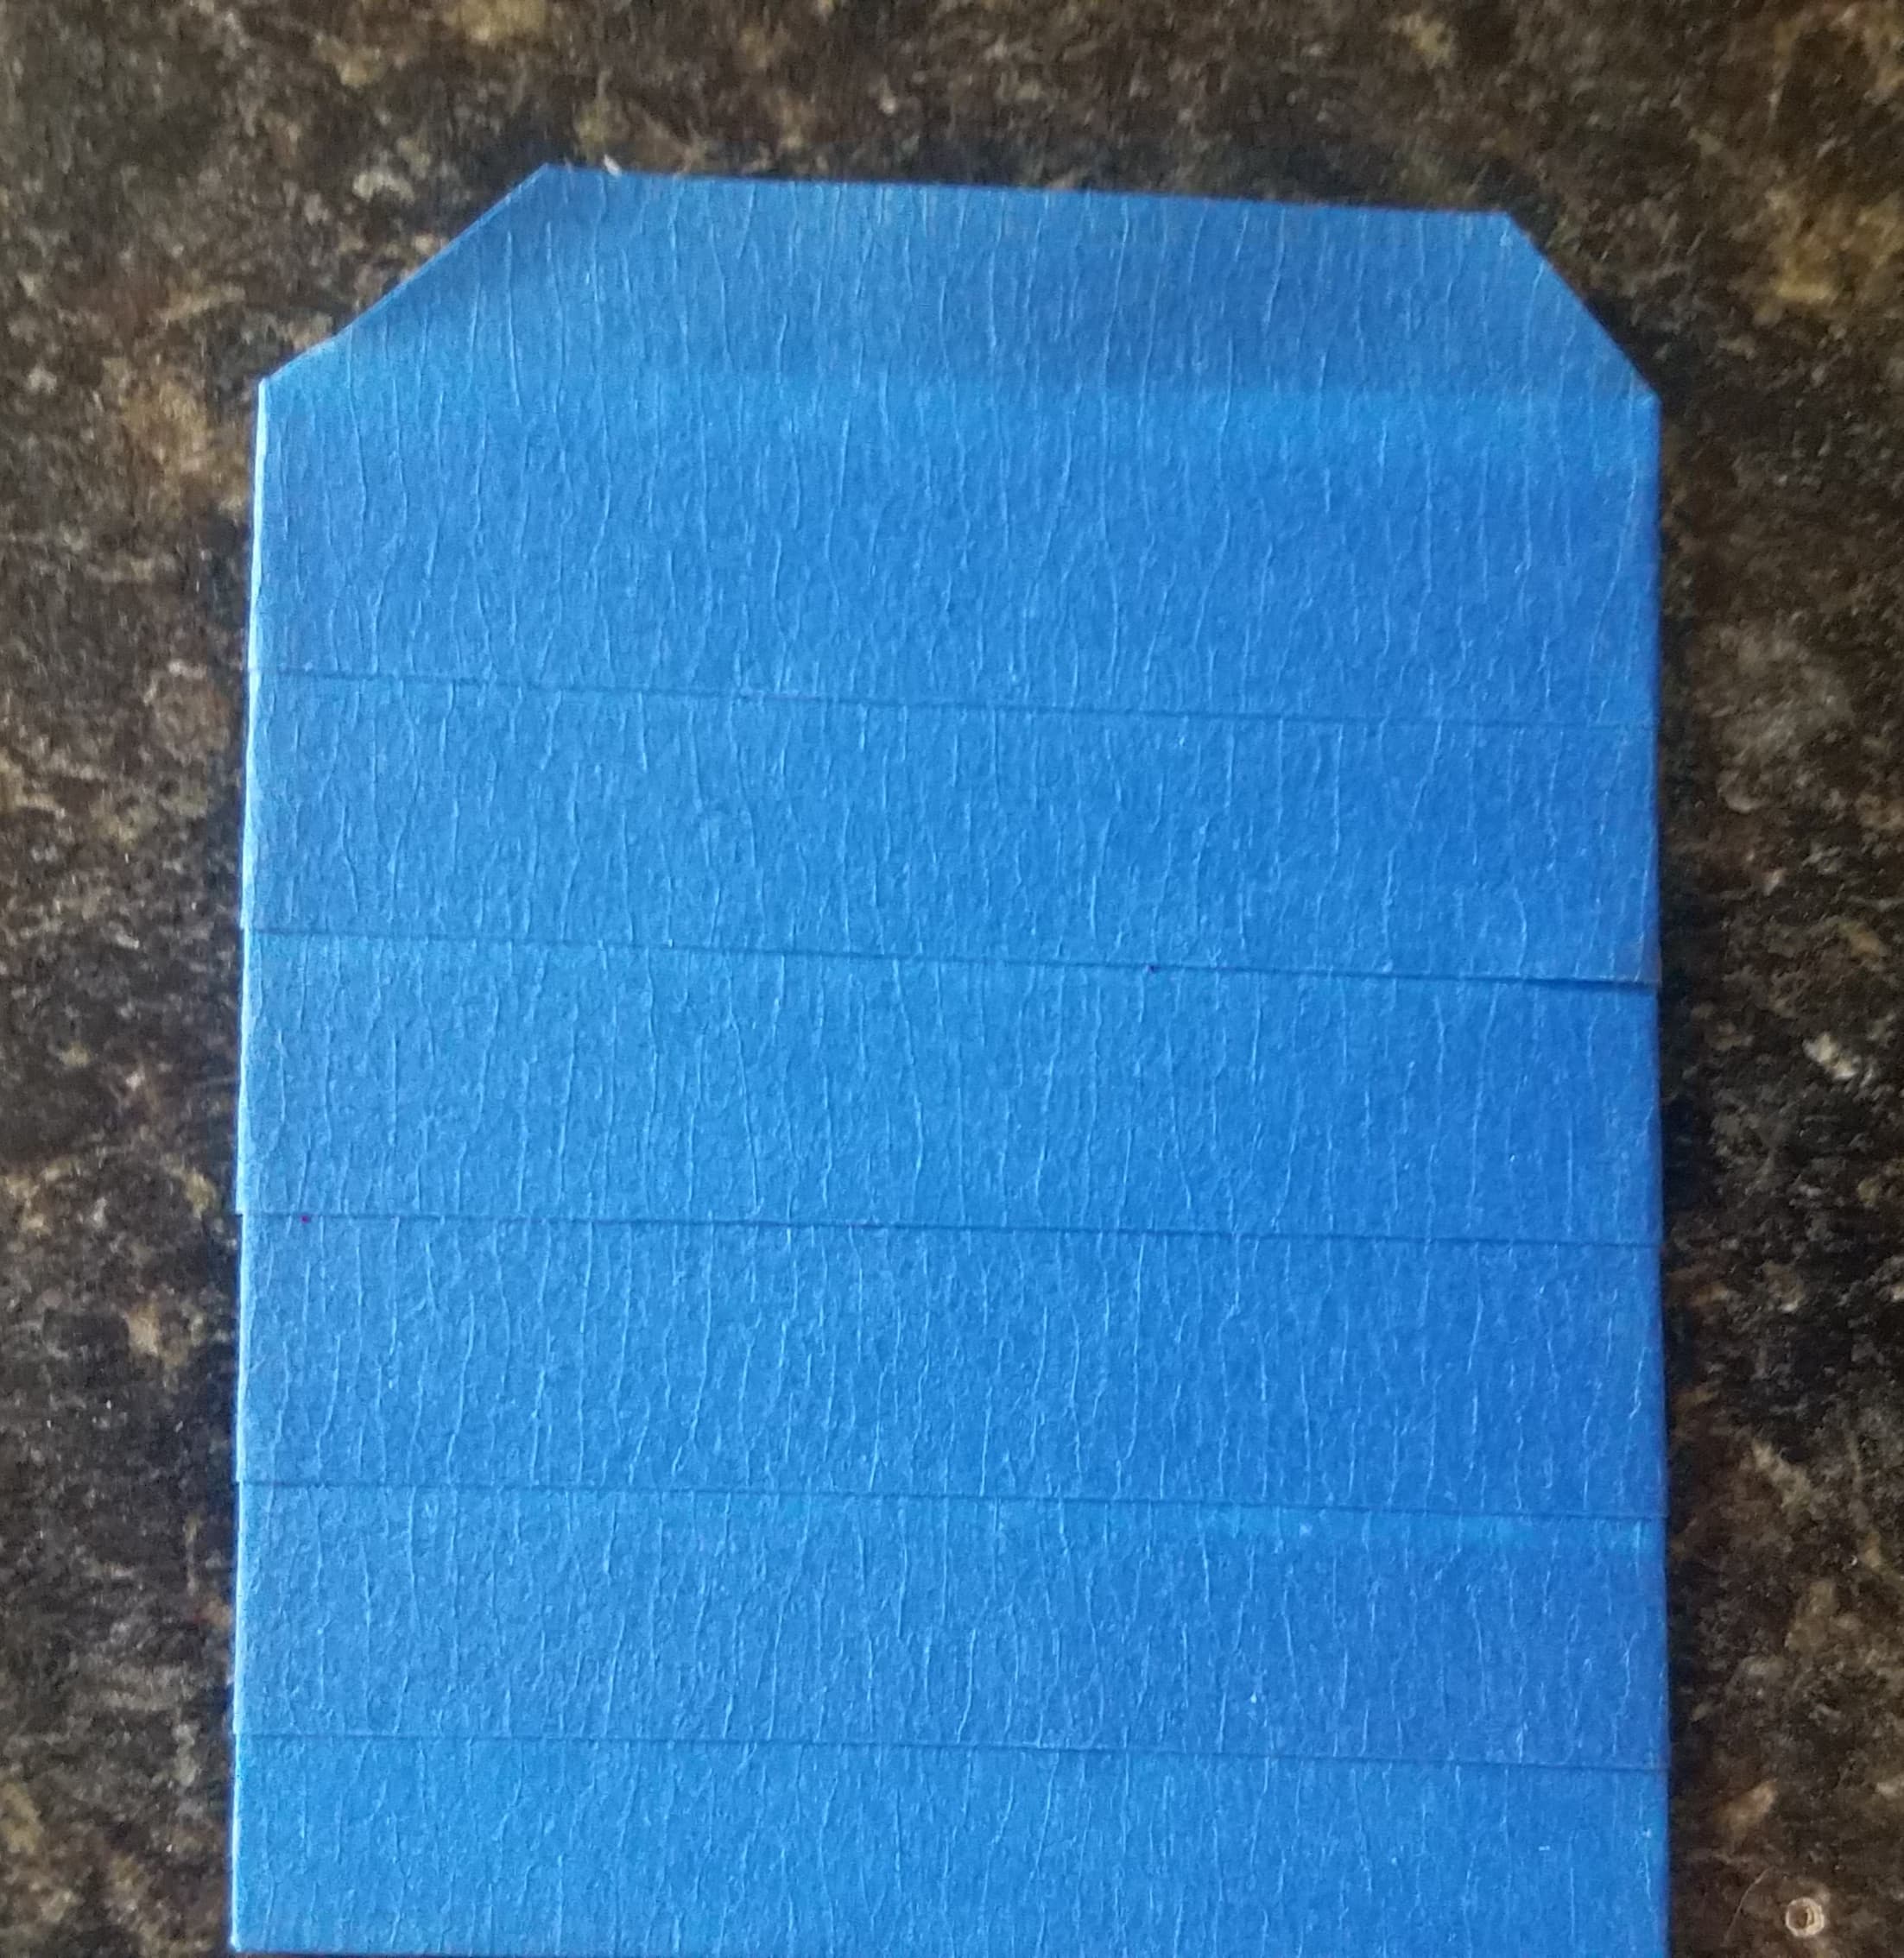
With the roof taped, be sure to check the fit of the roof before moving onto finishing the roof.

If the roof fits, move onto painting the roof. I like using a color called "pavement" to give it a faded look. Brand new these roofs would be black. 
Try stressing the roof some by dry brushing some lighter colors onto it and add "patches" to really give it a used look! 
This week's Tips& Tricks is more Tip then Trick. Add some color to your grassy field by "planting" some wild flowers.
Adding flowers to your model railroad.
September 29th, 2020
Adding some color to your lanscape.
Along with different color ground foam, trees, and bushes, another easy way to add some variation in your landscape is to add some flowers. Check out the bead isle at the local craft store (or online) for small colorful beads to use as flowers for your landscaping. Also, if you find some red beads you can make some apple trees. Modeling the South? Orange beads could be Oranges, and so on.
Attaching the beads is very similar to ballasting or adding ground foam. Either spray or soak some spots with diluted white glue/ water mixture and place the beads.
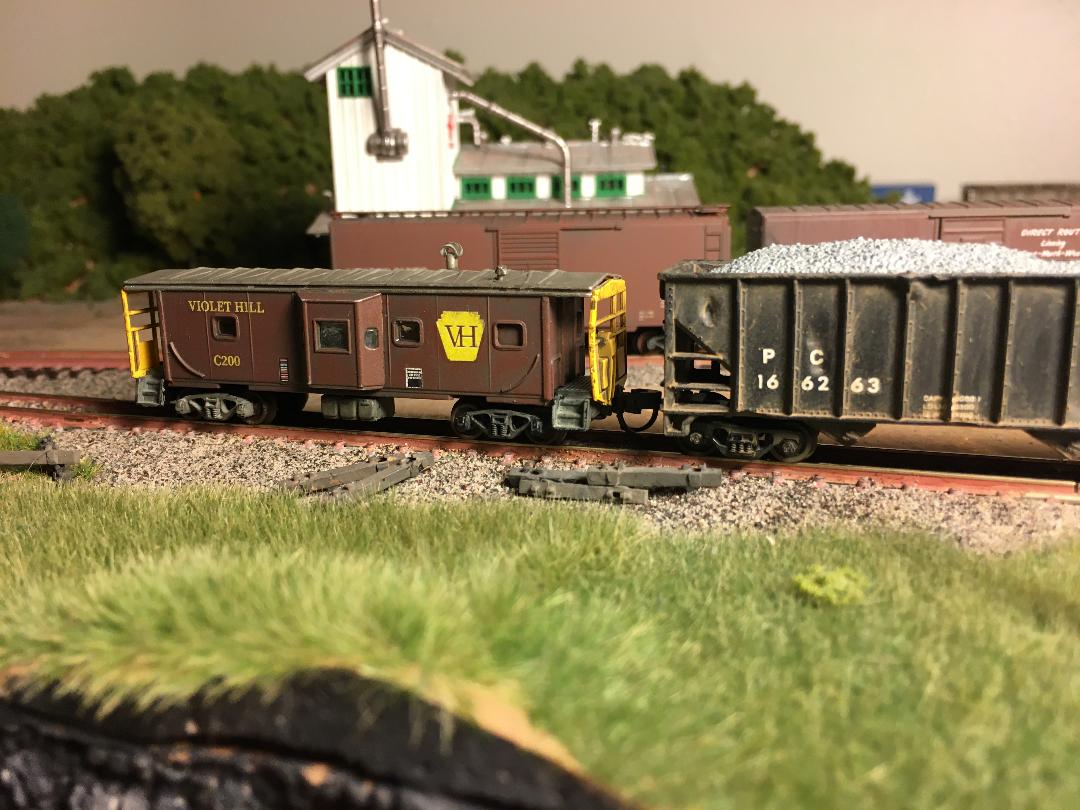
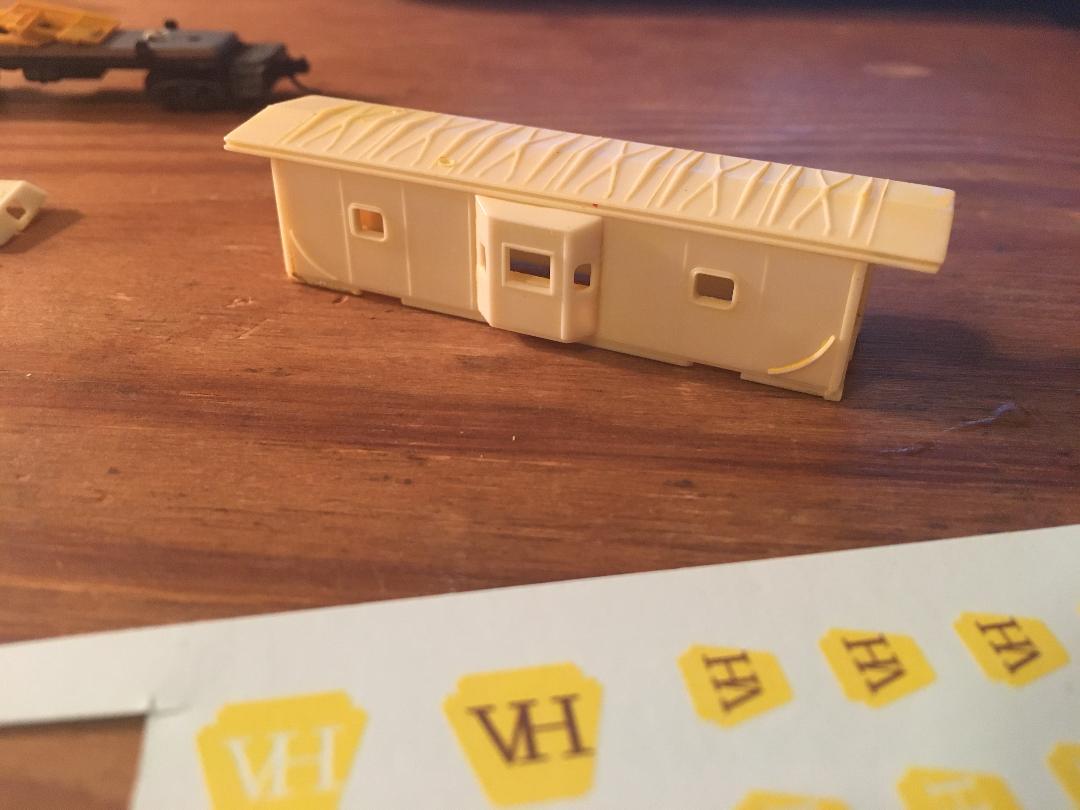
The Violet Hill gets a new caboose!
September 22nd, 2020
Getting started.
We start with this Walthers N scale caboose, stripped of its old paint using 90% rubbing alcohol.
After painting the caboose 'Boxcar Red', I mask off the body to paint the roof silver using Tamiya model masking tape.
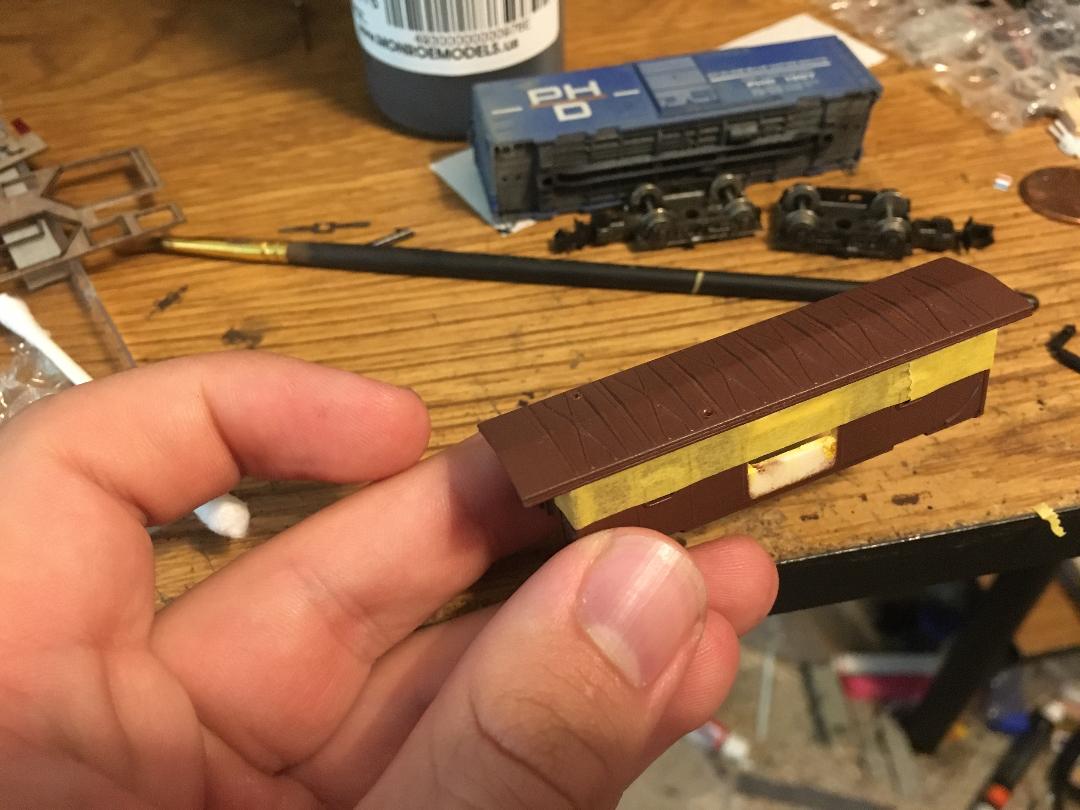
With the silver roof, it's really starting to take shape!
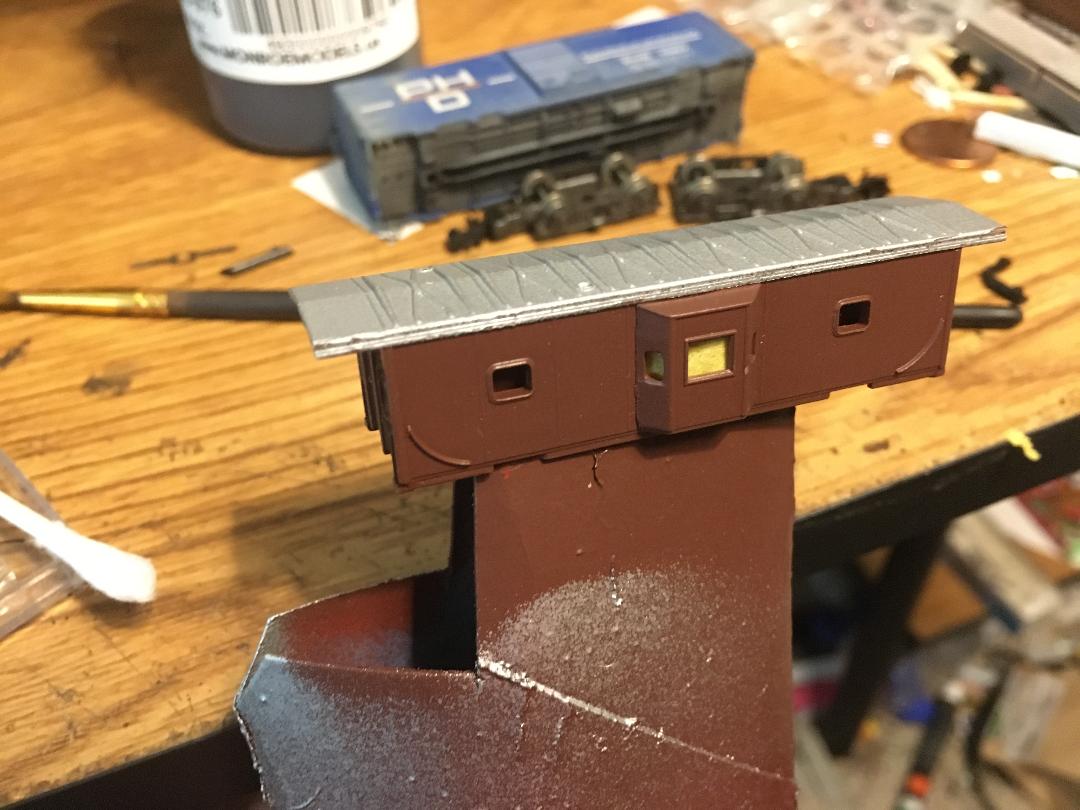
Once it's mostly reassembled, I cut out the decals and position them on the caboose to see how it'll look. Today I'm using a mix of decals, with data from Microscale and custom decals from Switchline Decals for my freelanced railroad. You can see the decalling process in a past Tips and Tricks Tuesday!
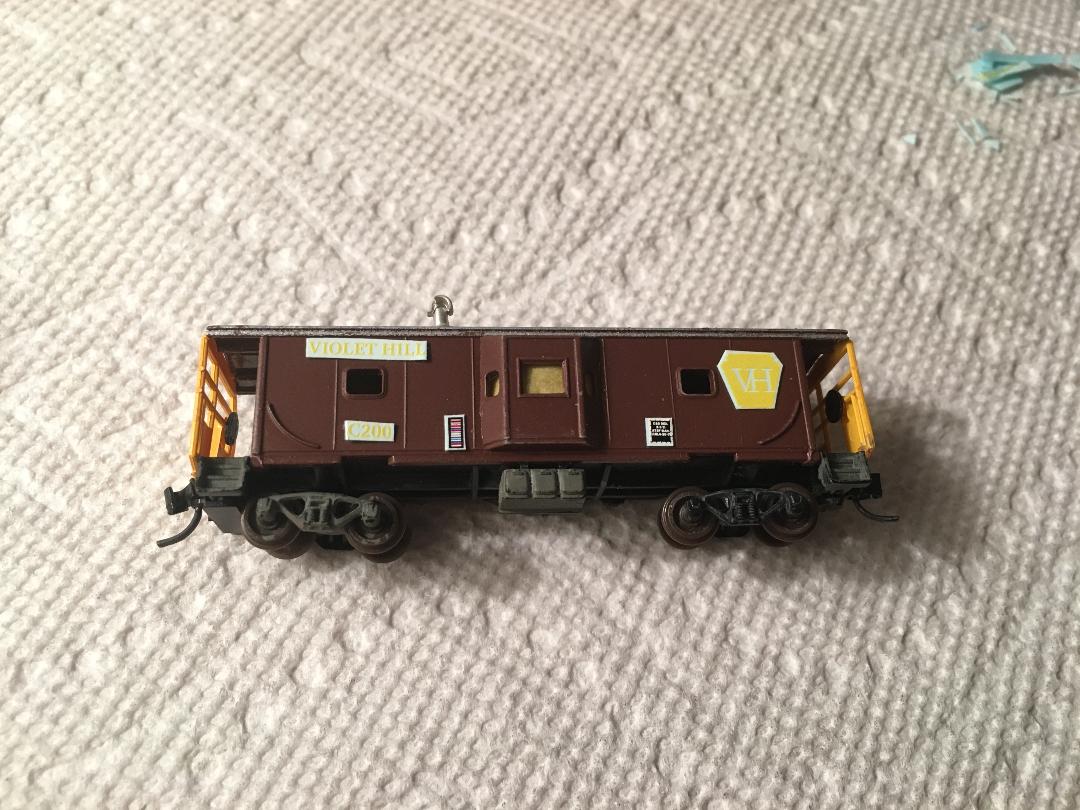
After decalling, I weather the whole thing using techniques shared in a previous Tips and Tricks Tuesday. Now, the car is ready for service!
Decaling and Standardizing Wheels and Couplers- Milwaukee Coal Train Build contd.
September 15th, 2020
Deciding on a design
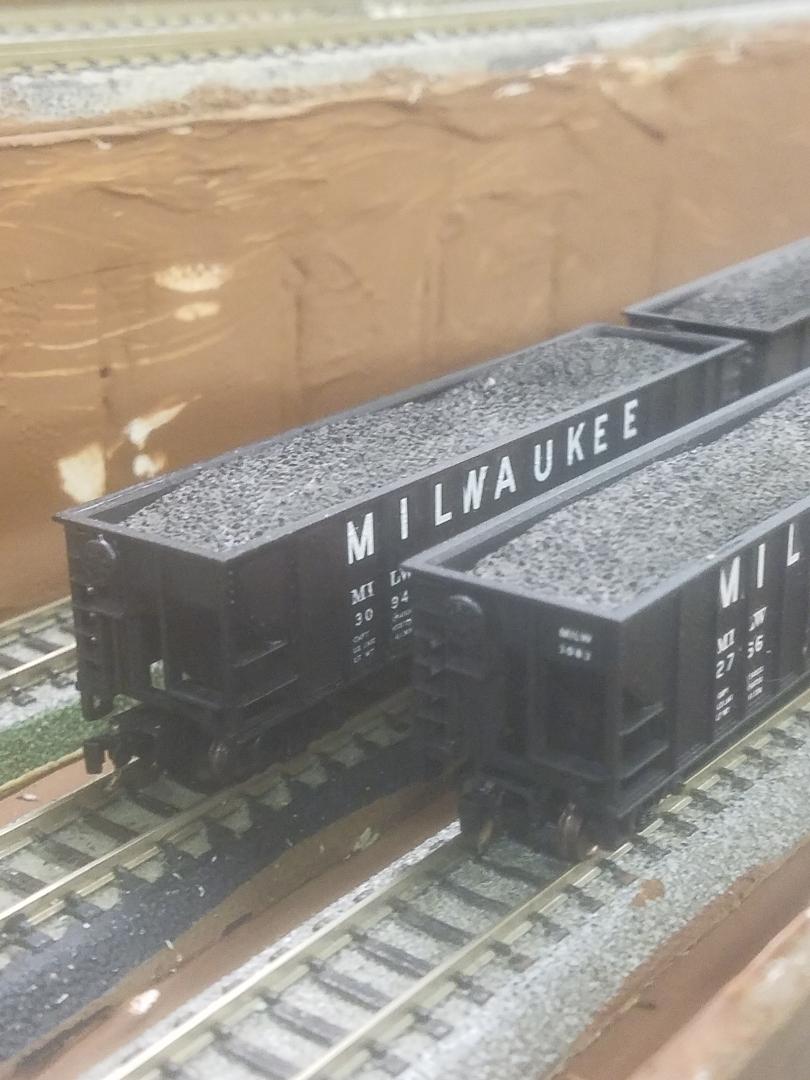
By the late 60's, railroads were trying hard to break out of their old, worn-out, and outdated image many people depicted them as. This led to an explosion of colors and paint schemes on diesels that had not been available for steam locomotives. Eventually this movement made its way down to passenger and freight cars. Coal cars were no different. Although typically coal cars retained their black or brown paint; the lettering/logos reflected a sleek design to show the Country the railroads were updated and ready to complete in today's world. I modeled this change by applying different sets of decals to show the coal cars in various stages of lettering and logos. The method behind the application of the decals is the same however.

Applying the Decals
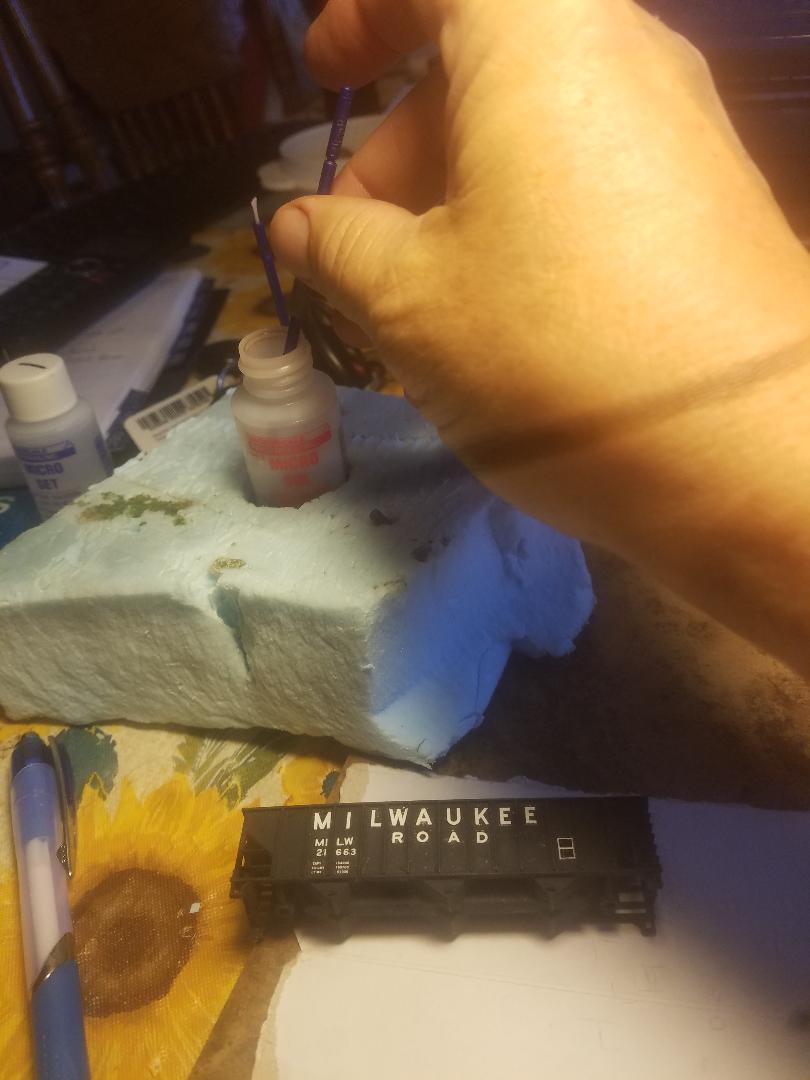
Before starting, you will need the following. A sharp modeling knife, a small cardboard sheet to cut on, a few small brushes, tweezers, decal solution, a dull tip, and Q-tips. I also found having additional lighting and a magnifying glass is useful.
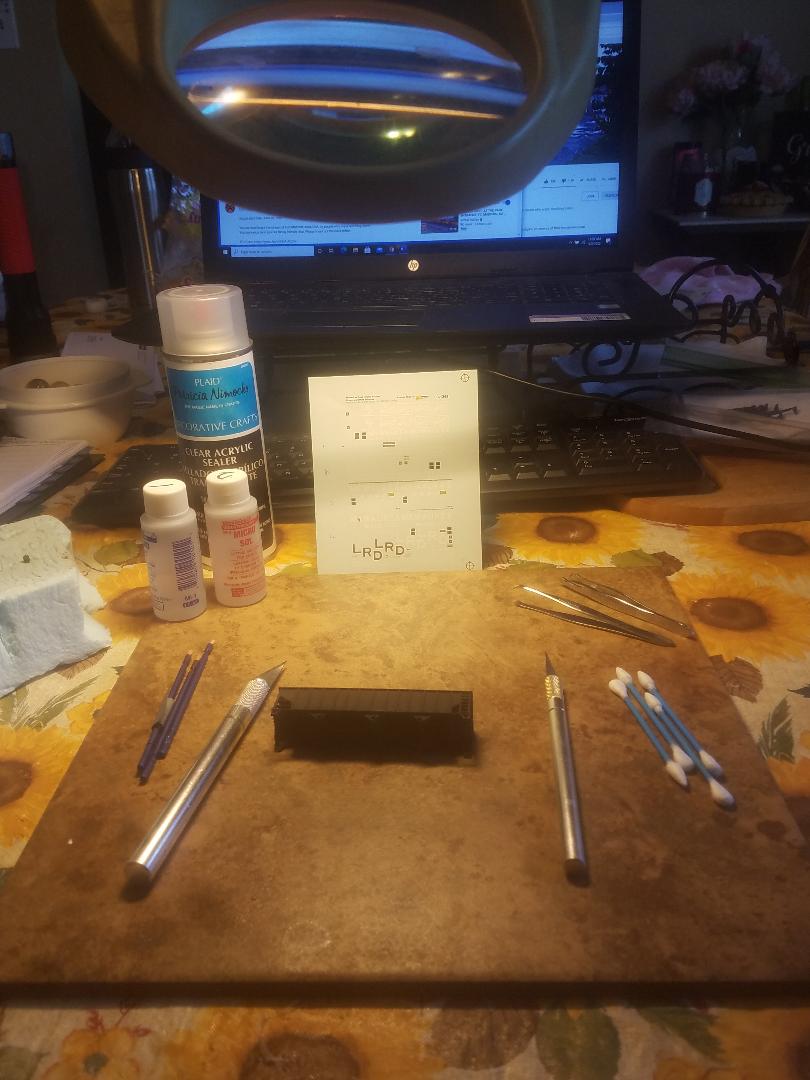
I use Micro Set (comes in a blue bottle) and Micro Sol (red bottle) made by Microscale Industries for applying my decals
I start by applying the name to the car first because I found it easier to work from the top of the car down. Using my hobby knife, I carefully cut around the entire letter on the decal sheet. Take your time as you don't want to cut through the letter.

Next, using a brush, I apply a liberal amount of Micro Set (blue bottle) to the surface of the car close to where the decal will be placed. Carefully, I use my tweezers to pick the decal up and lay it on the wet surface. You will see the decal start to soak in the moment you lay it down. I then apply more Micro Set to the top of the decal and wait about 30 seconds for the solution to work its way in.
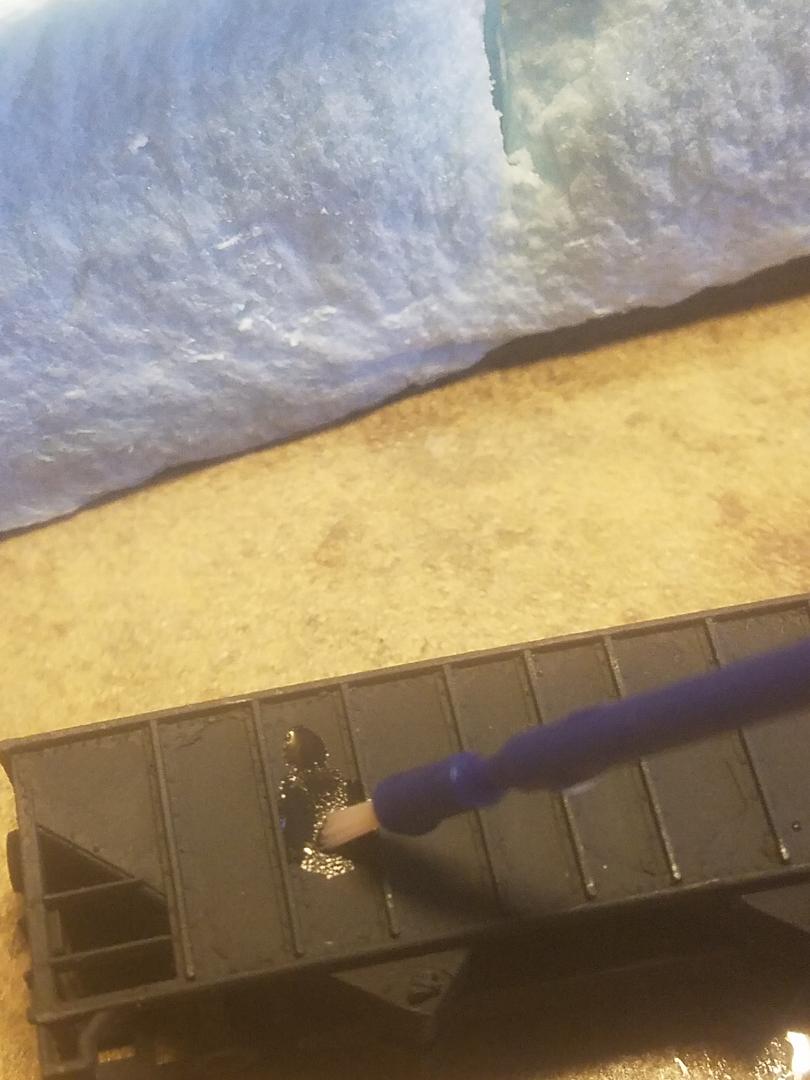
Using a dull pick, I carefully slid the decal off the paper backing, and position it on the car. Check to make sure the decal is lined up correctly then use a Q-tip to soak up any excess solution around it. Continue on to the next letter/decal. If you discover later a decal needs to be re-positioned, apply Micro set to the decal, wait 30 seconds, and it should move freely. If the decal rips you should still be able to position it correctly and with a little maneuvering, fix it so the rip doesn't show. Or you can remove the damage decal and put another in its place. It is recommended to do one side of the car before moving on to the other side.
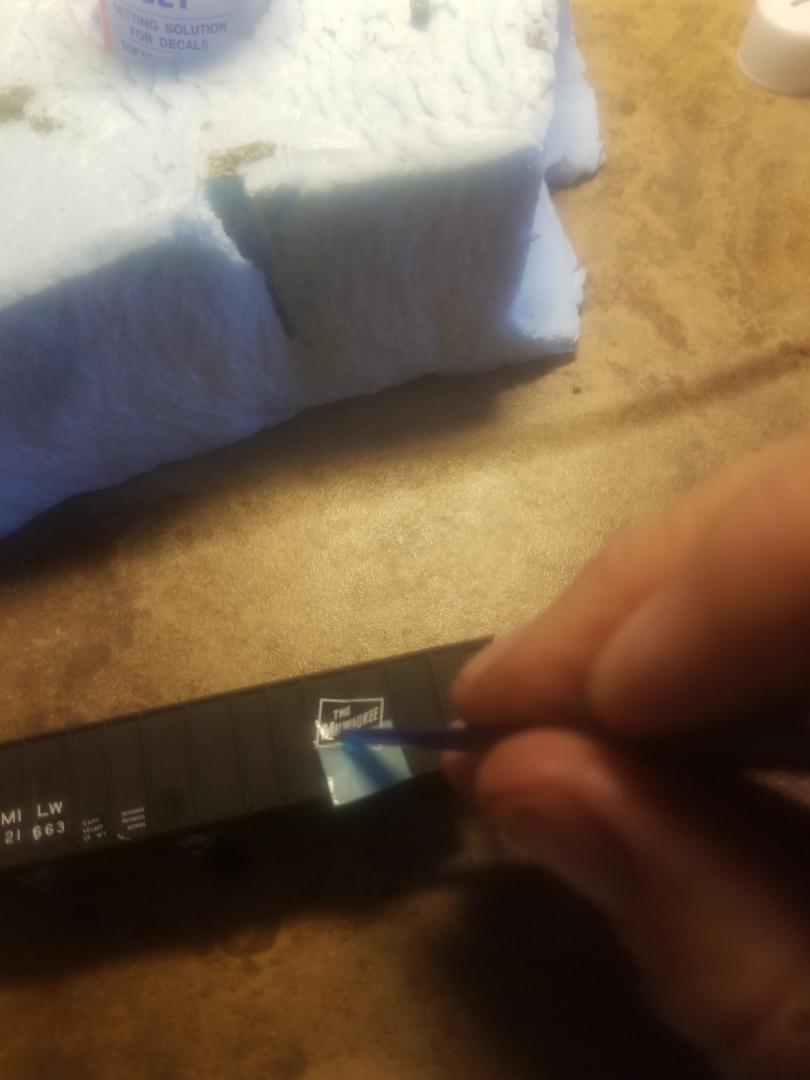
Wait for the car to dry completely before moving on to step two. Take the Micro Sol (red bottle) and lightly brush a little of it over each decal. Micro Sol allows the decal to conform perfectly to surface. Be careful as wetting the decal can cause it to move. Wait for the solution to dry and then apply the reporting markings to the ends of the car if desired using the same two-step process.
Once you are done and satisfied with the positioning of your decals, you need to seal them in place. If you don't the decals will eventually start to fall off. Take the clear sealer and apply it over the car the same way you painted it. Two or three passes should be enough.

Reporting marks on the end of the car.
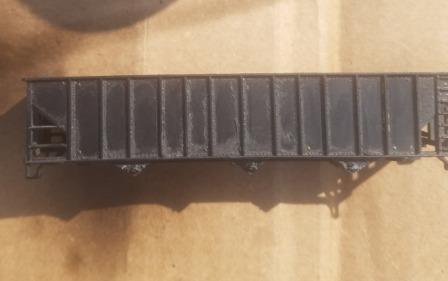
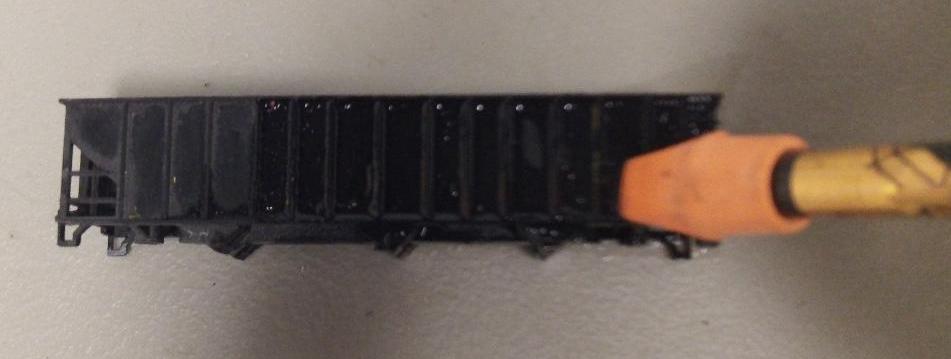
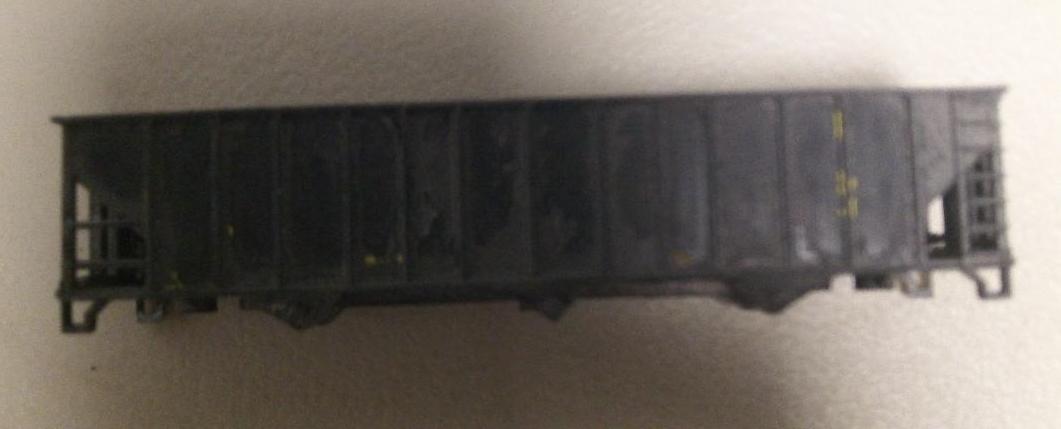
Every coal car has reporting markings on their sides and ends. When I first started, I didn't add markings to the ends. To be honest, you don't notice them missing unless you look real closely. However, I like to keep things somewhat prototypical and knew some of these cars may show up in a photo or two.
The decal sheets have reporting markings and numbers small enough to fit on the ends. Even so, because of the small size, you would go insane trying to match the numbers on the ends with the one's on the sides. So, I took the easy way out. If the car has five digits, I cut out five numbers (in a row) from the sheet and apply them to the end. Yes, the numbers don't match but no one will notice and the car looks more prototypical than if nothing was there. Study the picture with the car that has no reporting marks next to the car that does. This trick works and I get to keep what little hair I still have.
Trucks, wheel sets, and Couplers.
There are two type of couplers to consider in N-scale; Rapido and Knuckler. From this point on I'm only going to be talking about knuckler couplers. Rapido couplers work but are unrealistic for modeling.

Most manufacturers make their own couplers and trucks for cars they produce. To put it frankly, not all couplers/trucks are built with the same dimensions. There are standards manufacturers follow which allow their cars to interact with other brands. However, that is where the similarities end. Some cars don't pair as well with other manufacturers. Trucks don't roll as smoothly and/or couplers don't line up correctly. Some brands uncouple when pulling a string of cars while others stay connect. This is especially true if the cars are weighted.
For years I ran trains with different brands of trucks and couplers. While this worked, the lack of symmetry convinced me I needed to standardize my trucks/couplers. After much thought, I decided to go with Micro train trucks and metal wheel sets.
In N-scale, most trucks come with couplers attached. Some modelers, like my son, prefer to body-mount the couplers to the body. This makes the car more stable when backing up as the pressure is on the car body and not on the trucks. If you’re modeling HO-scale, I would highly recommend body mounted couplers. However, in N-scale it's less of an issue. While body mounted couplers do tend to improve performance and decrease derailments when backing up; it's not an easy task adding them. Plus, you have to buy the trucks and couplers separate which will jack up the cost. Then there is drilling while working with real small screws to get the couplers attached. Finally, if you are going to go this route you have to make sure ALL your couplers are body mounted. I've discovered trains mixed with body mounted and truck mounted couplers have major issues when backing up.
I used truck mounted couplers because of the number of cars I own and my lack of patience. The couplers come with short, medium, and long extended shanks. I used the short-extended couplers with my coal cars. Mediums extended couplers are good for tankers cars and grain cars. Long extended couplers are used on auto racks or 86-foot boxcars. Sometimes you have to put a short and medium on a car to determine which looks better. I've found medium extended couplers look better on my 50' boxcars then the shorts but not always due to the manufacturer.
In my pursuit for better running, I replaced the plastic wheel sets with metal ones. I purchased Micro-trains 00-12-021 "33" metal wheel sets that come in packs of 60 axles. Metal wheels roll smoother on the rail than plastic because they create less friction. After running metal wheels for over a year I'm happy with the results and would do it again.
In my research, I discovered Micro-trains makes a replacement pin for mounting their trucks onto an Atlas car. Even though I wasn't having any issues using an Atlas pin, on a whim I decided it was worth testing out and ordered a pack of Micro-trains replacement bolster pins, # 003-12-030. It turned out these pins do hold the truck tighter in the car and allows for slightly freer moments side to side. That said, I didn't think the difference in performance was worth converting all my cars over. However, I did buy several packs when I need replacement pins.
The process to attach the truck to the car is a pretty straight forward. I remove the plastic wheels on the trucks first and replace them with metal ones. Next, I take a car pin and place it through the hole in the truck. I then push the pin/truck firmly into the body until it is tight. Once done, I check to make sure the truck is secure but still moves freely from side to side. I usually snip most of the air hose off the coupler to prevent them from interfere when running over switches although with a special tool you can bend them up. The hoses are there to work with magnets for switching. I use a pick to uncouple cars since I find the hoses more of a nuisance than a benefit.
After the truck is in, I place the car at the front of the train and run it around the layout to see if there are any issues. Every once in a while, I installed the wheel sets incorrectly and have to re-position them.
Thinking outside the box.
When Peter surprised me with the modern design I was thrilled. However, I was hesitant when I discovered he had placed the new design on the opposite side of the car with the older-style. Traditional thinking is both sides should look the same. But as Peter pointed out, you can't see both sides at the same time unless it's going past a mirror. Using his method, I could actually double my fleet of coal cars while not increasing the number of cars. He was right.
To demonstrate this point, let's say I have 20 cars with the old-style lettering on both sides and 20 cars with the new-style. This gives me a total of 40 cars. However, I only have the ability to run a 20-car coal train using hoppers with the old-style lettering. If I wanted to run a 40-car train (for either style), I would have to build a further 20-cars for each type. That means an additional 40 more cars on the layout taking up space most modelers don't have. It also means more money spent on cars, decals, wheel sets, and so on. Having the designs on both sides allows me to run a 40-car train of either design or a combo of both without expanding my roster. Pretty niffy when you think about it. To make things less confusing, the same number is used on both sides allowing you to list the car on a computer or card-routing (waybill) system only once.
Another thing I did was modify some of my coal cars to look slightly different from others. I already mentioned painting cars brown as opposed to the black indicating earlier models. Less subtle but just as effective was decaling the cars. For example, the decal sheet comes with large and small lettering for "Milwaukee Road". Some coal cars have the larger, Milwaukee Road on their side. Others are lettered the same but with the smaller print. A few cars I lettered just "Milwaukee" to portray them as earlier release hoppers with an older design. On one car I replace the big "O" with the small "o" because I had damaged the original. Some cars with the modern logo got the smaller, newer red logo instead of the older one.
Differences like these are more common than you think. New cars are sent out from the builders looking the same. However, over time cars are damage and panels or doors are replaced. This leads to cars returning to duty not as they originally arrived. A boxcar needing a brown door may end up leaving with a blue door instead. Panels are replaced on a hopper car but the stencil for a certain type of letter is not on hand. So, the railroad shop uses what's available, a smaller or different version of the letter, to get the car out in revenue service as quickly as it can. Sometimes the paint on a repair job doesn't match the current color of the car because it has faded over the years. Examples like these are common on the railroad and too good to pass up. The next time you're at trackside watching a train roll by; see if you can spot the oddballs in the bunch.
Wrapping the Project Up.
I hope these tips have been useful. Before starting this project, I didn't think I had the skills needed to decal a car. I found that although I made a few mistakes, this project was not as hard as I first thought and it gave me confidence to try other things. You're going to mess up but just remember mistakes are part of the learning curve. I found hours of enjoyment working on these cars. And doing more than just running your trains makes the hobby more interesting and enjoyable. That is what this model railroading is all about.
Painting the Cars- Milwaukee Coal Train Build contd.
September 8th, 2020
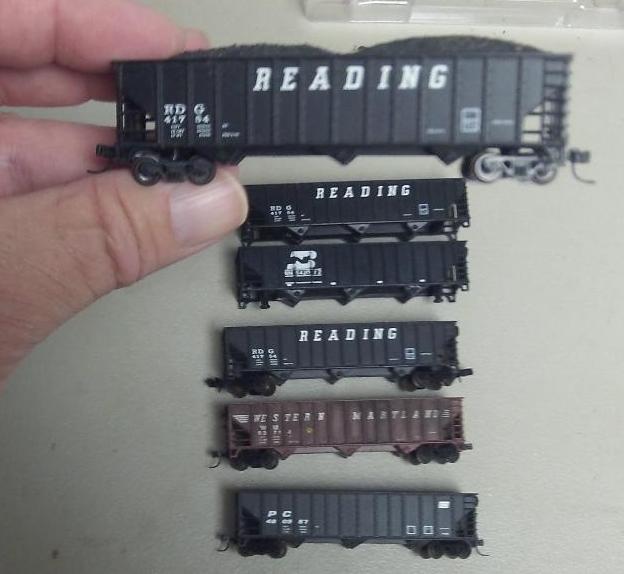
I decided early on that my coal cars would be painted black with white letters. However, the real Milwaukee did have a small fleet of brown ballast/coal cars with white lettering. These were used to haul stone and ballast around the system. If my scenario happened, these cars would have been put into coal service at the beginning. To duplicate this, one out of every six coal cars is painted brown (about 17% of my coal fleet). I also have two orange (MOW) cars put into coal service and as well as a yellow coal car. This breaks the monotonous of seeing a long string of black coal hoppers rolling by. I also applied the same technique when decaling my hoppers which will be talked about later.
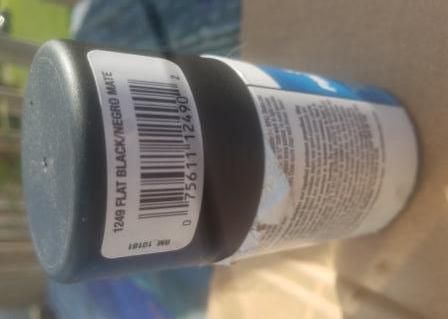
For my paint I selected flat black over glossy. While cars would have come out of the shop looking shinny and clean, they don't stay that way for long. Coal dust gets on everything. The Milwaukee built their own cars on their property so new cars were quickly put into service once completed.
When painting, start just beyond the end of the car and with a gentle, sideways motion spray the car from one end to the other. Two or three passes should be enough to cover the car. NEVER spray directly on the car and don't stop moving until you pass over the entire car.

The only time I spray directly onto the car is when I'm doing the inside of the coal car. In this case, I want the inside to look dark and thick with coal dust. It also helps hide the weights.
Before covering weights.
One weight painted.

Both weights covered by spraying directly onto them.

Do both ends and one side of the car first, and then wait for the paint to dry. Once dry, exam the car closely. Sometimes the paint is not crisp or fresh and may need another coat.
Generally, it's the ends of the car that require more paint so I re-do them when spraying on the other side. Again, examine the car carefully for places missed or where the old color is bleeding through. Go over them again unless it adds to the look of the car. I have a few brown coal hoppers that, once I had soaked in the rubbing alcohol, exposed part of the black shell underneath. It looked so natural as an old and worn car with the paint fading/peeling off that I didn't paint over it. You may find that yourself in a similar situation. Always be open to change and it will serve you well.
To finish off the Milwaukee Coal Train build, next week Kirk will be applying decals to all of the cars that he has been working on.
Weighing the cars- Milwaukee Coal Train Build contd.
September 1st, 2020
One of the greatest disappointments you can have in this hobby is seeing cars derailing all the times. There are a number of reasons why this happens. The usual culprits are that the cars are too light, the location of where the car is placed in the train, or a problem with the track. Unless they were modified by the previous owner, Atlas coal cars weigh in at .30 of an ounce. A lighter car will easily derail over switches, especially when you are backing up through a switch. Also, having a light car in the front of a train followed by heavier cars will cause a derailment. Not surprisingly, real railroads have the same issue which is why empty or lightly loaded cars are usually added to the rear of a long train. There can be great differences in the weight of cars from one manufacture to the next. The question is, how heavy should any car be?
It's important to establish a standard before you start. Some modelers follow the National Model Railroad Association (NMRA) weight chart to the letter. Others, like myself, don't. All my freight cars weigh in at one-ounce no matter what their size and length. Some freight cars are heavier only because they came that way and it's not possible to remove weight without damaging the car. This difference in weight between cars doesn't seem to cause an issue although I still like to keep the heavier cars behind the engines and not next to the caboose.
For reference, a 30-car freight train with cars each weighting two-ounces will require more engines to pull then those weighing in at only one-ounce apiece. This becomes even more relevant when running trains up a grade or through a series of tight curves. The upside to heavier cars is they usually hold to the track better (less derailments) and present you with "real railroad" problems. One example I mentioned is power vs. tonnage. You may find your train will need helpers going up a grade or have to double the hill (dividing a train into two sections and taking each section up the grade separately). Some modelers thrive on prototypical operations while others just want to see trains run with little effort. It depends on where your interest lay.
Keep in mind, some clubs are VERY strict on how much a car must weigh before it can run on their layout. If you plan to join a club or are already a member of one, check to see if they have any restrictions. Fortunately, my fellow members go with the philosophy that if it works why fix it.
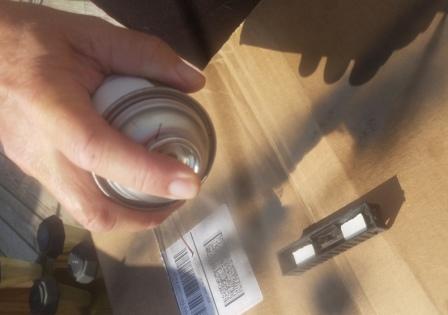
To weight my cars, I use an inexpensive digital scale I picked up at Wal-Mart. I start by placing the car body, wheel sets, and any loads it will be carrying on the scale. If the car may not carry a load all the time (running empty), I exclude it. I would rather have my cars slightly heavier with a load then being too light without one.
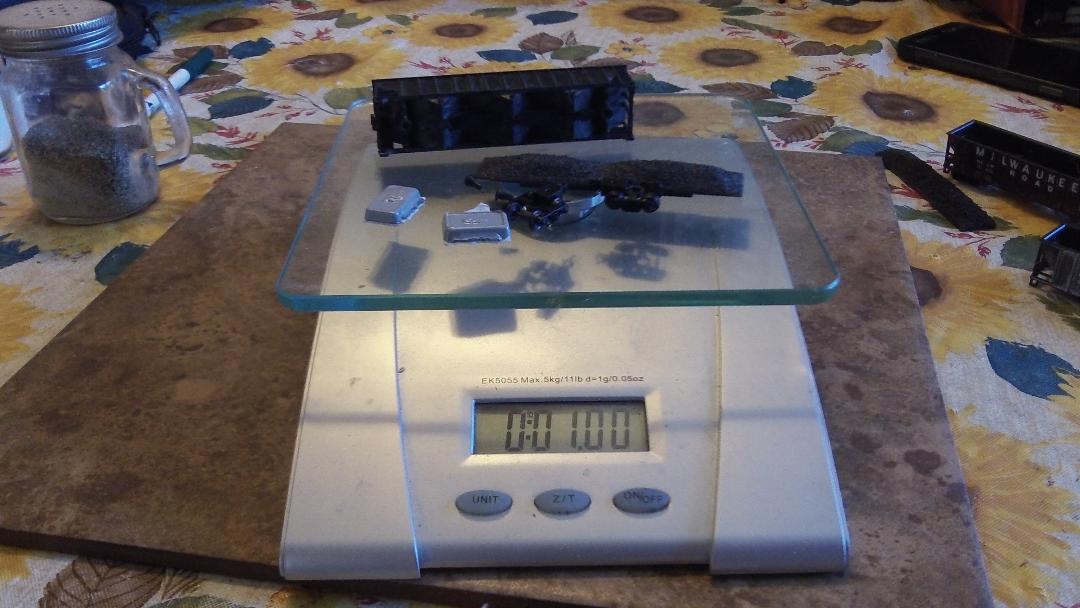
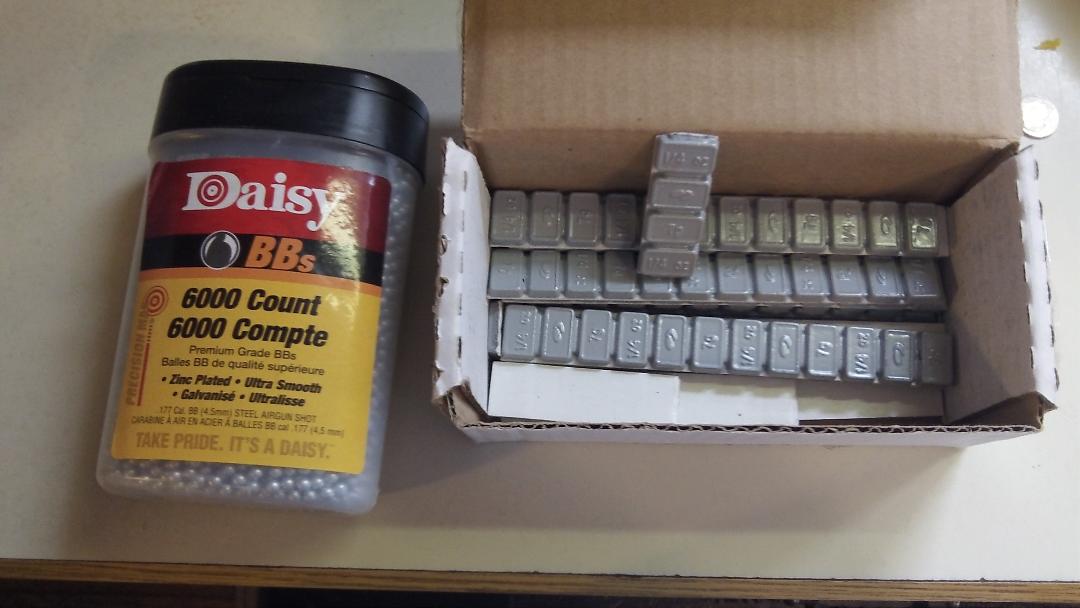
Next, I place weights on the scale to get the car to one ounce. I use .25-ounce weights I purchased from a local car part store. These weights are used to balance car tires and work well because of their small size. Each weight has a sticky adhesive side you can use to attach to the car and with a decent saw; these weights can be cut in half with little effort.
My only complaint about the tire weights is they have raised characters on the top. For a closed car, like a boxcar or grain hopper, this isn't an issue. In an empty coal car, these characters stick out like a sore thumb.
To get around this, I peal the paper off the adhesive and place the weight into the coal car with the adhesive side up. Then I apply liberal amount plastic or modeling glue around the weights and let it sit for 24 hours. You can also use Elmer's white glue but it takes longer to dry; about 48 to 72 hours.

Word of caution. On some brands of railroad cars, the hole for the wheel pin which attaches the wheel sets to the car body goes all the way through the bottom of the body. To avoid having glue get into the hole, put a piece of tape over the hole before gluing on the weight.
I also purchased a box of BB's to use when I needed to add just a little weight. The downside, I discovered, is you need 30-40 BB's to increase the weight by .05 of an ounce. It's also impossible to hide the BB's inside an open car even after painting. For this reason, I only use BB's when they can't be seen. For the open cars, I trim a tire weight down to get them to my one-ounce requirement.
Location on where to place the weight is another issue. Some modelers put their weights directly in the middle of the car. Myself, I place the weights over the wheels even if that means cutting it in half. In my mind, more weight over the wheels means the car tracks better. That may not be true but it does gives me piece of mind.
Model Railroading with a History, Getting Started - by Member Kirk DePeel
August 25, 2020
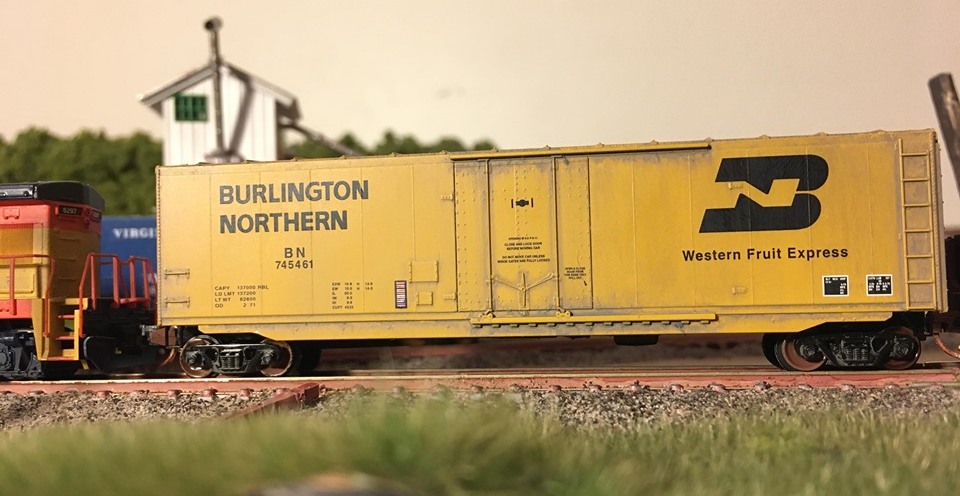
"I model the Milwaukee Road and Burlington Northern (BN) rails in the western part of Montana around 1979/80. At that time both railroads existed and competed for the rich traffic coming out of the ports of Seattle, WA. Today the BN is now part of the larger Burlington Northern Santa Fe (BNSF) railway system spanning throughout the west while the Milwaukee Railroad is a distant memory. Most of the Milwaukee's western expansion, arguably the best engineered and fastest route between the west coast and Chicago, was abandoned in March 1980. The railroad's remaining mainlines were merged into the Soo Line in 1985.
In my world, the Milwaukee Road took advantage of its strengths to become a powerful competitor to the BN. It's merger with the Chicago and Northwestern gave them access to the Powder River Coal basin and trackage rights on the BN. The BN and Milwaukee competed with each other to move the more than 200 plus coal trains that left the mines each day. Unlike the BN, the Milwaukee had few coal cars and those were used to haul stone or ballast, not coal. This meant a massive building program in the Milwaukee car shops to produce the thousands of coal hoppers needed for the job.
With no prototype to pull from, I started working on creating a fleet (about 40 coal cars) needed on my layout. I decided on the color, what lettering I wanted, and what couplers and wheels sets I would equip them with. Working with a fellow member, we came up with two designs which I will explain later.
Removing the old decals
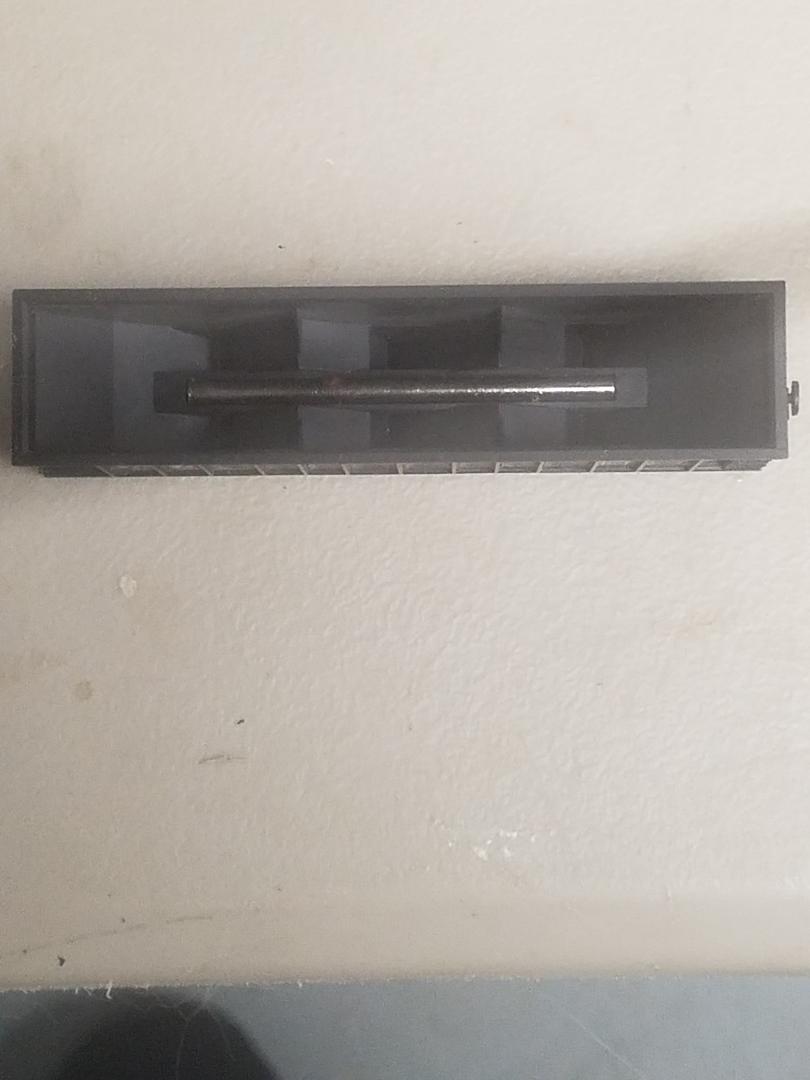
I decided early on to use Atlas 90-ton coal hoppers for my fleet. These cars are plentiful and easy to find at any hobby shop or train show. Because of the high number needed, I only purchased used coal hoppers with the intent I wouldn't spend more than $6 per car. Most of these cars came with the wrong brand of couplers or missing wheel sets. Since I convert all my cars to micro-train couplers this wasn't an issue as long as the car body itself was in good shape. Nor was the road name on the side of the car since I was going to strip the decals off and repaint the car.
After liberating a plastic container from my wife's kitchen cabinet in the middle of the night, I removed the wheel sets and placed the wheel pins into a zip lock bag. I discovered the surest way (for me) to lose something is to lay it on the table close by.
Next, I placed six or seven cars into the container *upside down*, leaving enough room between the cars for the alcohol to flow freely. I slowly pour rubbing alcohol into the container until only the bottom of the cars weren't submerged. I then positioned weights on top of each car to keep them in place. Unless the car is made of something other than a plastic, they will float and even flip on you.
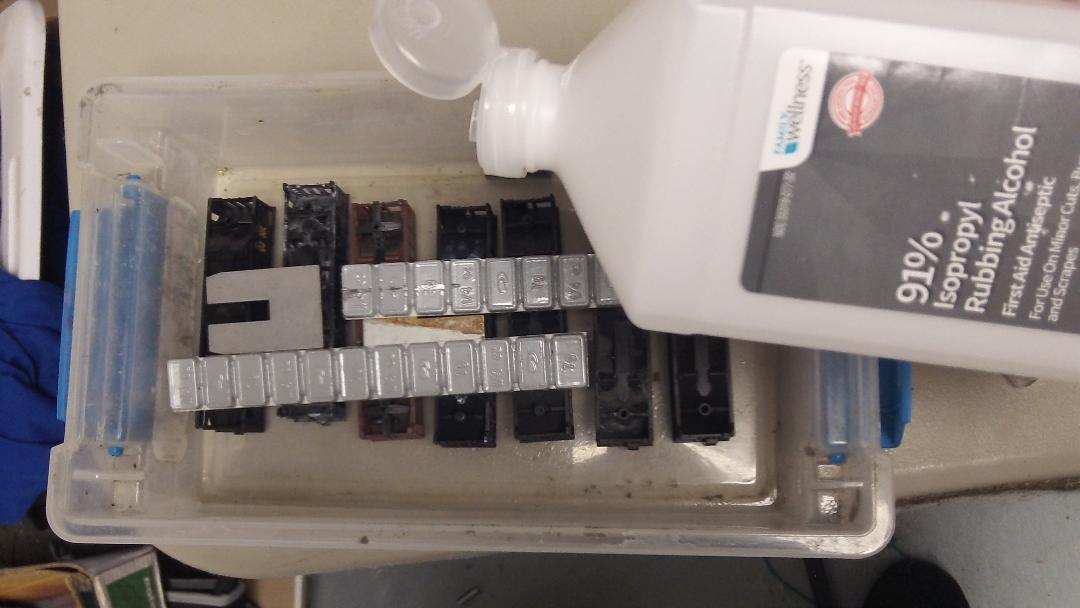
Some modelers only wait 15 minutes before pulling out the car to remove the decals. I keep the cars in the alcohol at least overnight. It doesn't harm the car but it will remove most of the original decal before I start scrubbing. What decals remain come off fairly easy with an old toothbrush or eraser. NEVER use something sharp like a knife. This will scratch the car which will show even after you paint the car several times.
Once the decal has been removed, wash your car under warm water to remove any dirt or material still hanging on. Some people use soap and warm water with a toothbrush and then dry the car off with a towel. I use my fingers to rub the car clean and let it dry on its own."
Next week Kirk will tell us how he weighs each of his car to optimize how the car performs.
Modernizing 40' Boxcars - by Member Peter Hayes
August 18, 2020
In the 1960s and 1970s, boxcars on most railroads still had their roof walkways. However, by this time, brakemen weren't walking the roof of the whole train applying brakes, so railroads started removing them altogether.
Follow along here as we do the the same on this N scale Atlas 40' Boxcar for today's Tips & Tricks Tuesday.
These Atlas boxcars have thick, bulky roofwalks down the center of the roof, making for a great candidate for 'rebuild'!
The first step is easy, just popping the roofwalk off the car with a small flat head screwdriver.
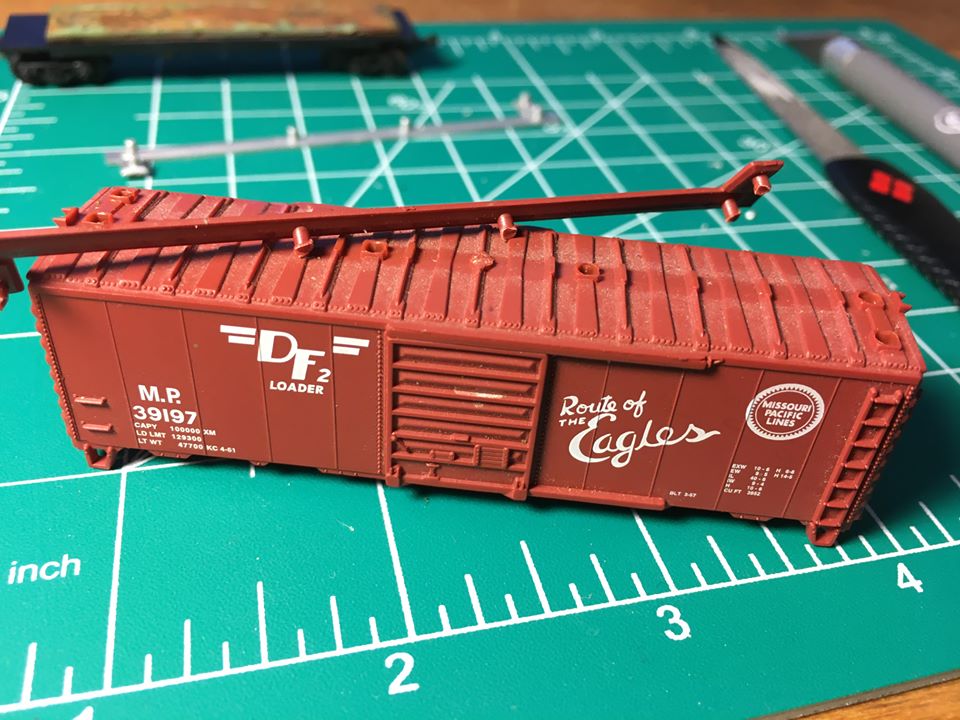
After removing the roofwalk, you'll need to sand down the indents of the supports flush with the top of the car.

Next, we'll use a product called "Squadron Putty" (can be purchased at a hobby store) to fill in the holes. After the putty dries, it can be sanded to be flush with the car roof.
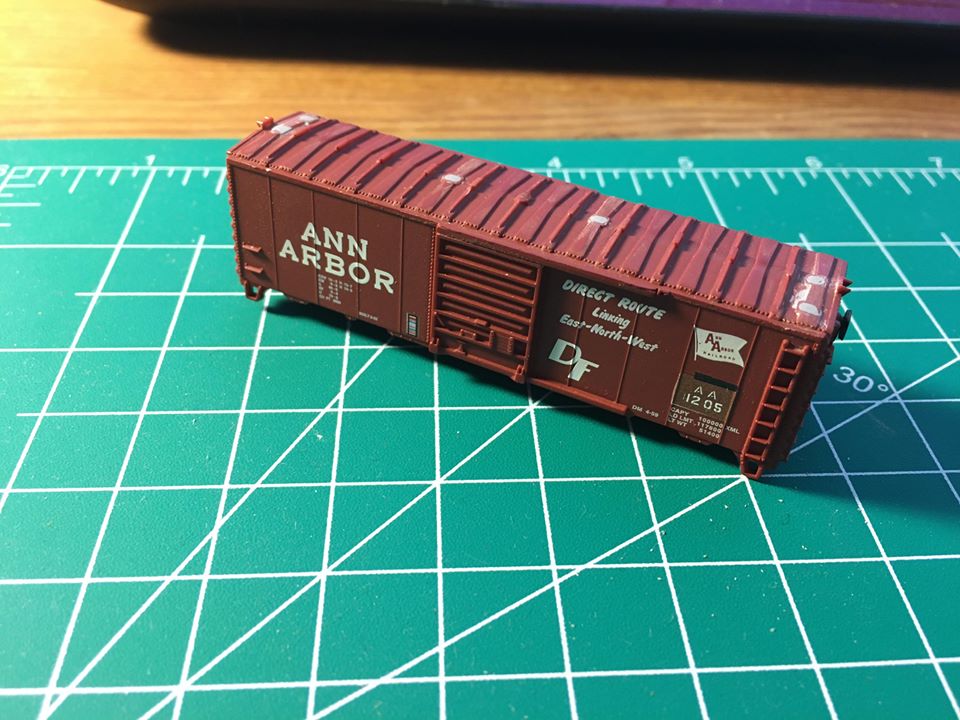
Once the putty is sanded, it is time to paint the car. For this project we are repainting the car completely, but choose a color that is close to the original color of the car if you are keeping the car the same after the rebuild.
Here, we see three stages of cars. The left car has had it's walk removed, and the indents of the supports have been cut off flush with the top of the car.
The middle car has had the holes filled with Squadron Putty, and then sanded down to be flush with the car roof.
The car on the right has been fully repainted, and any evidence of this surgery has been erased!
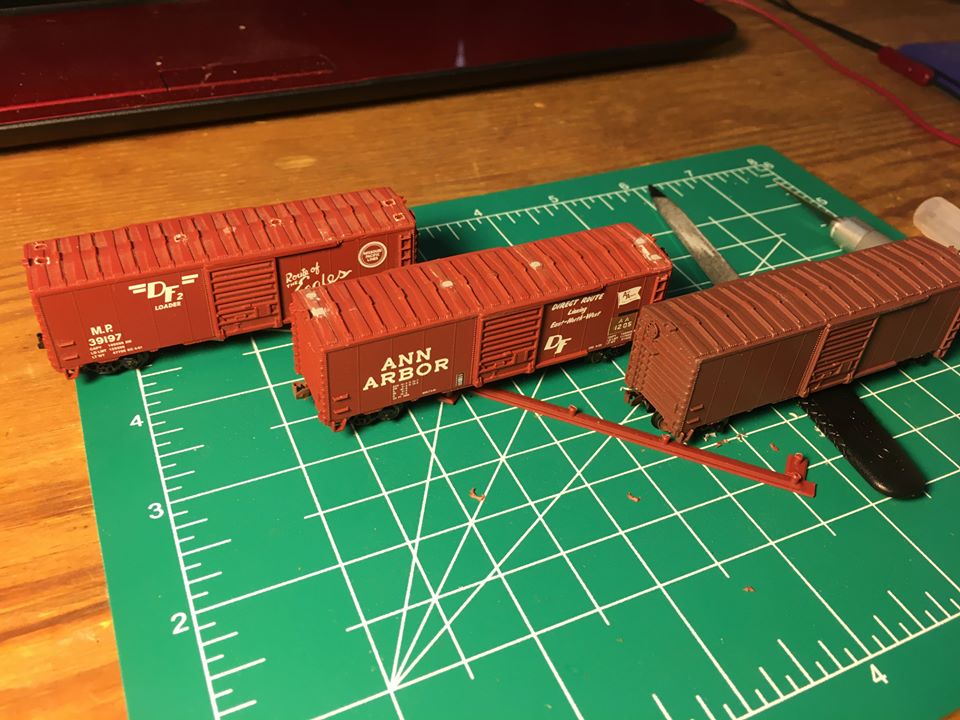
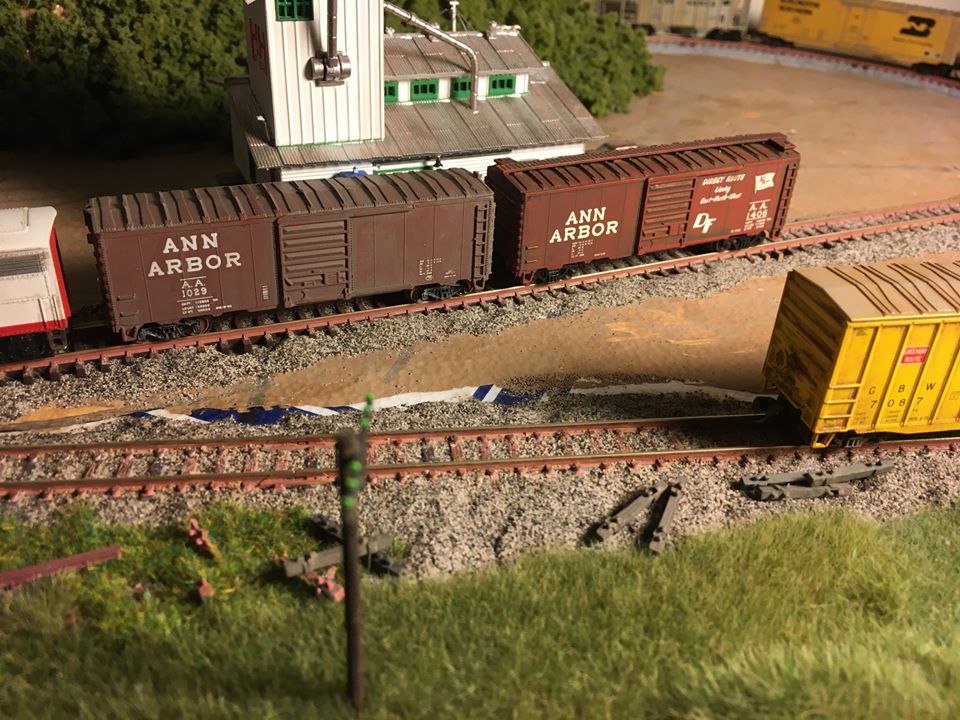
Finally, a comparison. The car on the right was not rebuilt, while the car on the left had this rebuild done. Note also, both cars were weathered using the methods discussed a couple Tips & Tricks Tuesdays ago!
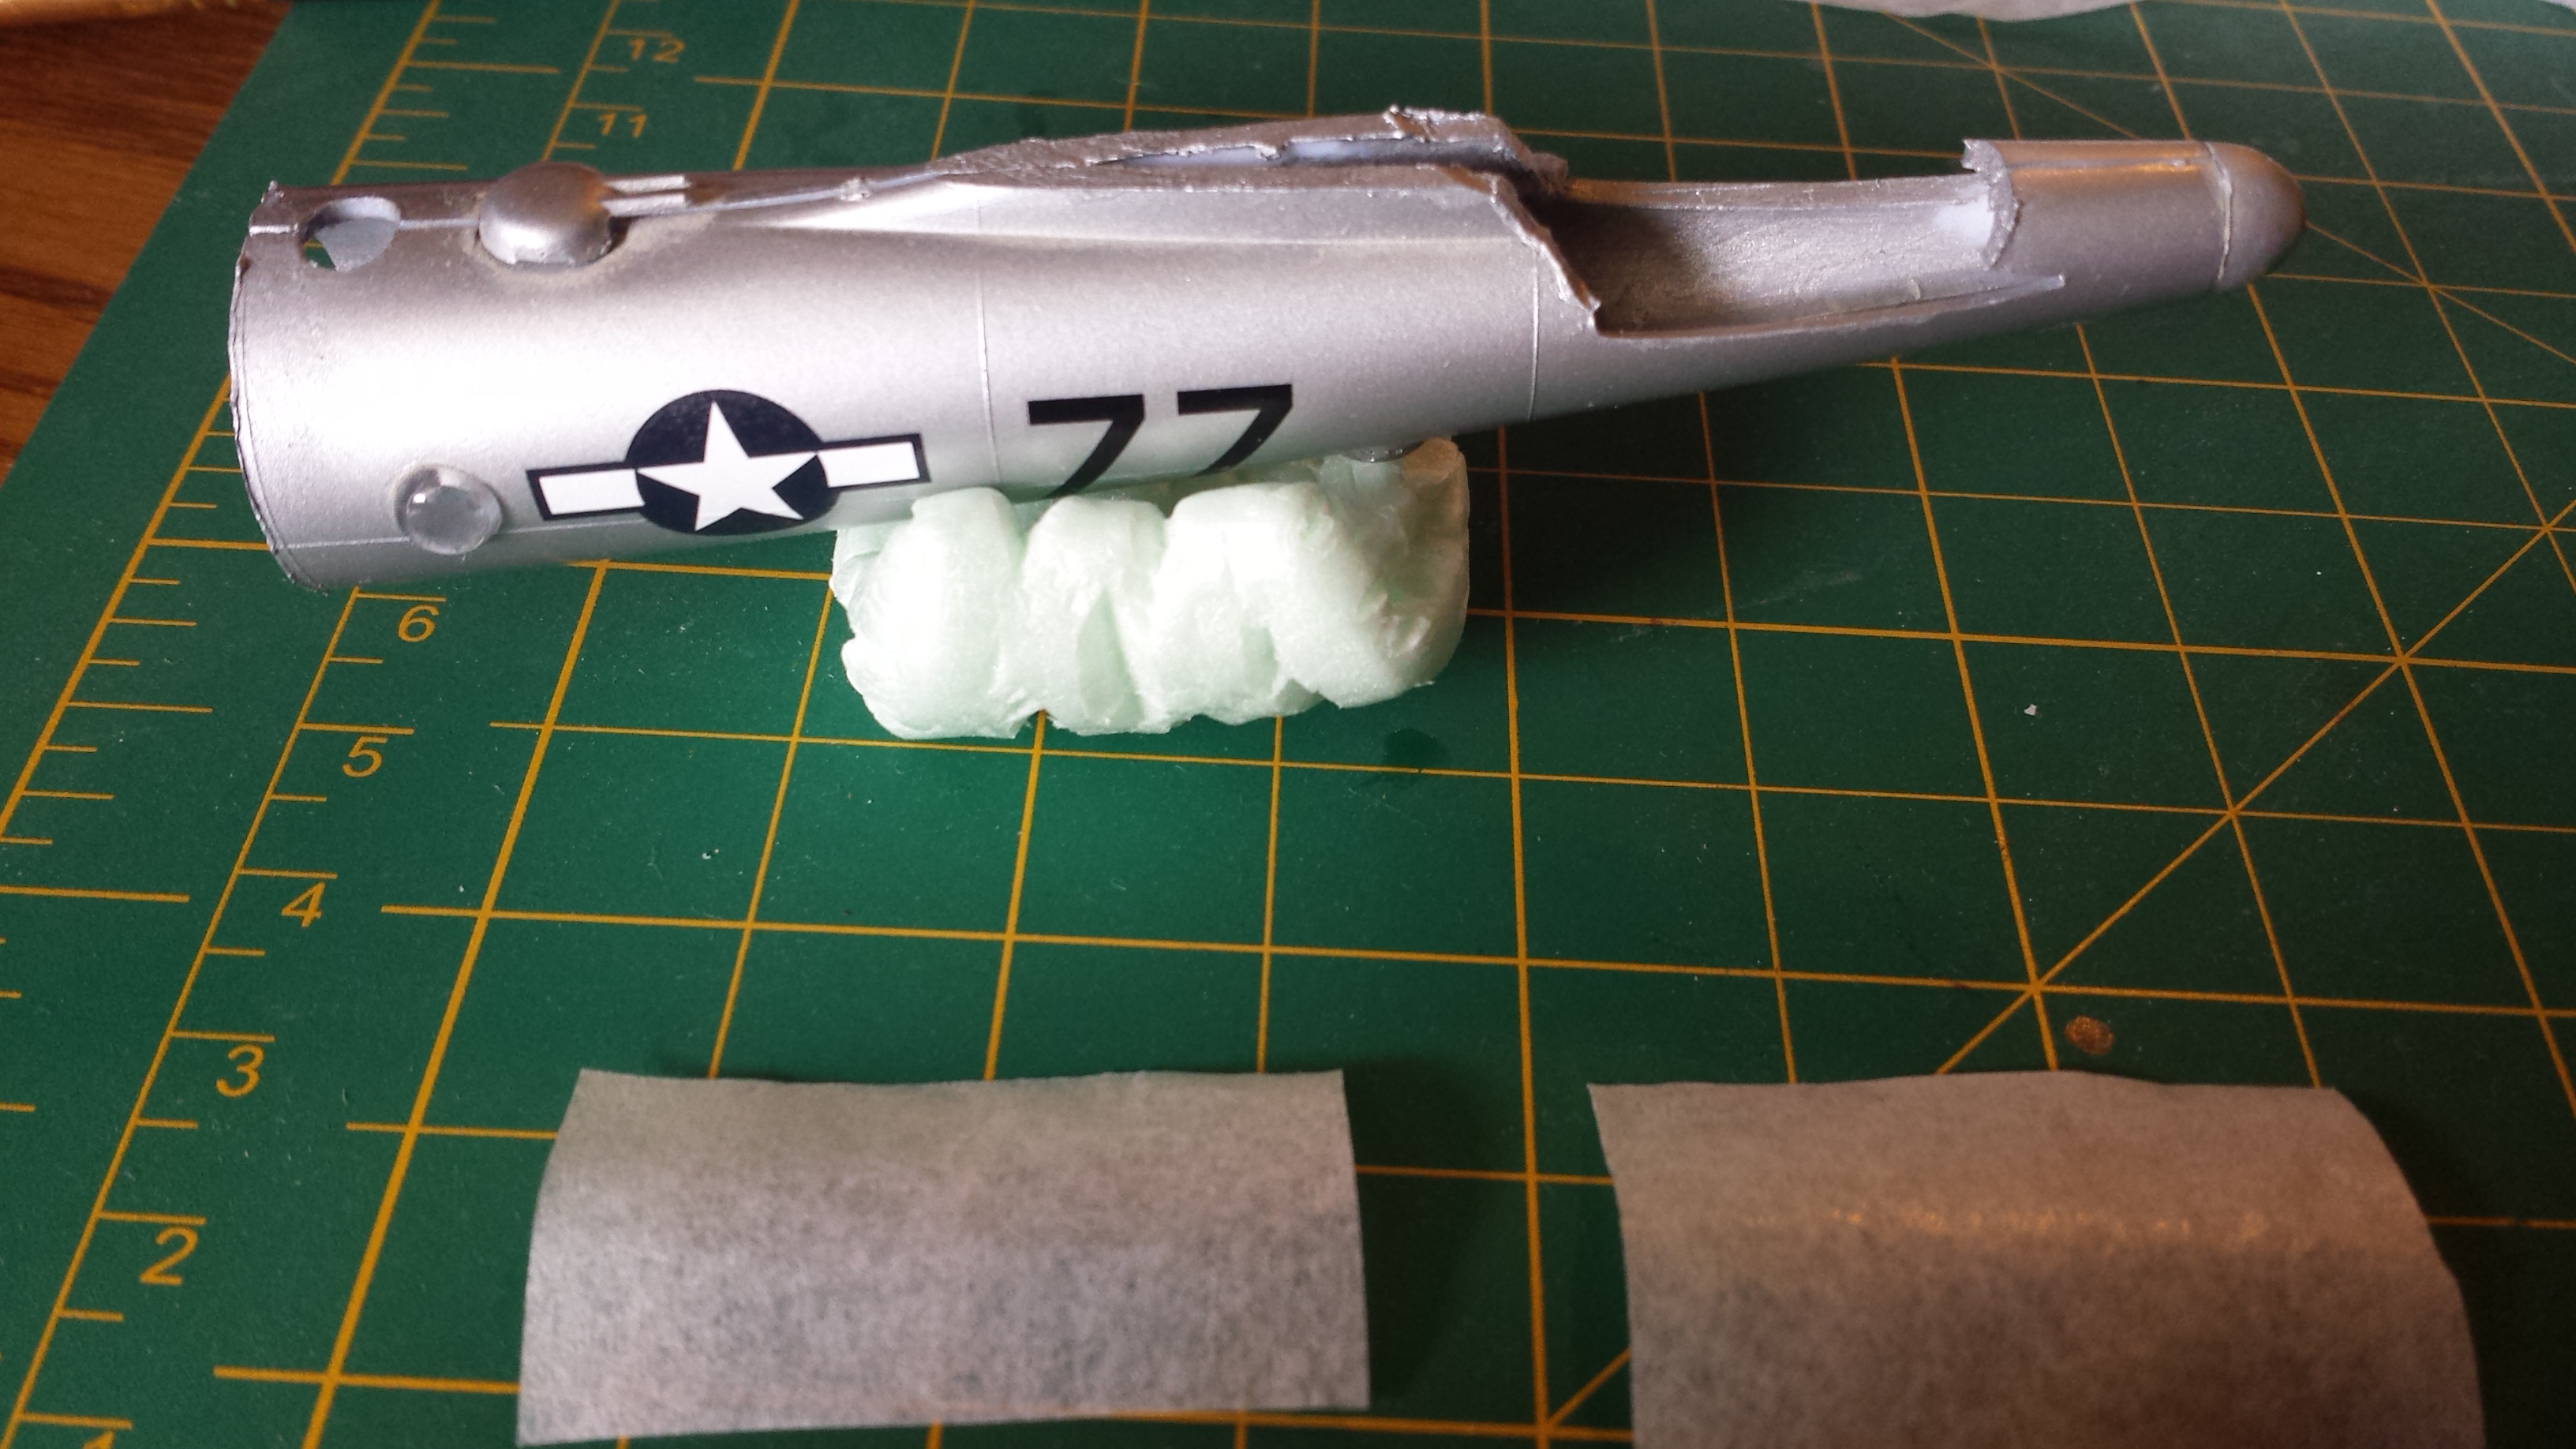
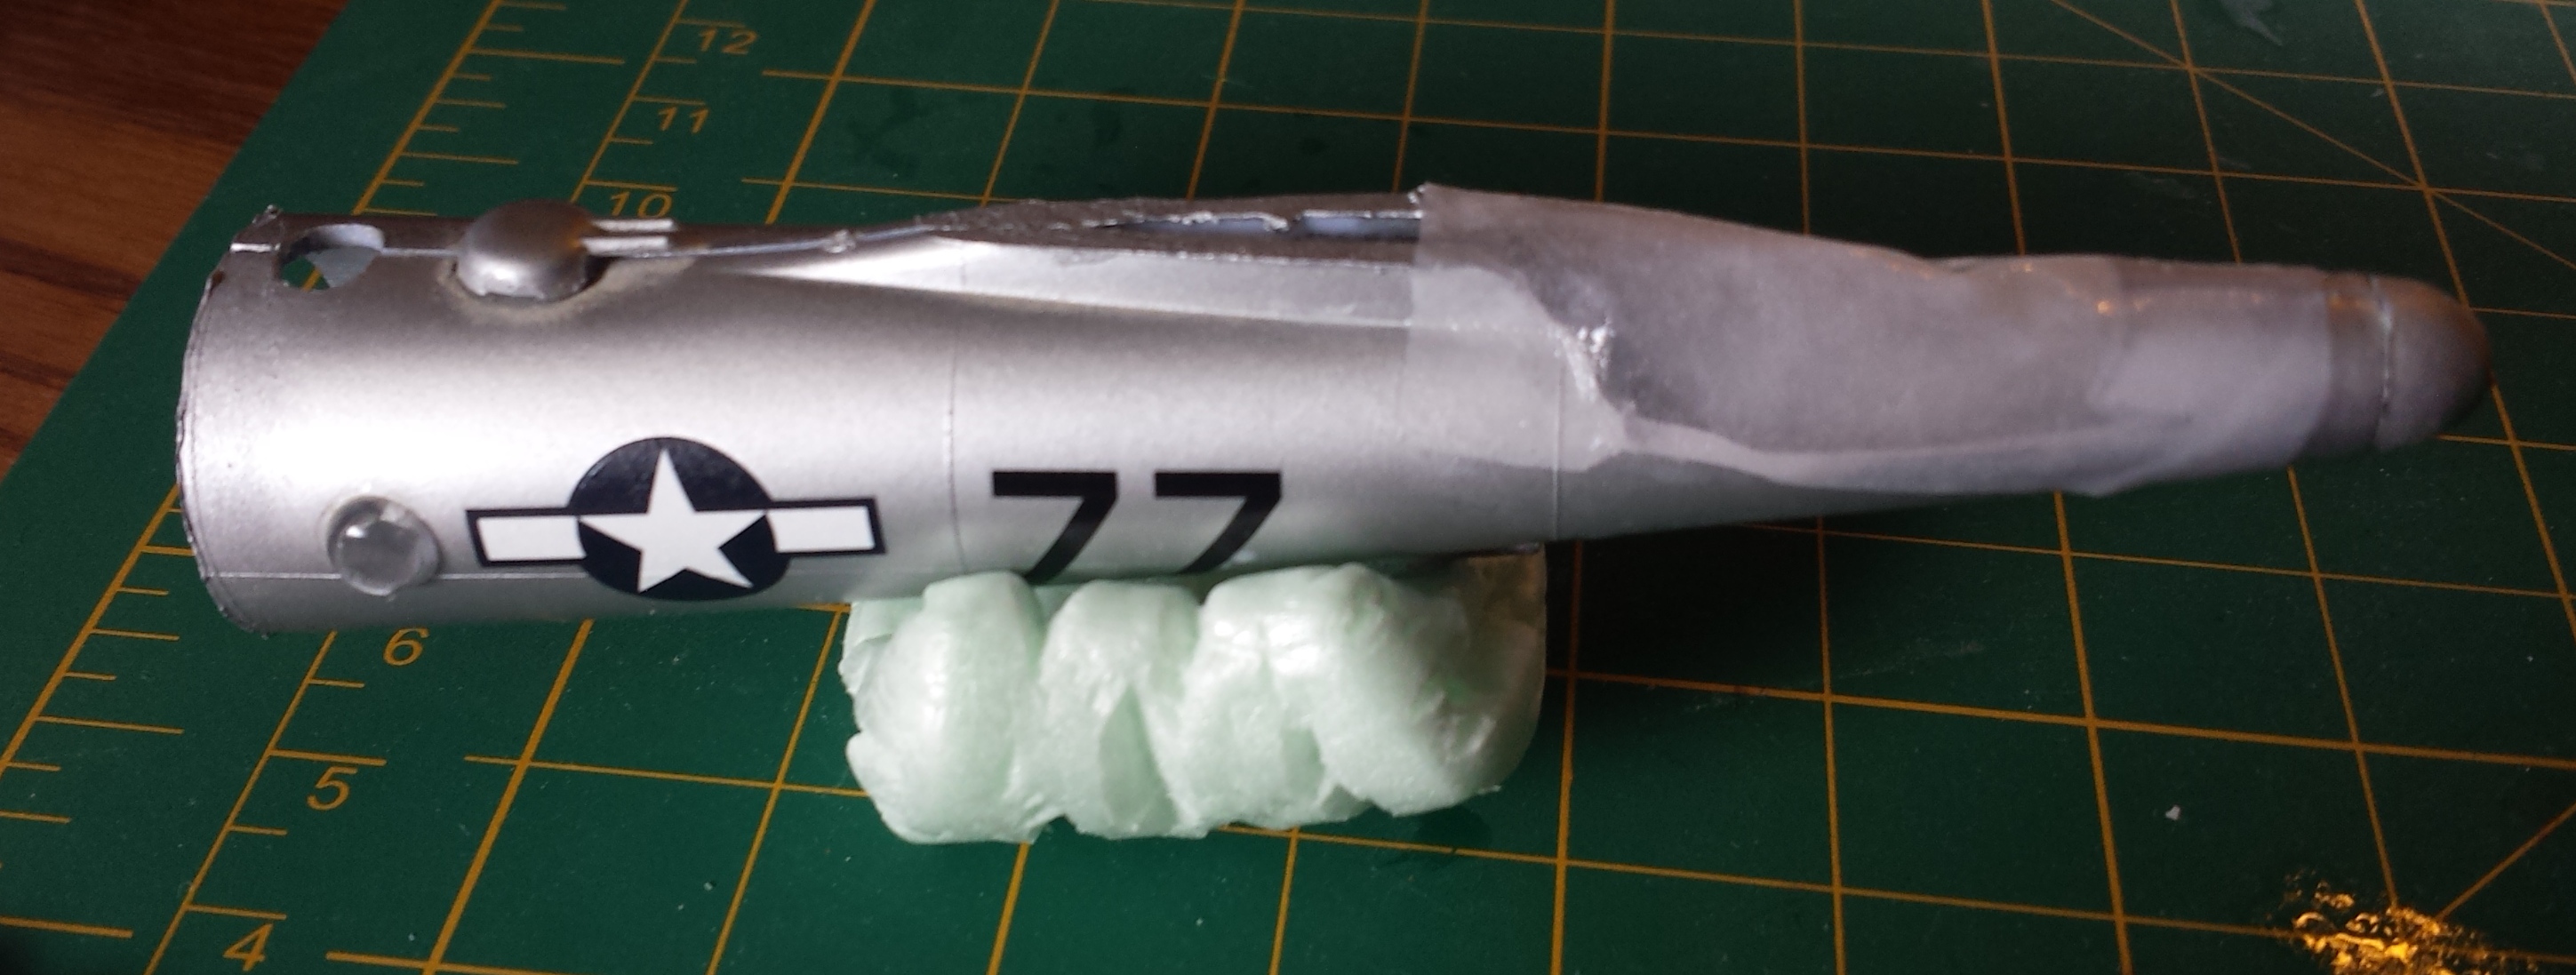
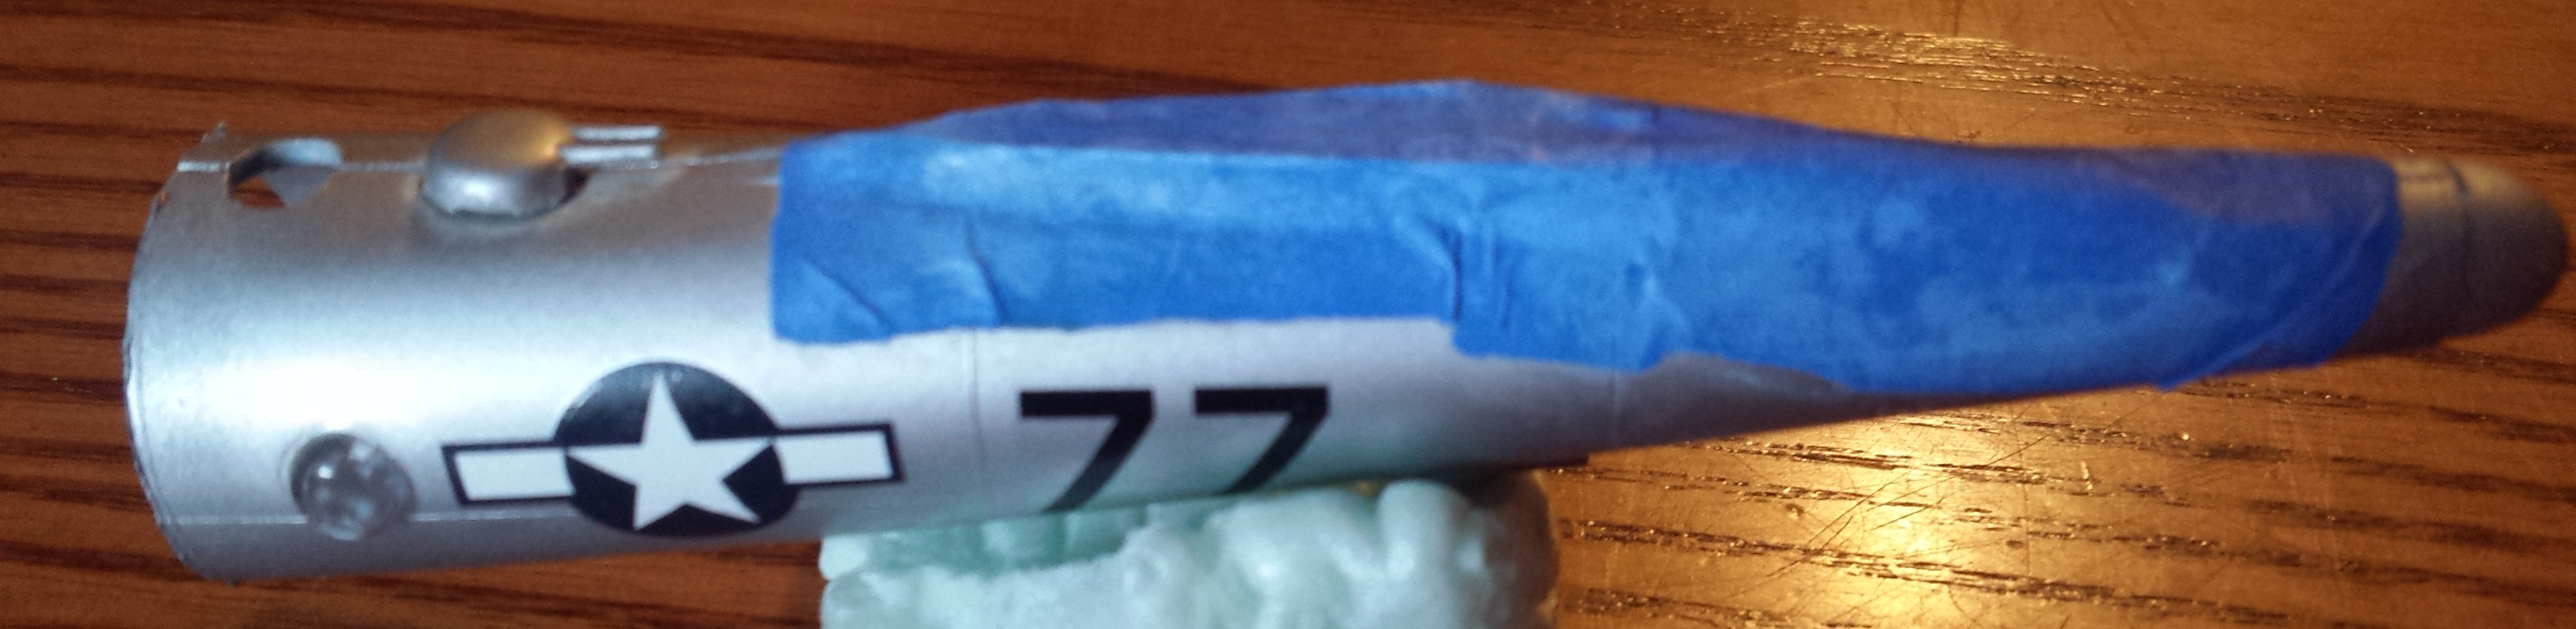
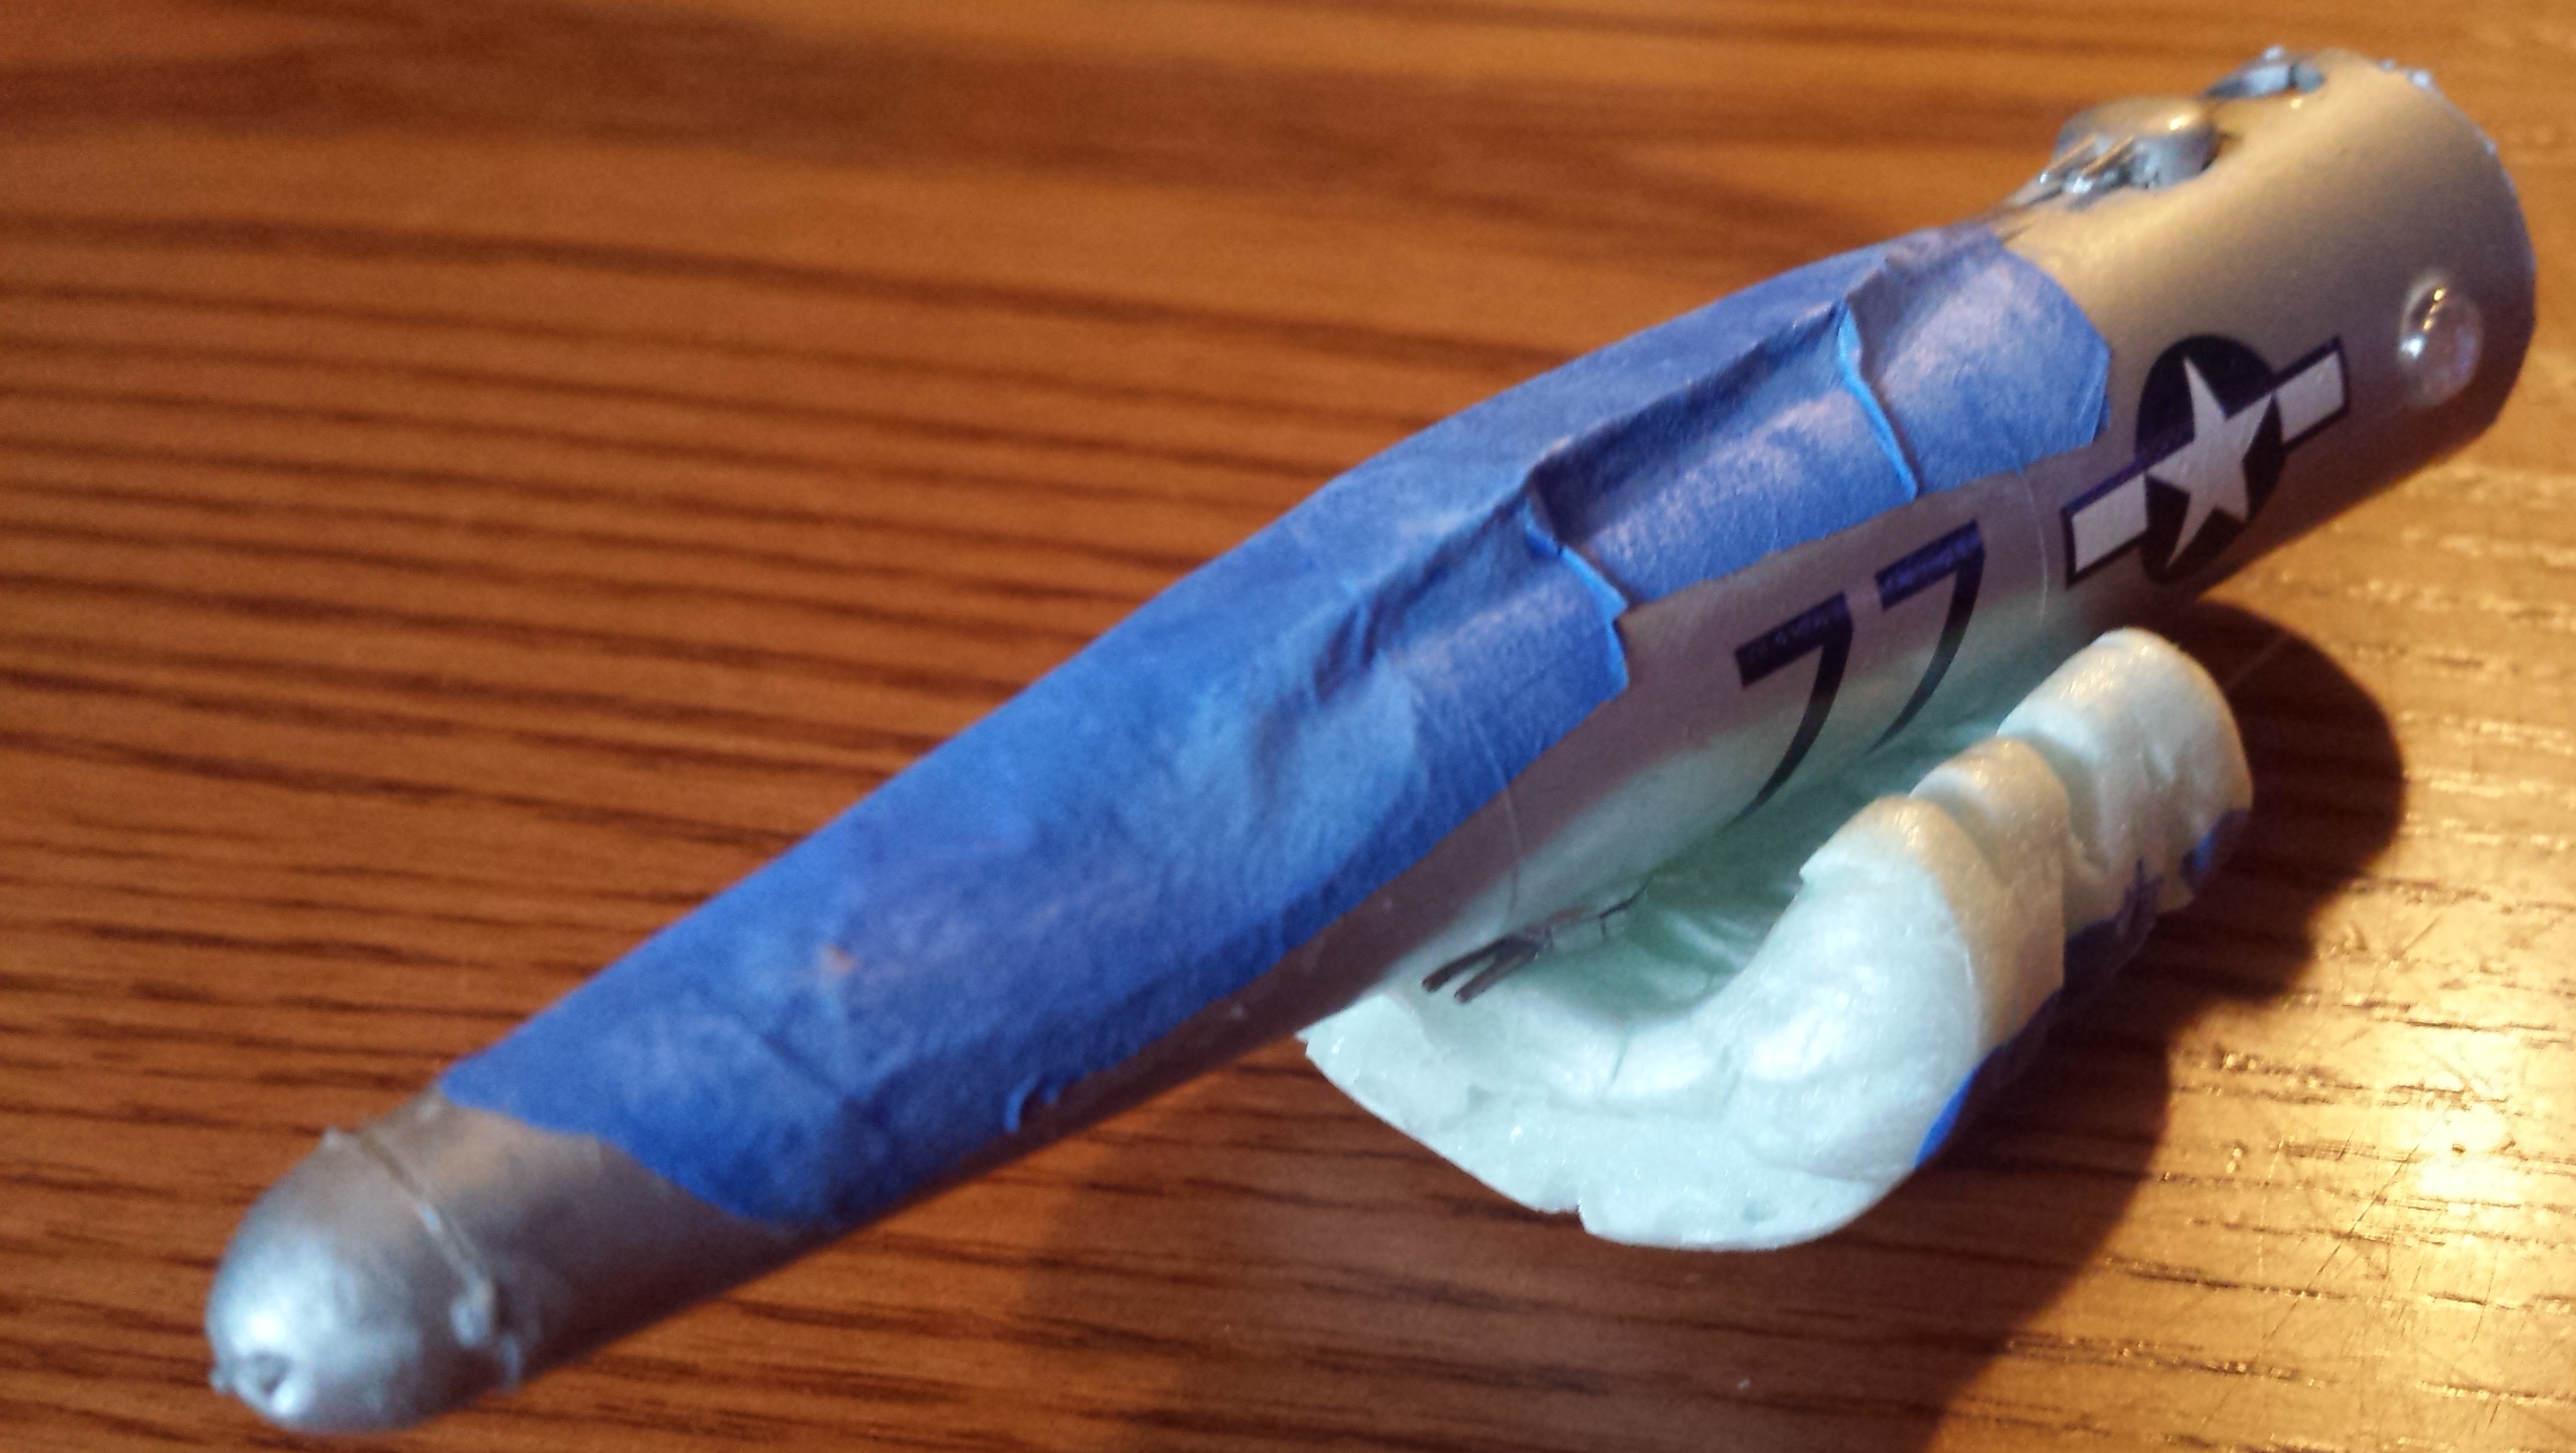
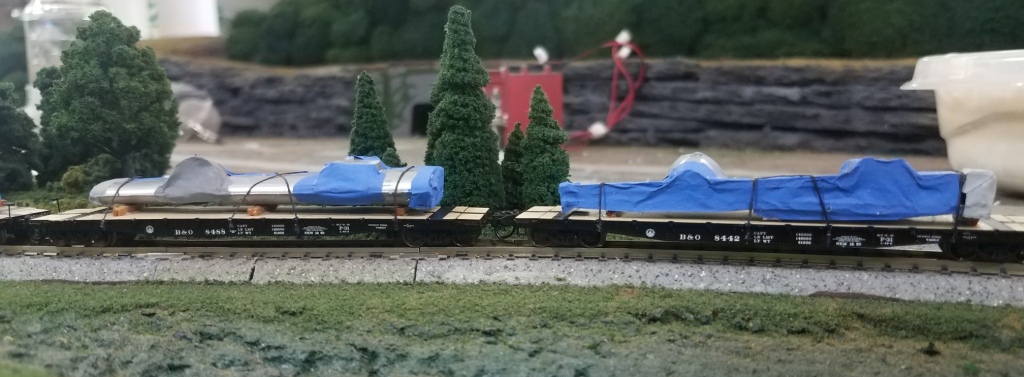
Tarped Loads- by Member Bo DeCoy
August 11, 2020
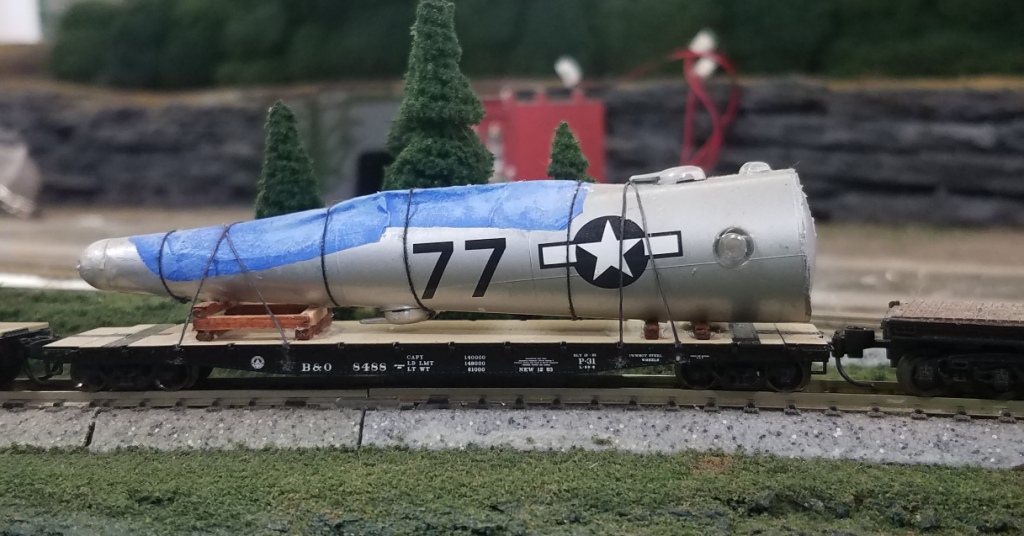
For this week's Tips & Tricks, we will show you how to make a detailed tarped flat car load using white tissue paper and 50/50 mix of white glue and water. You can use tarps for other areas of your layout as well. Tarps are great as you can cover something that may not have fine details, but with it being covered, your imagination will do the rest to guess what is covered.
I had this model airplane that I built over 15 years ago that had survived several moves, but was in rough shape. Since it was close to N scale which I model, I decided to turn it into something that I could use instead of just sitting on a shelf. This required using my dremel tool to cut it down to smaller pieces to fit on the flat cars. I did some research and found that they moved one of these planes (B29) by semi trucks to be restored, so I cut up my model in similar pieces as they had done. I used the tarps to cover up the cut ends of the parts.
First step is to cut small pieces of tissue paper to the desired size tarps.
Next, with a paint brush, brush the white glue mixture onto the tissue paper and then lay the tissue paper onto the working area. Remember, tarps are not always flat, so experiment with adding ripples to the tarp at this time using the paint brush to move the tissue paper around.
After letting it dry, choose a tarp color to carefully paint the tissue paper. After the primary color is dry, try dry brushing a lighter color to indicate that the tarp is worn.
After the paint on the tarp is dry, thats it! You're done. Pretty quick and simple right? For my flat car load I went further and added cribbing and load tie downs, but not all tarp applications will need that.

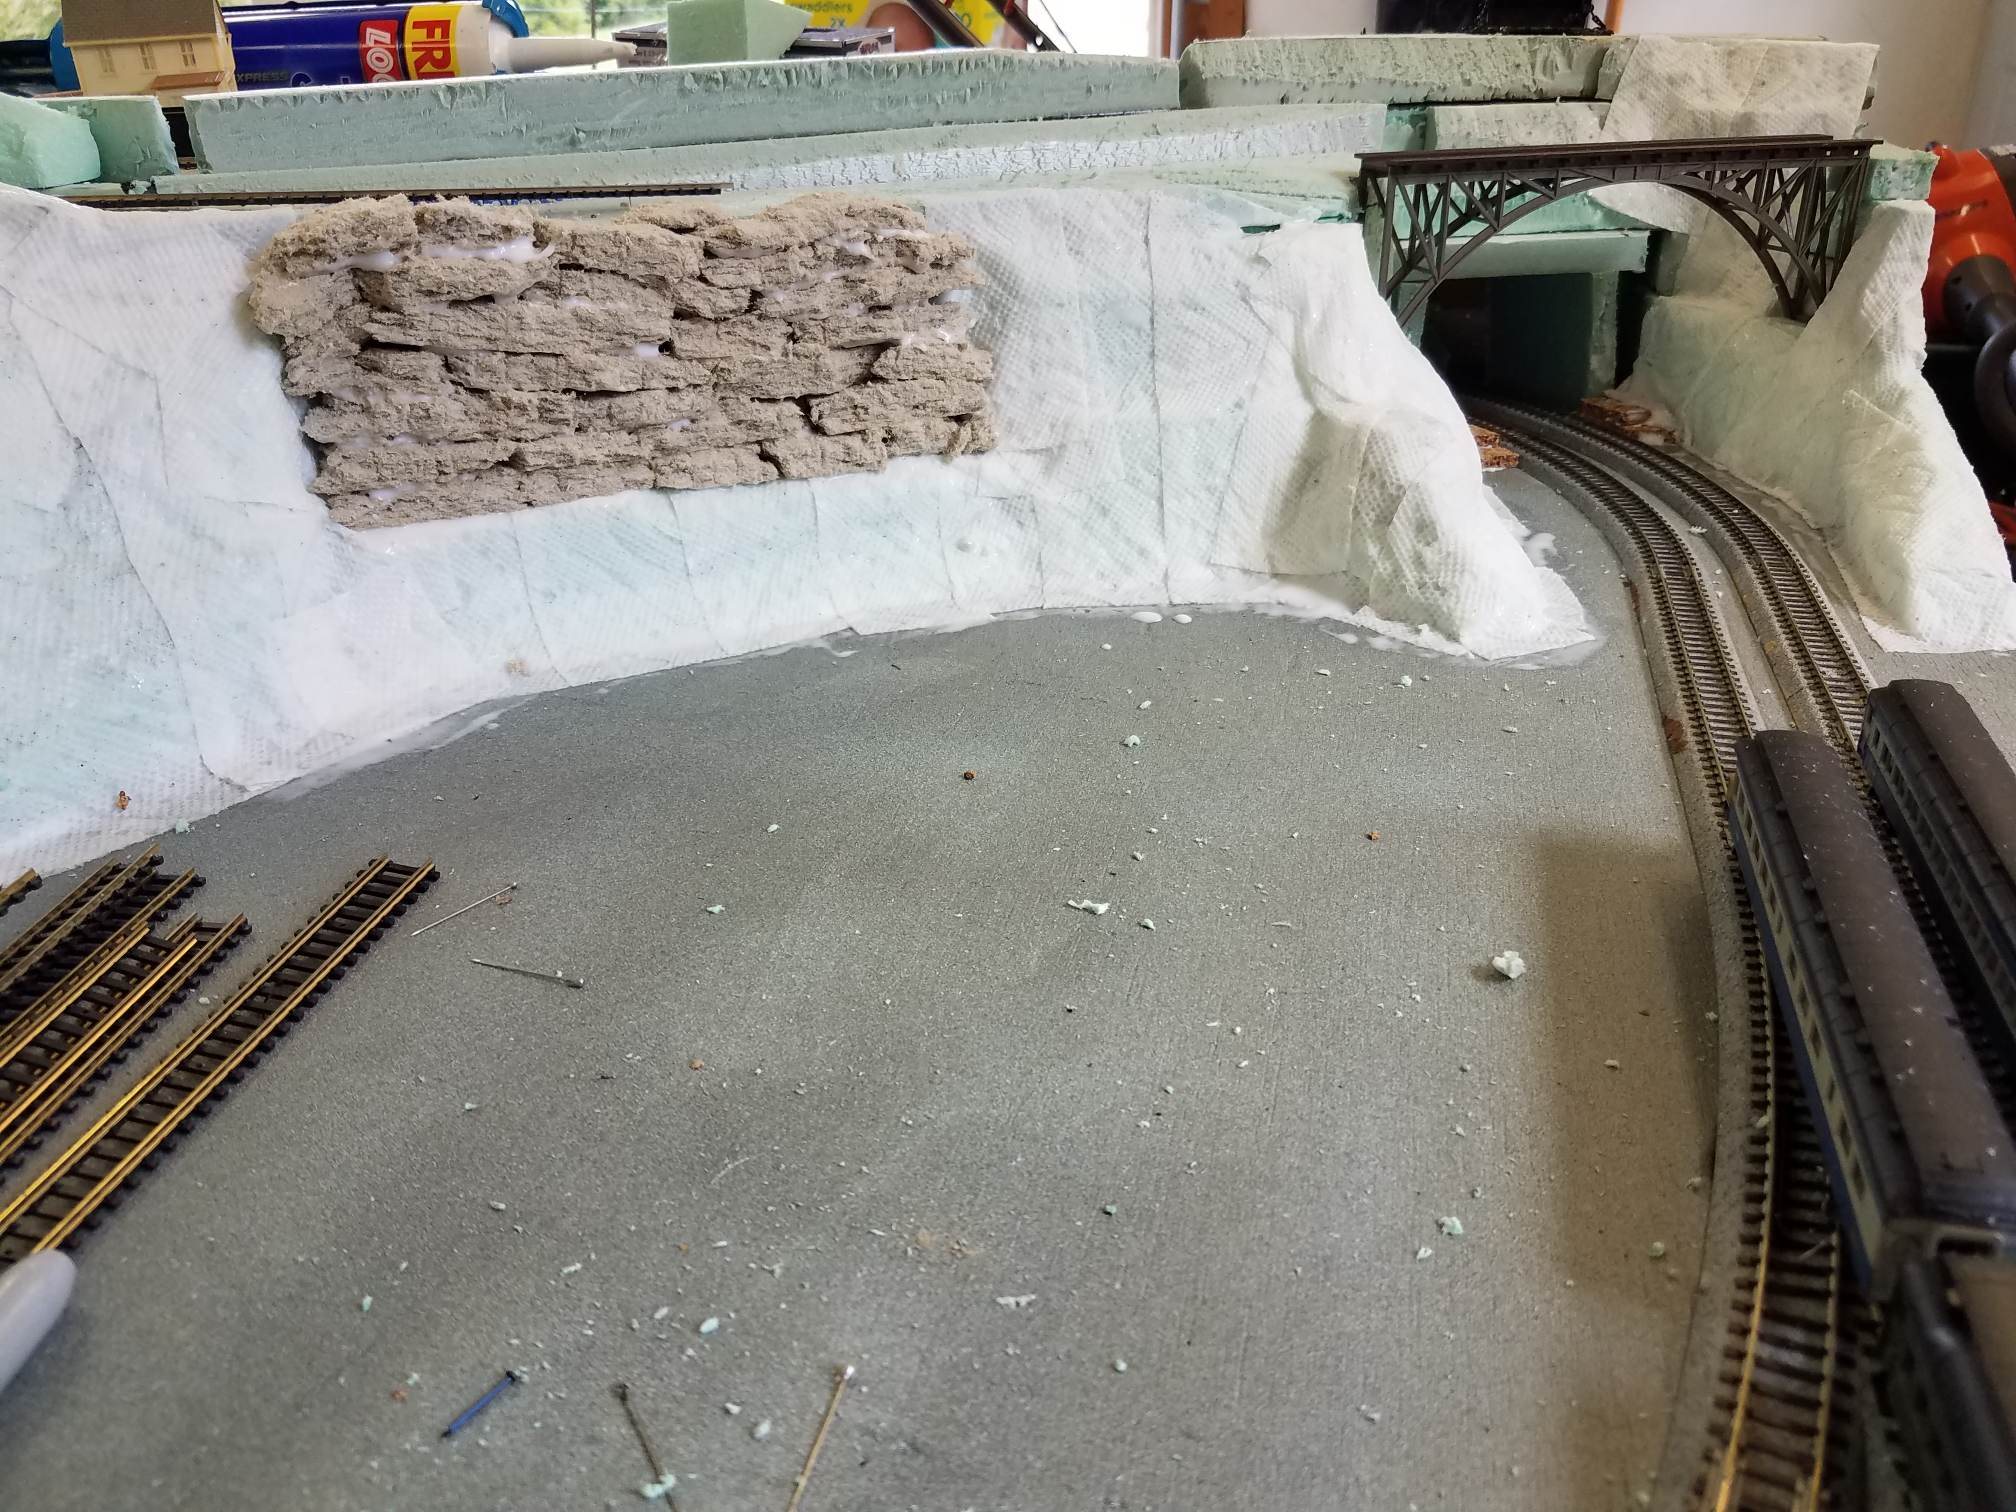
Quick and Cheap Rock Faces - by Member Bo DeCoy
August 4, 2020
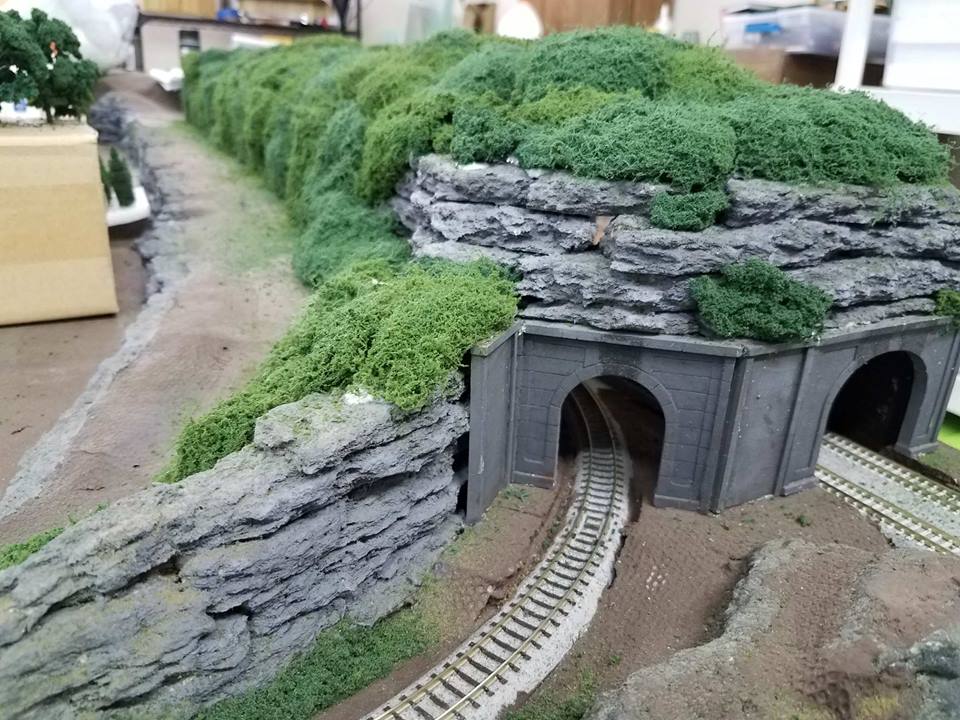
Last week we created hills for our Model Railroad Scenery. This week we will look at a technique to make rock faces to go along with our hills and terrain.
On this week's Tips & Tricks Project, Bo shares with us how he makes rock outcrops to add some variety to his hills when he models rural Appalachia.
"I am pretty sure that this method has been around for a while, but I was shown it several years ago while we worked on a club module. There are many different ways to create rock outcrops, but this is the way that I lean towards as you can get very quick results and the materials are cheap and readily available to me. You'll need white glue (or hot glue for faster results), a drop ceiling tile (can be purchased at any Re-Use store for a couple bucks), a box cutter, and a garbage can or box to help contain the mess. This process can be done with modelers of all ages, but I recommend that a more senior modeler use the box knife.
Take your ceiling tile and break off small strips. The ceiling tile does not brake off uniformily which is good when modeling rock outcrops. Now here is the messy part, over a box or garbage can, remove the textured surface of the strip of ceiling tile by carefully scraping it off with a box knife. Again, this should only be done by someone who is able to handle a box knife safely. The textured side is the side you would see when the ceiling tile is installed and is usually painted a color. After the textured surface is removed, the rock is then ready to place on the working area. This is the same process that you will use to make all of the rocks for the rock face. Some additional shaping of the rock may need to happen to make them fit, but that is all it takes to make a rock for our wall.
With your chaped rock, you can use either white glue or hot glue to place it on the working area. Sometimes I will layout a whole layer of rocks before gluing them down so that I can visualize what it will look.
Keep layering the rocks until you reach the desired height. Also, not all rock formations are horizontal, some are sloped or even bent depending on the area that you are modeling. Be sure to keep that in mind as you layout your rock faces.
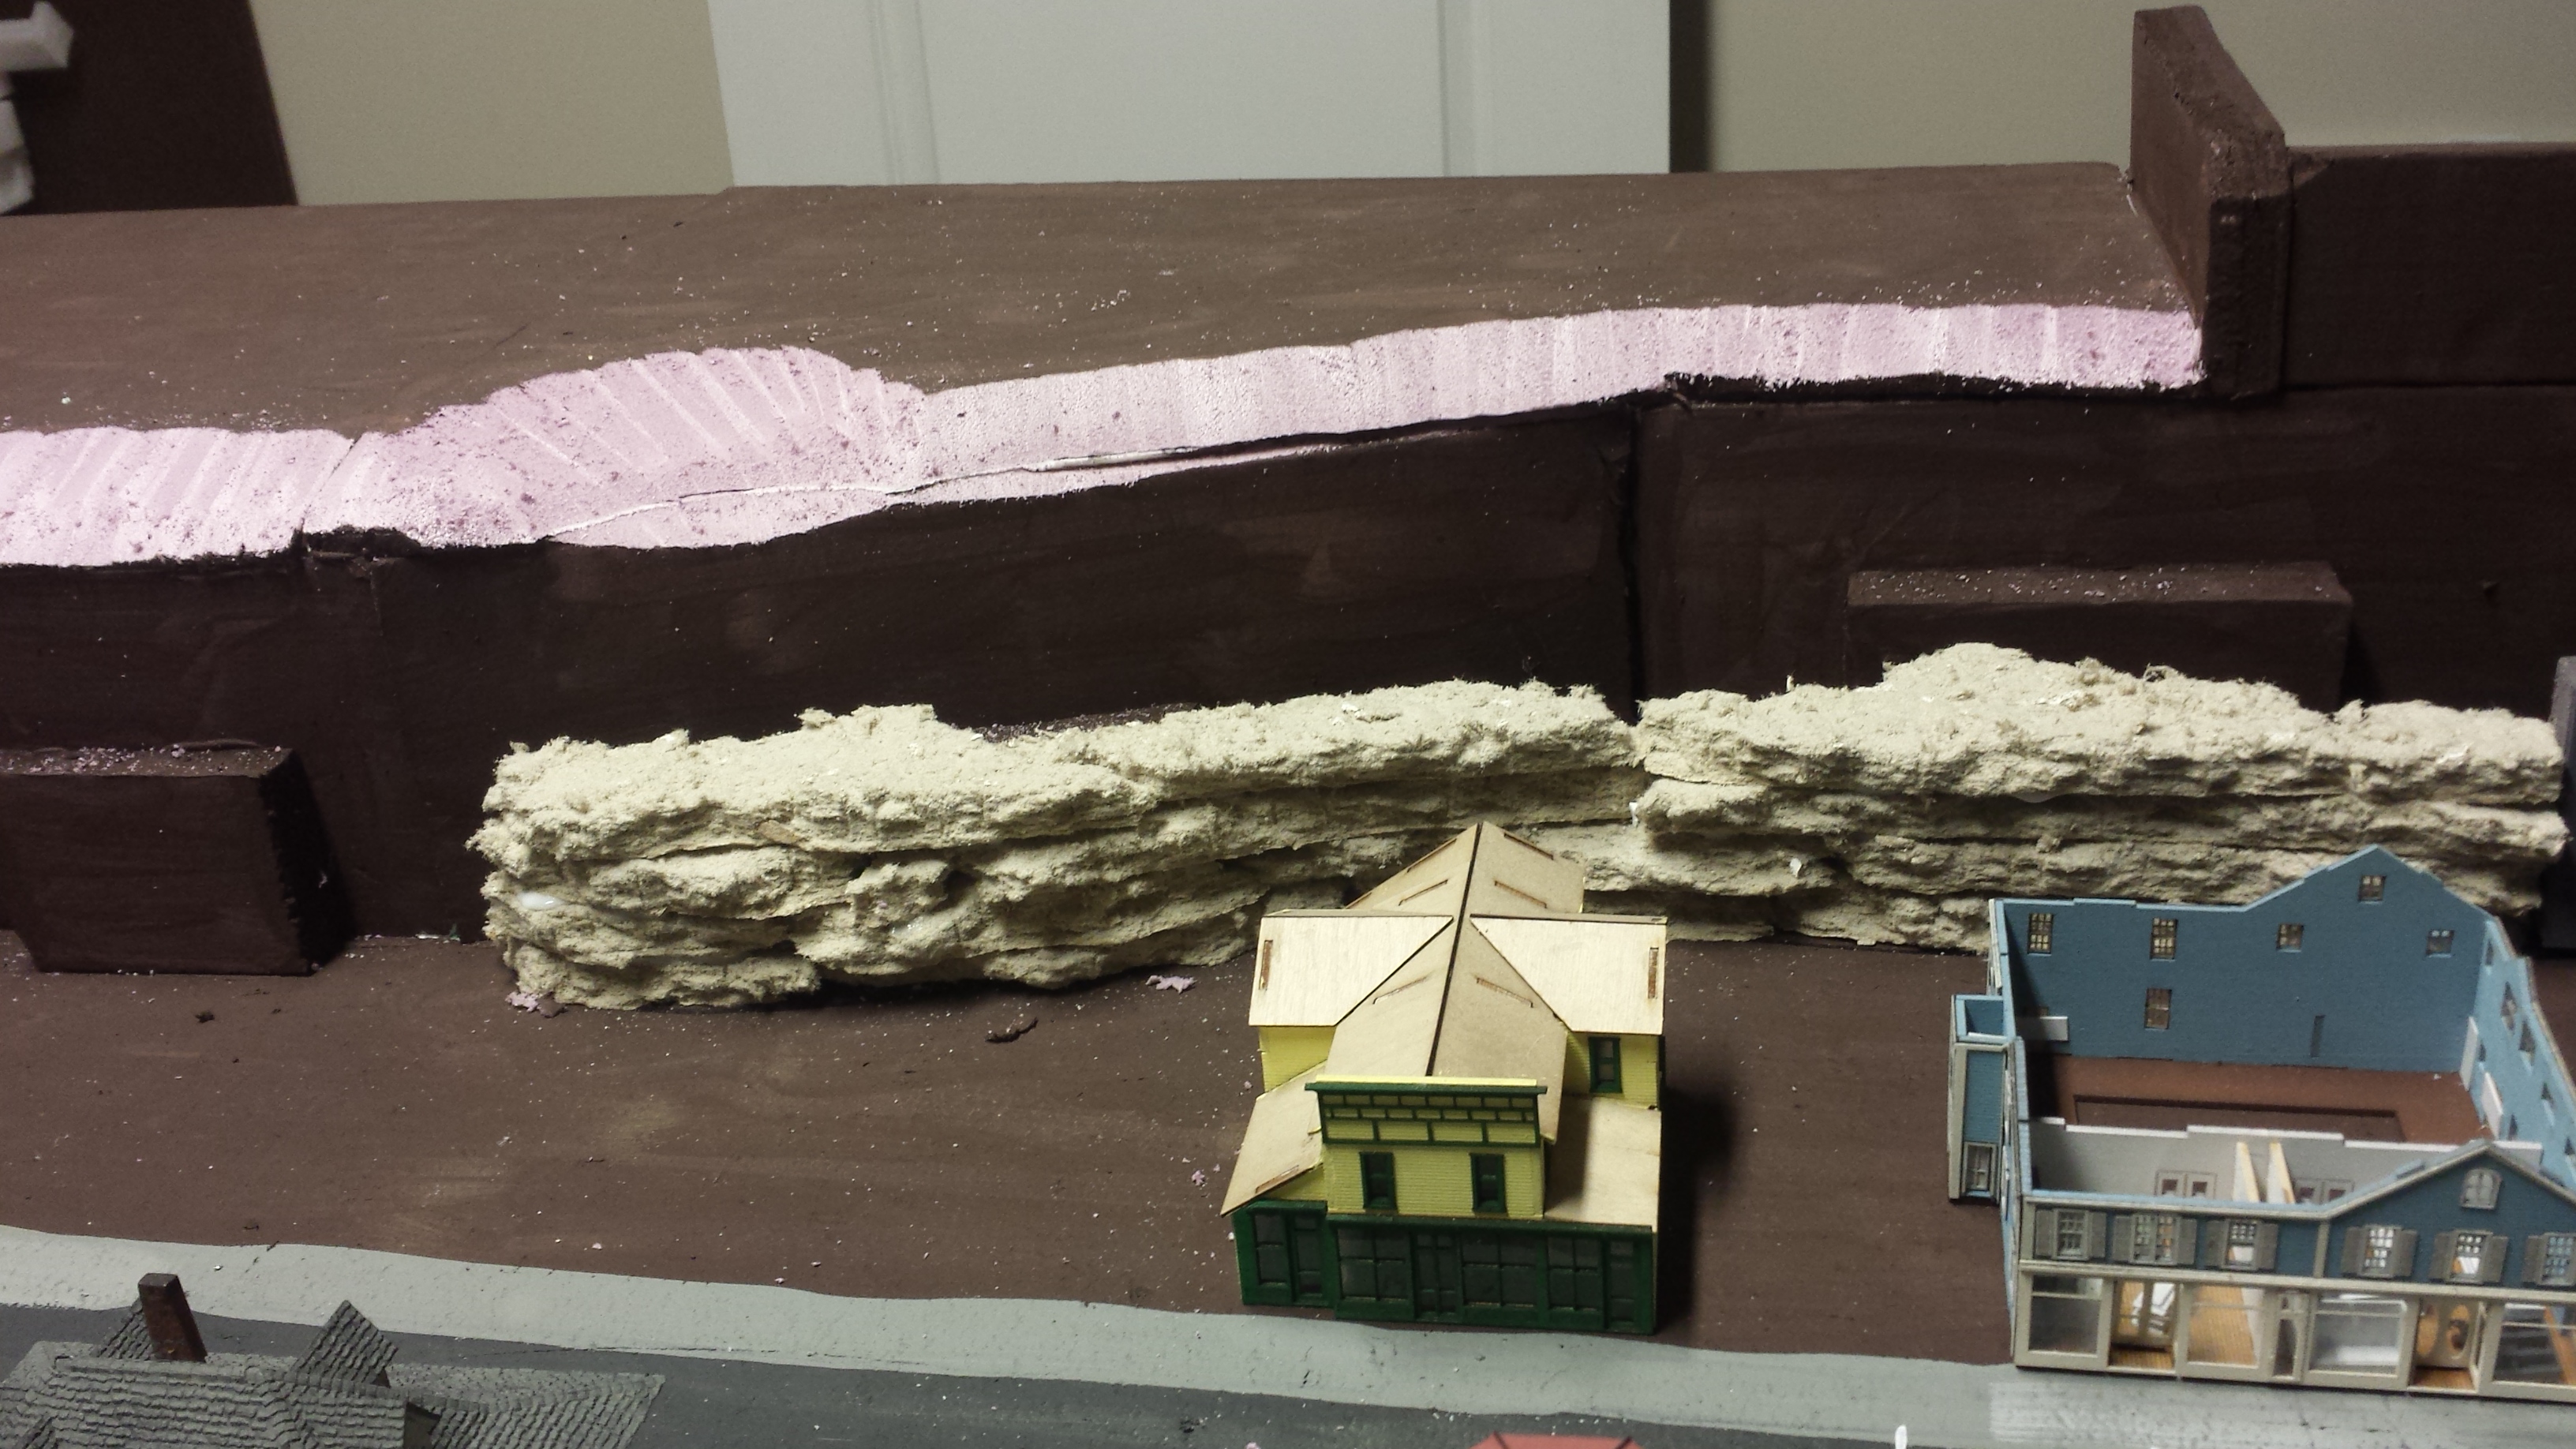
Once you are down laying the rock face, apply a base color of craft paint. Really layer on the paint as this material will soak up paint and the paint will actually help reinfore the rock work and make it stronger. Again choose a color based on your modeling area and with that in mind, dry brush secondary colors onto the rocks to help add variation in the coloring.
You can use the paper towel hill shaping method that we showed last week to help blend in the new rock faces into the hillside. Be sure to add bushes, trees, and ground foam to really make the area look good when you get to the scenery part of your layout build!
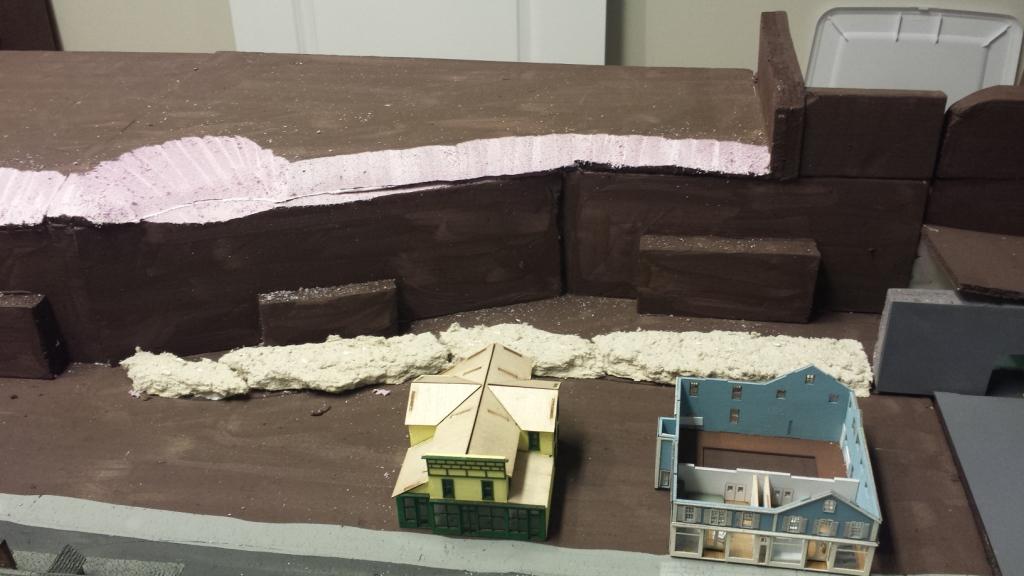
Mountain Raising - by Member Bo DeCoy
July 28, 2020
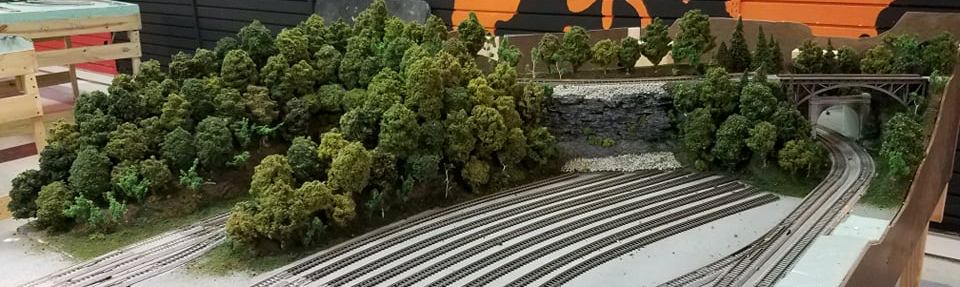
Have you ever wondered how the landscape on model railroads are created? How do Model Railroaders go from a flat blank canvas to a landscape with hills, cliffs, valleys, and river beds? Even if you are an experienced Model Railroader, this may be a new method that you may be able to use.
On this week's Tips & Tricks Project, Bo shares with us how he created the hills on his N Scale Bendtrack Return Module.
"I picked up this method several years ago from an online source. There are many different ways to form hills, but this method seems to be the easiest for me. Your mileage may vary though. This is very similar to paper mache where you take a flexible material and soak it with a material that hardens over time. For this project, we will need some foam pieces, paper towels, a wide paint brush, and some white glue (buy this big container of it).
The first step is to glue and stack the foam pieces to the desired height and shape. It sometimes is easier to shape the foam before gluing them down.
I will often get the inspiration of how to shape the foam by setting the models in the area to get the feel for the lay of the land.
Once I am happy with how the roughed in terrain looks, I cut paper towels in 1 & 1/2 to 2 inch strips. This is can be the messy part. Working from one side of the hill, I take the paint brush and brush on some white glue to wherever the paper towl strip will touch the foam. Once the foam is coated with glue, place the paper towel. Take your paint brush again and brush glue on to the paper towel to coat the paper towel strip.

Repeat this process until you reach the end of your working area. While the first layer is still tacky, I normally add a second layer to help reinforce the areas that may be covering a gap in the foam. Repeat this process until you are happy with the slopes of the hills.
Your working area should look like a Winter Wonderland at this point. Let the paper towel layers dry before moving onto the next step. This may take several hours or over night depending on how heavy you applied the white glue.
Next step is to paint the paper towels. I would recommend finding an "earth" color of which ever area that you are modeling. I chose burnt umber as my color.
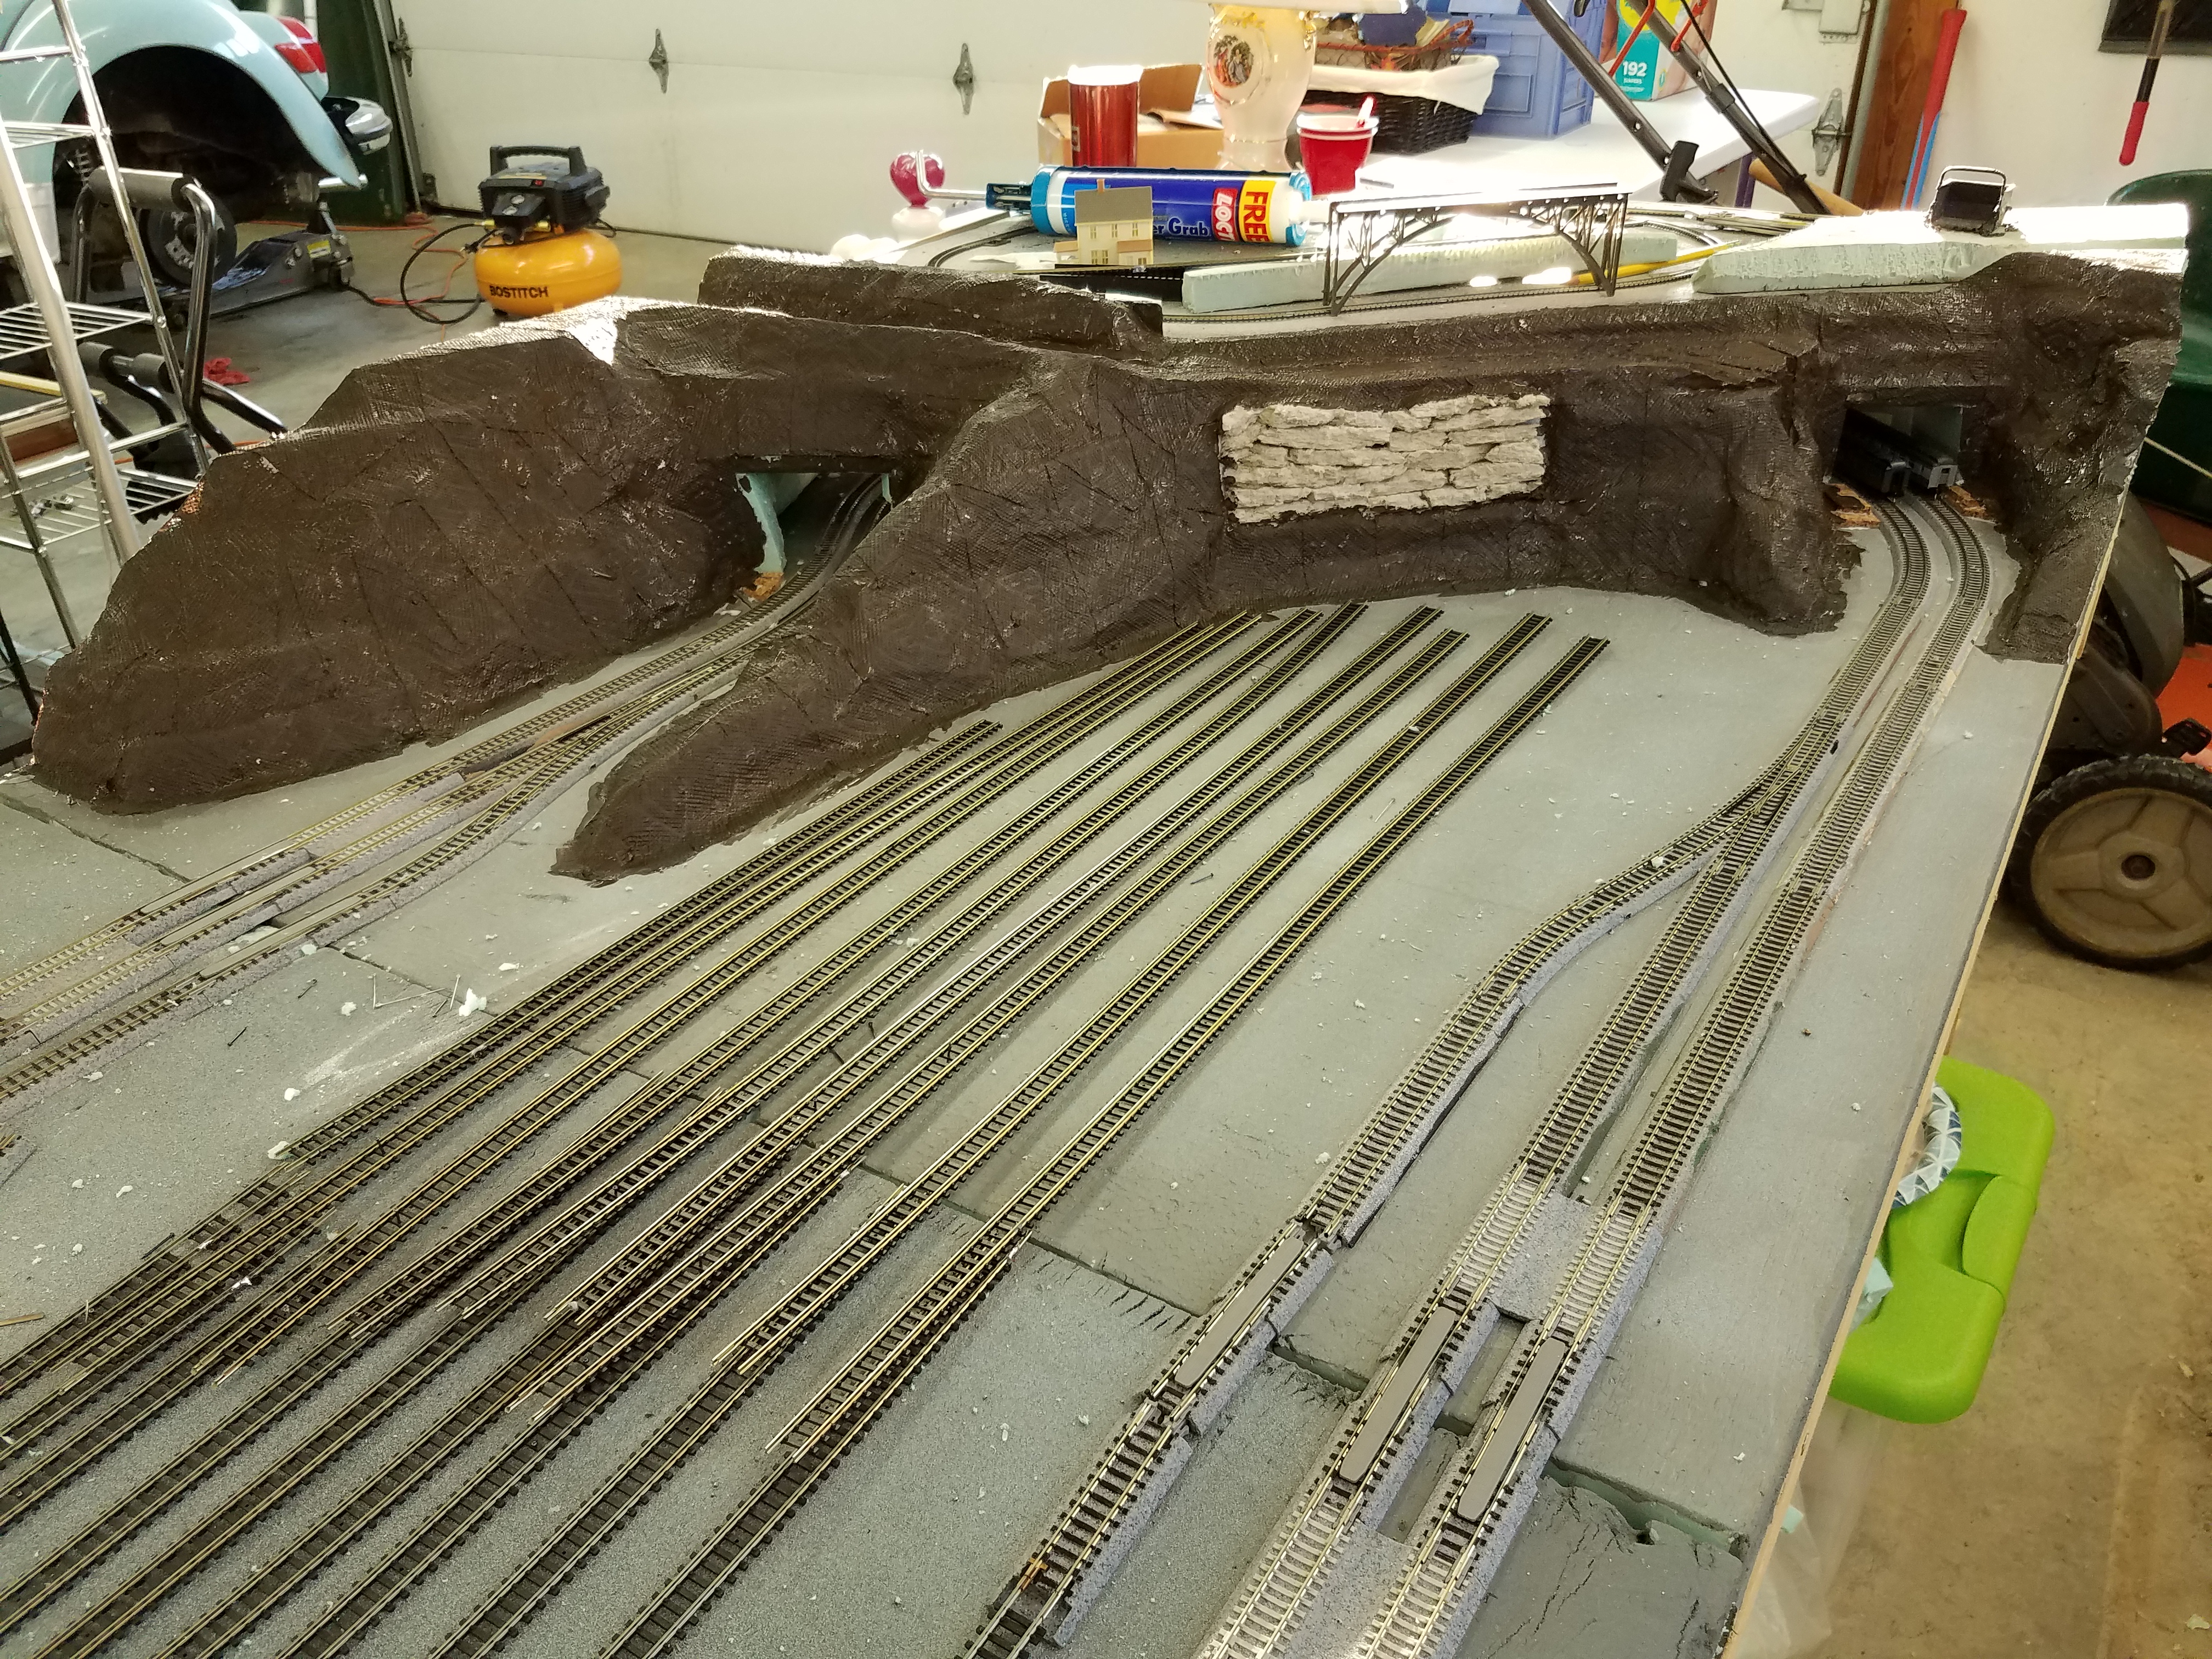
Do not be stingy with the paint. I find that if I apply a heavy coat(s) of paint, that it will help disquise the pattern on the paper towels. Also, the white color will be more noticeable then your earth color paint and will blend in better with your scenery. After the area is painted, move onto scenery!
I hope you enjoyed this method of terrain forming. To me, this is a low cost method that can yield great results."
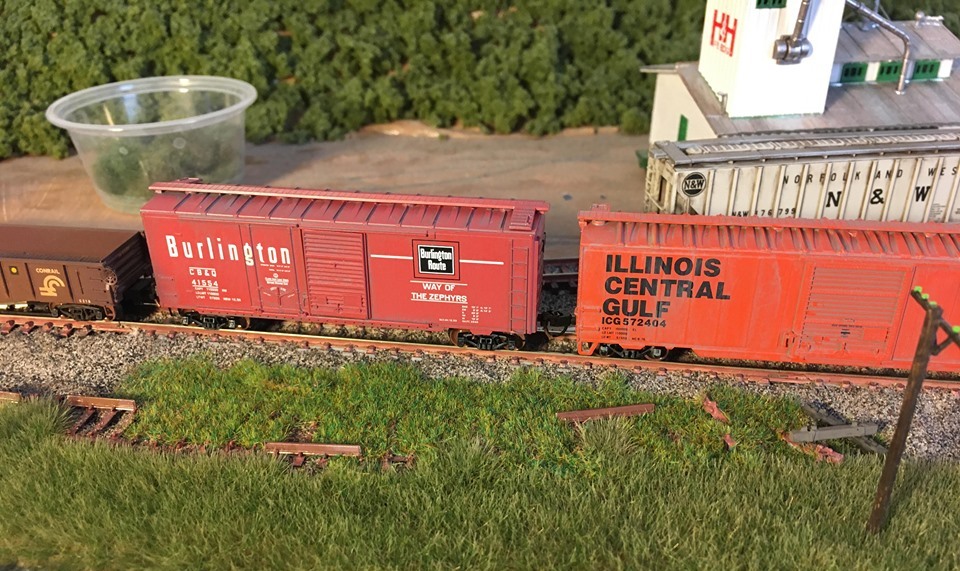
Weather Rolling Stock - by Member Peter Hayes
July 21, 2020
On the railroad, freight cars were very seldomly cleaned and most of them do not look like they just came out of the box like the models that you bring home.
Peter has been working on taking the "sheen" off of some of his N scale rolling stock to make them look closer to the real thing.
Read below to see how he lightly weathers his rolling stock.
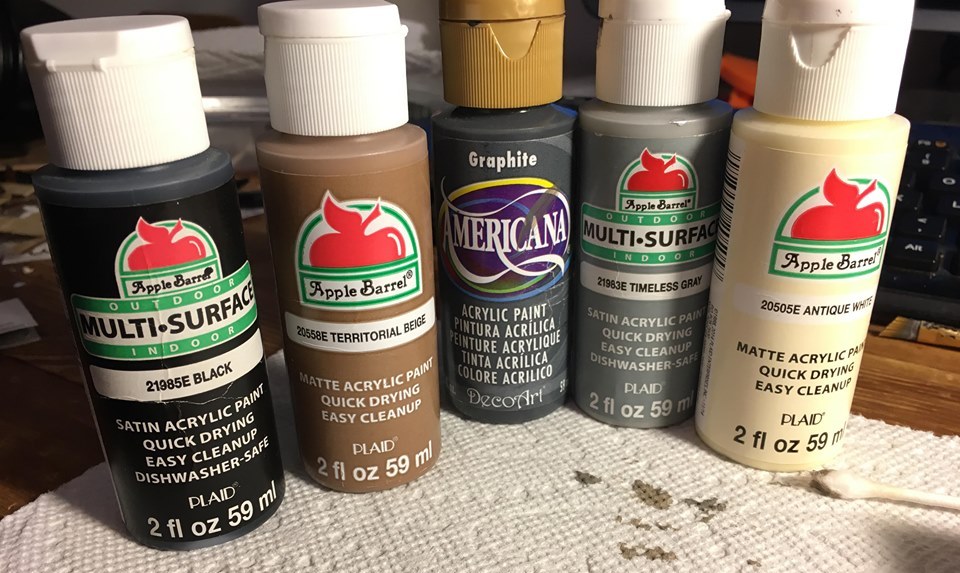
"Usually, I weather a car using alcohol-based weathering washes. This ends up being time consuming, messy, and it starts to look uniform if you are not careful. So I was looking for a different way to weather my rolling stock (and locomotives!).
I found that, using ~$1.00 bottles of acrylic paint mixed together with water, you can have freight cars not looking significantly weathered, but worn enough to fit into a fleet of cars.
This is the starting point for the car. First up, I remove the chassis and trucks. I also added an ACI barcode to the side, which places the car firmly in the 70s-80s.
Next, I mix together a few different acrylic paints, plus a little water to thin it. Once I reach the color that I am looking for, I brush it over the entire side of the car.
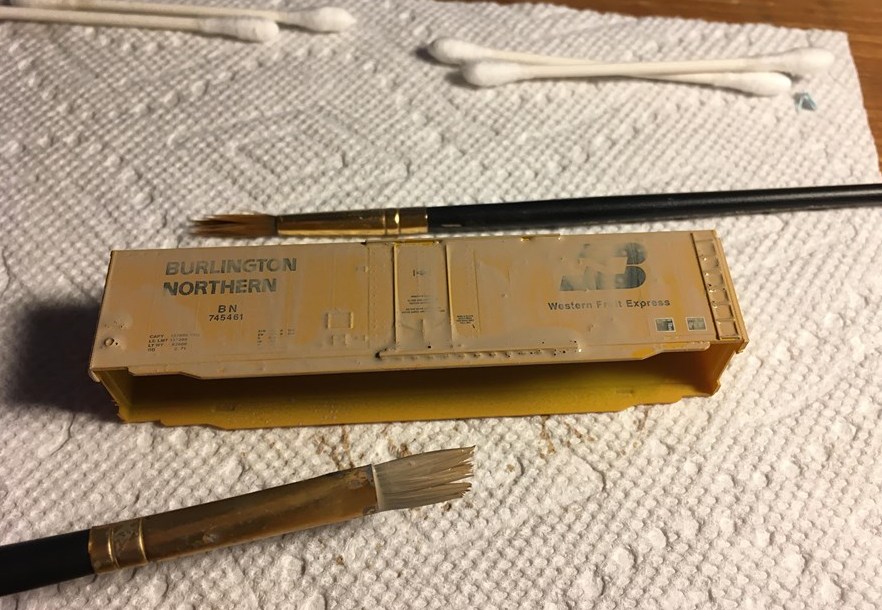
I let it sit for 30 seconds to a minute, and then wipe downwards with a paper towel, leaving a little bit of paint on the car, especially under surfaces. I usually do this a few times, occasionally mixing a different color in for variation in places. I let the paint dry completely between each coat.
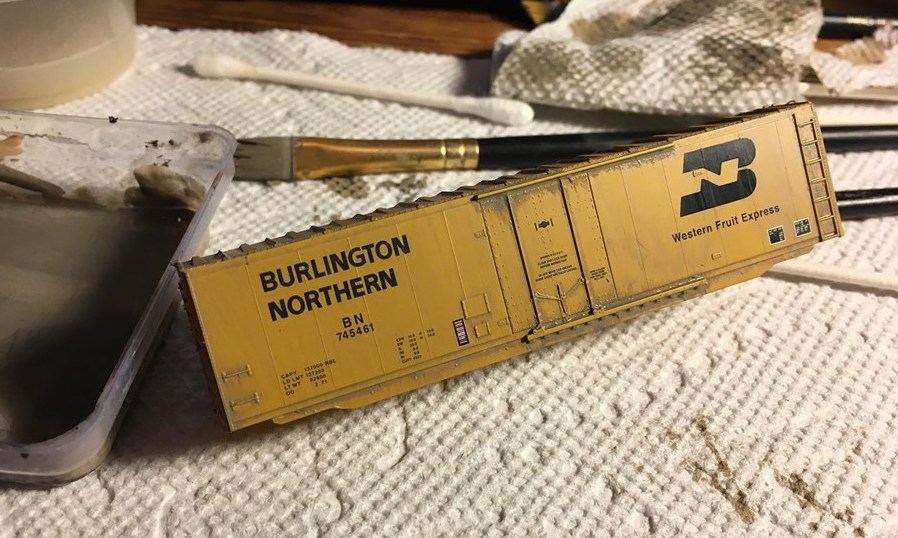
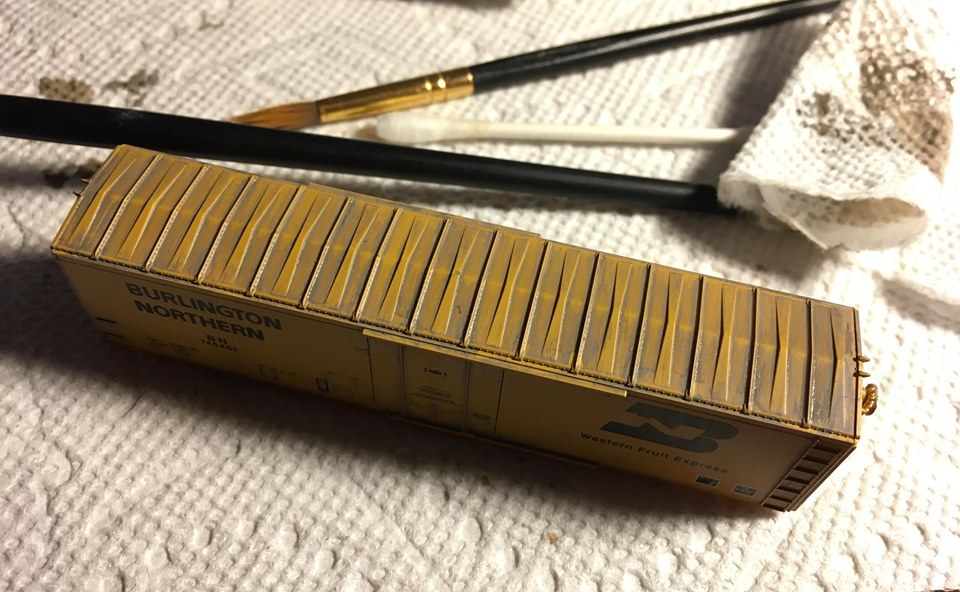
The roof is similar, I mix a slightly darker color and make sure at least a little paint is on the whole roof. I did this twice.

Then, using a paper towel, I again wipe the paint off. With this roof, I wipe from the center out, like how rain would hit the car. It settles into the grooves.
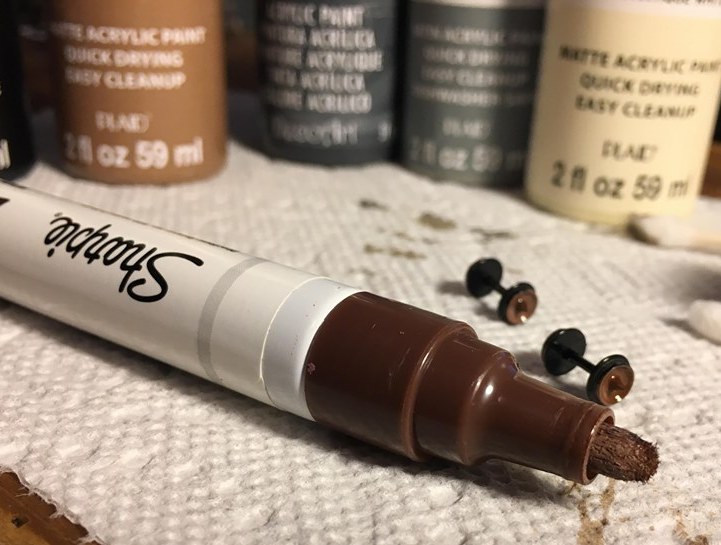
Before reassembling the car, I use a brown paint pen to paint the outsides of the wheels, being careful not to get any on the flanges (where the wheel actually touches the rail).
The whole process can range from a few minutes to half an hour, depending on how strong you want the weathering to be. The end result is a not-too-weathered boxcar, which has enough wear and aging to look good in the middle of a freight train! "